Creative Woodworks & crafts 2004-11, страница 25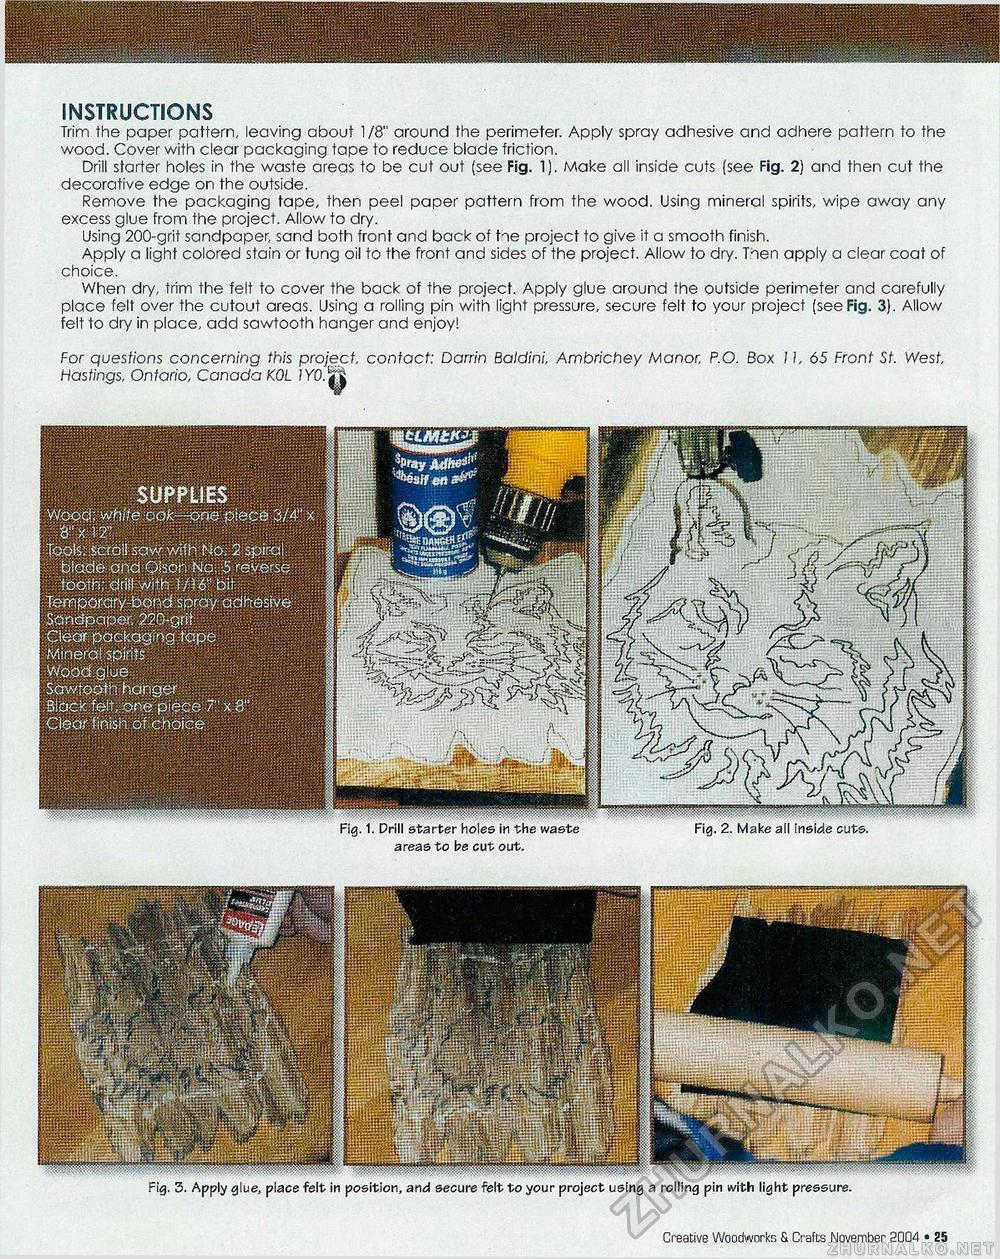
INSTRUCTIONS Trim the paper pattern, leaving about 1/8" around the perimeter. Apply spray adhesive and adhere pattern to the wood. Cover with clear packaging tape to reduce blade friction. Drill starter holes in the waste areas to be cut out (see Fig. 1). Make all inside cuts (see Fig. 2) and then cut the decorative edge on the outside. Remove the packaging tape, then peel paper pattern from the wood. Using mineral spirits, wipe away any excess glue from the project. Allow to dry. Using 200-grit sandpaper, sand both front and back of tie project to give it a smooth finish. Apply a light colored stain or tung oil to the front and sides of the project. Allow to dry. Tnen apply a clear coat of choice. When dry, trim the felt to cover the back of the project. Apply glue around the outside perimeter and carefully place felt over the cutout areas. Using a rolling pin with light pressure, secure felt to your project (see Fig. 3). Allow felt to dry in place, add sawtooth hanger and enjoy! For questions concerning this project, contact: Darrin Baldini, Ambrichey Manor, P.O. Box 11, 65 Front St. West, Hastings, Ontario, Canada KOL 7V0.jp SUPPLIES Wood; wft(7e oa*---one piece 3/4'' x r x 127 Topis: iscrdil .saw wiih No. 2 spiral . blade ana Qfsoh 'No: 5 ydye'se foo-ri; drill wi*h YfW bit;:; :;:;;!!:;= ; Temporary-bond spray adhesive .Sandpaper, 220-gri! , >! Clear packaging tape Mineral spin's Wood glue Sawtooth hanger .Bidck fejt; ;ore piece T' x8" . •' : % Clear finish of choice..... 1 1 ........ Fig. 1. Drill starter holes in the waste areas to be cut out. Fig. 2. Make all inside cuts. -"•!.......... Fig. 3. Apply glue, place felt in position, and secure felt to your project using a rolling pin with light pressure. Creative Woodworks & Cr afts November 2004 • 25 |


