Creative Woodworks & crafts 2004-11, страница 27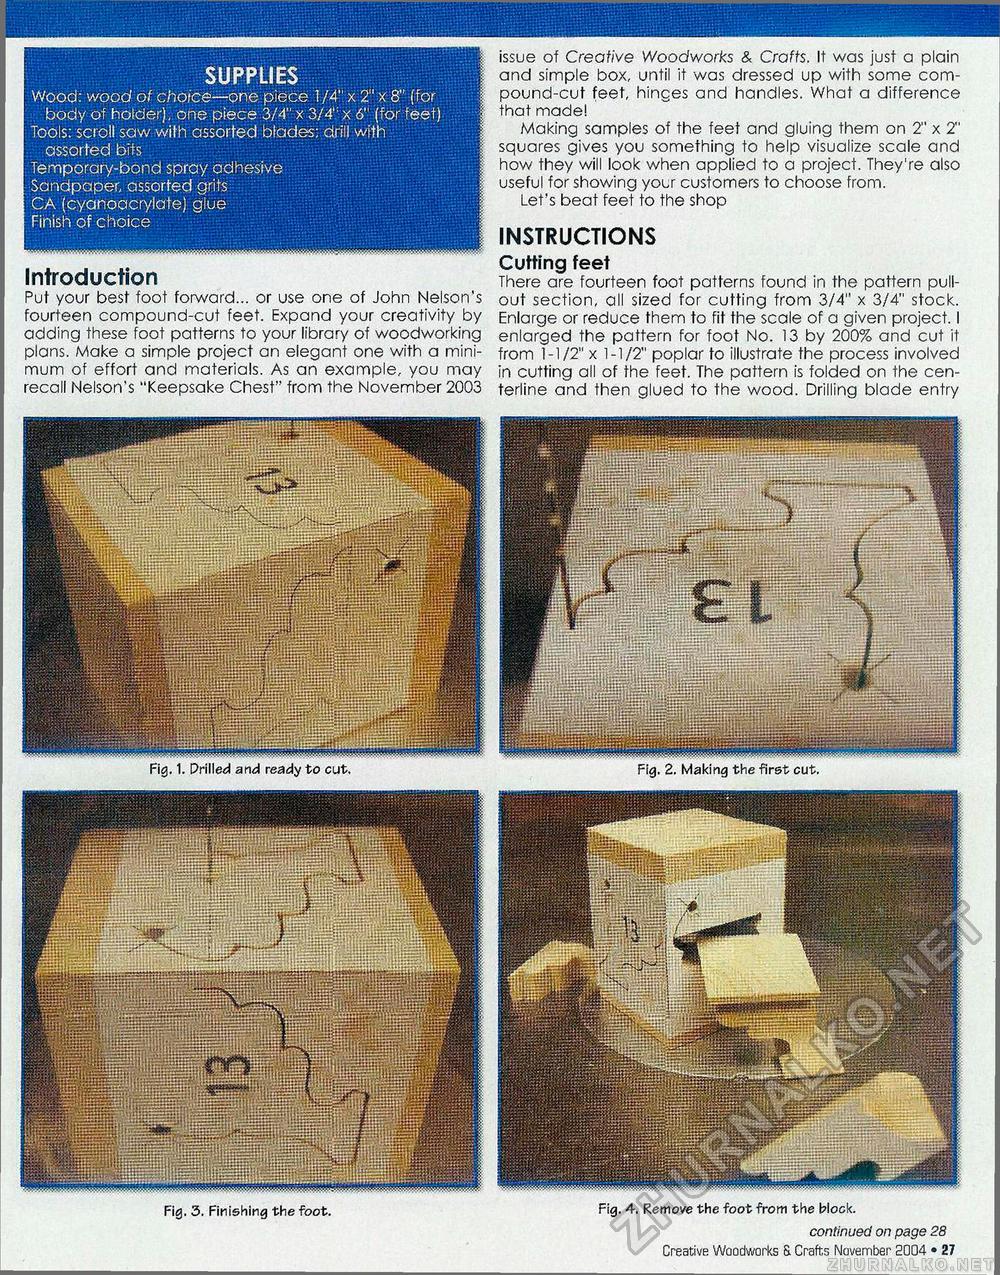
SUPPLIES Wood: wood of choice—one piece 1/4" x 2" x 8" (for body of holder), one piece 3/4" x 3/4': x 6" (for feet) Tools: scroll saw with assorted blades: drill with assorted bits Temporary-bond spray adhesive Sandpaper, assorted grits CA (cyanoacrylate) glue Finish of choice Introduction Put your best foot forward... or use one of John Nelson's fourteen compound-cut feet. Expand your creativity by adding these foot patterns to your library of woodworking plans. Make a simple project an elegant one with a minimum of effort and materials. As an example, you may recall Nelson's "Keepsake Chest" from the November 2003 issue of Creative Woodworks & Crafts. It was just a plain and simple box, until it was dressed up with some com-pound-cut feet, hinges and handles. What a difference that made! Making samples of the feet and gluing them on 2" x 2" squares gives you something to help visualize scale and how they will look when applied to a project. They're also useful for showing your customers to choose from. Let's beat feet to the shop INSTRUCTIONS Cutting feet There are fourteen foot patterns found in the pattern pull-out section, all sized for cutting from 3/4" x 3/4" stock. Enlarge or reduce them to fit the scale of a given project. I enlarged the pattern for foot No. 13 by 200% and cut it from 1-1/2" x 1-1/2" poplar to illustrate the process involved in cutting all of the feet. The pattern is folded on the cen-terline and then glued to the wood. Drilling blade entry A'MI'.OB.'Wll Fig. 1. Drilled and ready to cut. Fig. 2. Making the first cut. Fig. 3. Finishing the foot. Fig. 4. Remove the foot from the block. continued on page 28 Creative Woodworks & Crafts November 2004 • 27 |


