Creative Woodworks & crafts 2004-11, страница 34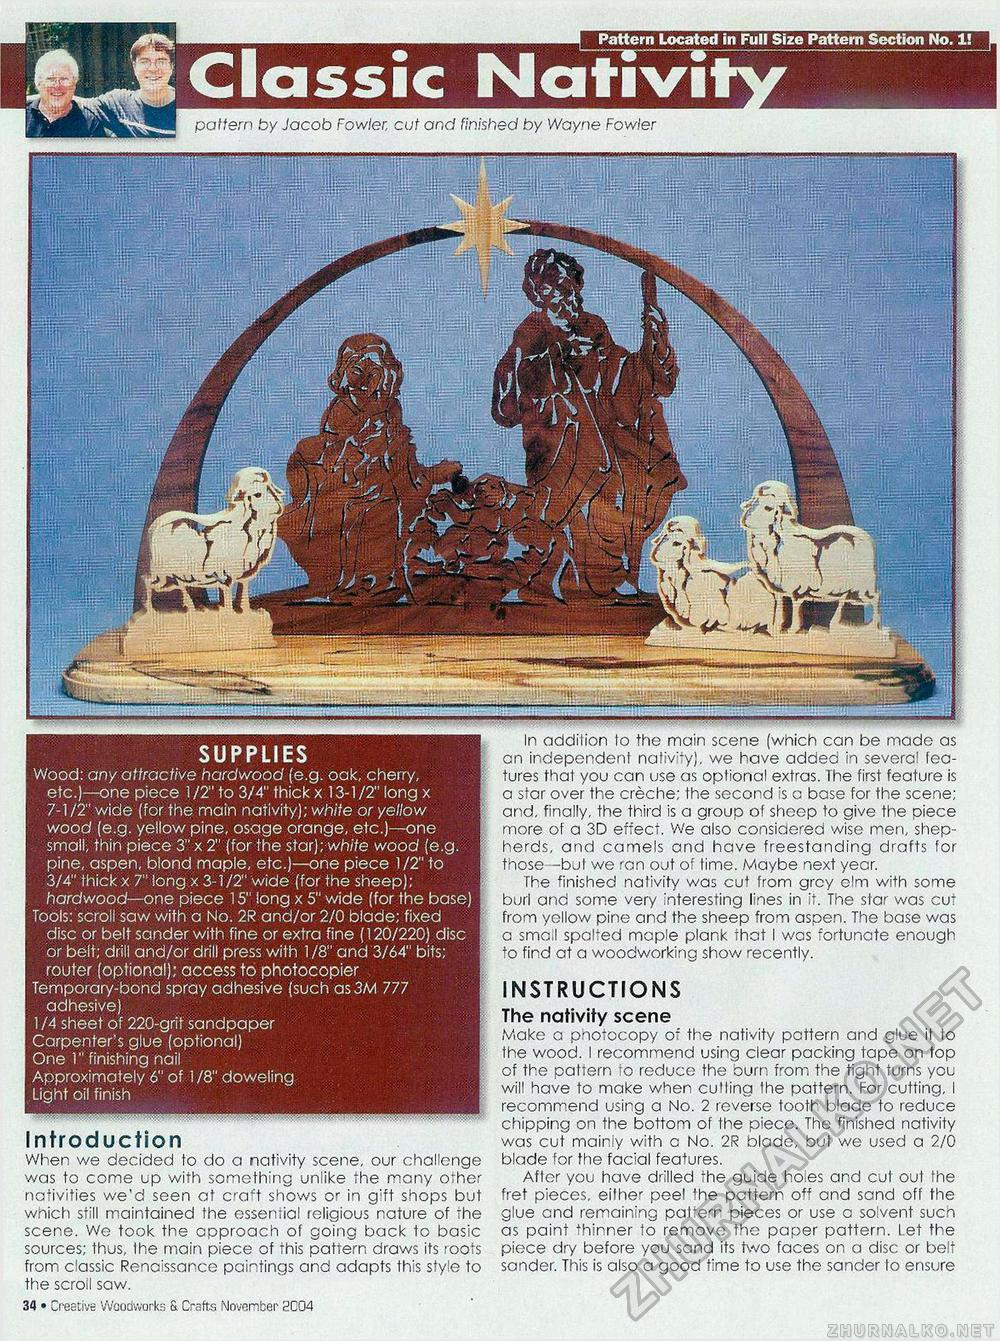
SUPPLIES Wood: any attractive hardwood (e.g. oak, cherry, etc.)—one piece 1/2" to 3/4" thick x 13-1/2" long x 7-1 /2" wide (for the main nativity); white or yellow wood (e.g. yellow pine, osage orange, etc.)—one small, thin piece 3" x 2" (for the star);-white wood (e.g. pine, aspen, blond maple, etc.)—one piece 1/2" to 3/4" thick x 7" long x 3-1/2" wide (for the sheep); hardwood—one piece 15" long x 5" wide (for the base) Tools: scroll saw with a No. 2R and/or 2/0 blade; fixed disc or belt sander with fine or extra fine (120/220) disc or belt; drill and/or drill press with 1/8" and 3/64" bits; router (optional); access to photocopier Temporary-bond spray adhesive (such as 3M 777 adhesive) 1/4 sheet of 220-grit sandpaper Carpenter's glue (optional) One 1" finishing nail Approximately 6" of 1/8" doweling Light oil finish Introduction When we decided to do a nativity scene, our challenge was to come up with something unlike the many other nativities we'd seen at craft shows or in g;ft shops but which still maintained the essential religious nature of the scene. We took the approach of going back to basic sources; thus, Ihe main piece of this pattern draws its roots from classic Renaissance paintings and adapts this style to the scroll saw. 34 • Creative Woodworks S. Crafts November 2004 In addition to the main scene (which can be made as cn independent nativity), we have added in severe! features that you can use as optional extras. The first feature is a star over the creche; the second is c base for the scene; and, finally, the third is a group of sheep to give the piece more of a 3D effect. We also consiaered wise men, shepherds, and camels and have freestanding drafts for those—but we ran out of time. Maybe next year. The finished nativity was cut from grey elm with some burl and some very interesting lines in it. The star was cu" from yellow pine and the sheep from aspen. The base was a sma.l spolfed maple plank that I was "ortunate enough to find at a woodworking show recently. INSTRUCTIONS The nativity scene Make a photocopy of the nativity pattern and glue il to the wood. I recommend using clear packing tape on top of the pattern to reduce the burn from the tight turns you will have to make when culling Ihe pattern. For cutting, I recommend using a No. 2 reverse tooth blade to reduce chipping on the bottom of the piece. The finished nativity was cut mainly with c No. 2R blade, bul we used a 2/0 blade for the facial features. After you have drilled the guide ho es and cut out the fret pieces, either peel the pattern off and sand off the glue and remaining pattern pieces or use a solvent such as paint thinner to remove the paper pattern. Let the piece dry before you sand its two faces on a disc or belt sander. This is also a good time to use the sander to ensure pattern by Jacob Fowler, cut and finished by Wayne Fowler |


