Creative Woodworks & crafts 2004-11, страница 51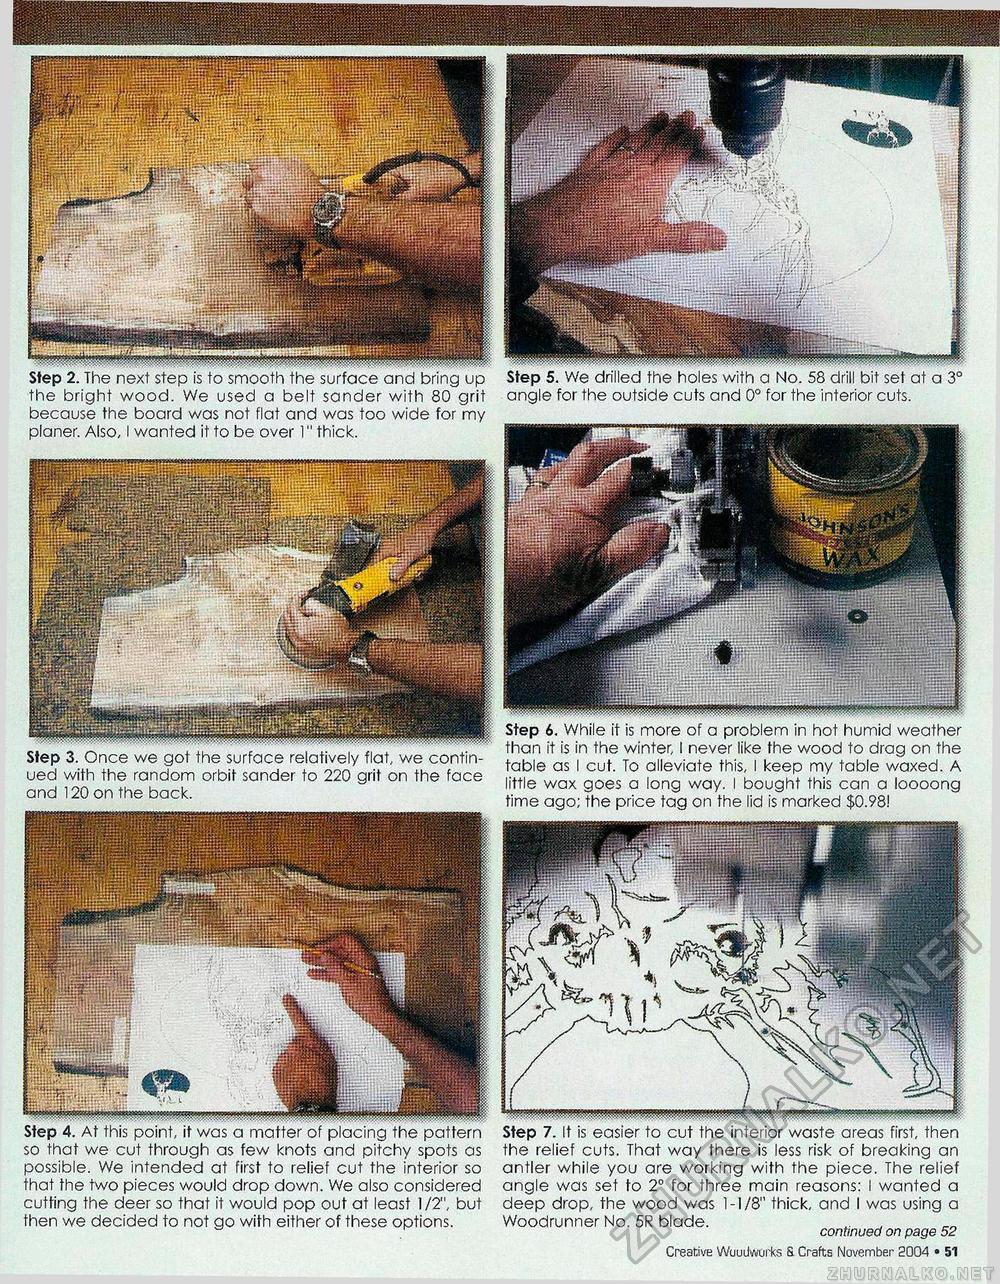
the bright wood. We used a belt sander with 80 grit angle for the outside cuts and 0° for the interior cuts, because the board was not flat and was too wide for my planer. Also, I wanted it to be over 1" thick. Step 3. Once we got the surface relatively flat, we continued with the random orbit sander to 220 grit on the face and 120 on the back. P if|I Step 4. At this point, it was a matter of placing the pattern so that we cut through as few knots and pitchy spots as possible. We intended at first to relief cut the interior so that the two pieces would drop down. We also considered cutting the deer so that it would pop out at least 1/2", but then we decided to not go with either of these options. Step 6. While it is more of a problem in hot humid weather than it is in the winter, I never like the wood to drag on the table as I cut. To alleviate this, I keep my table waxed. A little wax goes a long way. I bought this can a loooong time ago; the price tag on the lid is marked $0.98! Step 7. It is easier to cut the interior waste areas first, then the relief cuts. That way there is less risk of breaking an antler while you are working with the piece. The relief angle was set to 2° for three main reasons: I wanted a deep drop, the wood was 1-1/8" thick, and I was using a Woodrunner No. 5R blade. continued on page 52 Creative Woodworks & Cr afts November 2004 • 51 |


