Creative Woodworks & crafts 2005-01, страница 63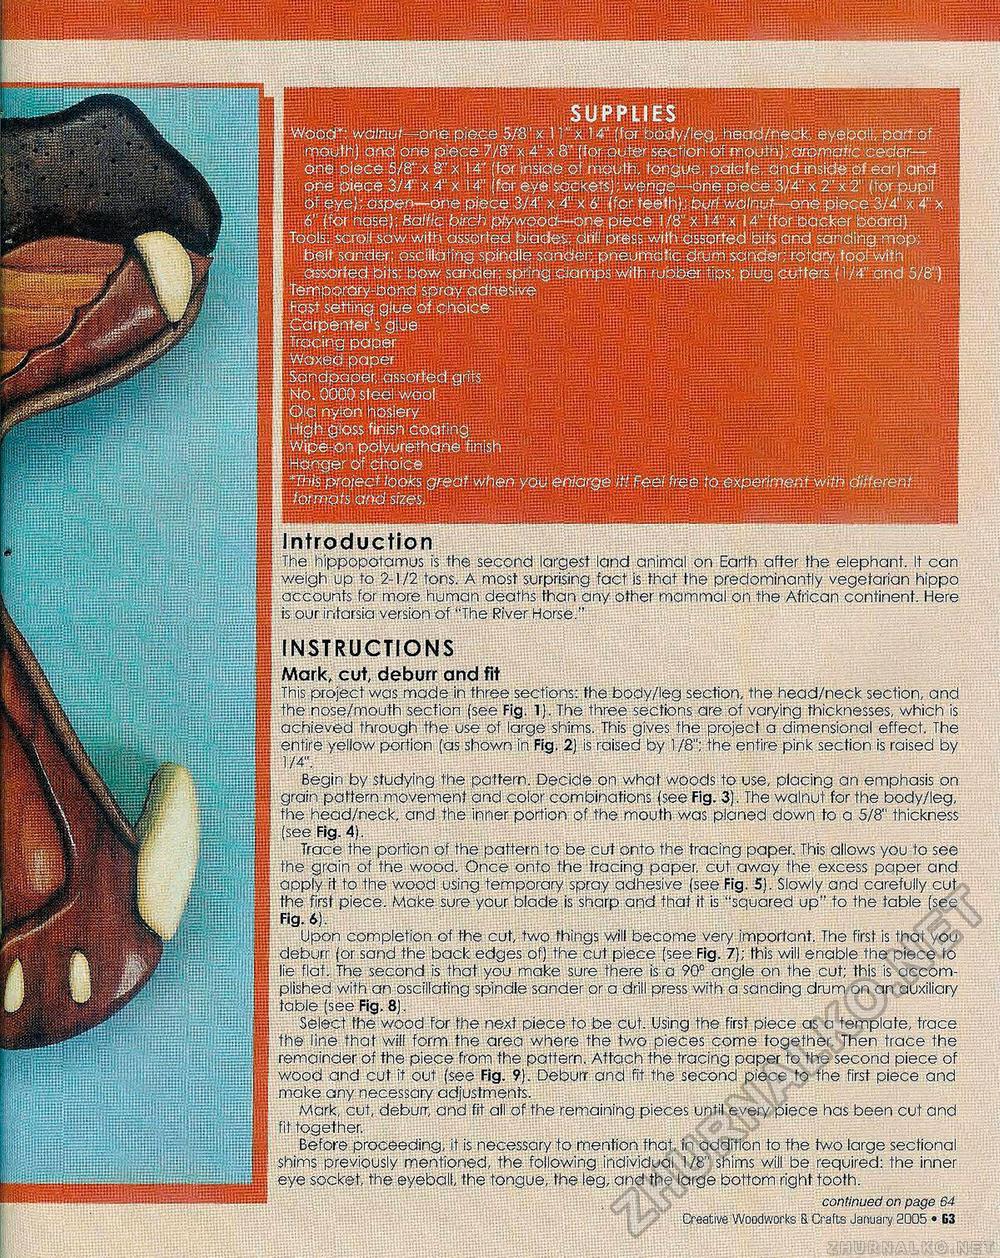
SUPPLIES -Woo'Cfi walnut- Srfepieae 5/8' x I1" x !4" [for body/leg, head/reck. eyeball', pfef -mouth! and'orte.p-tece 7/8-x-4" x 8" jfbr outer section of ^outlj;aroaiai/c cedar— one piece 5/8" x 8" x 1:4" [for inside of mouth, tongue, paiate, ond inside Of ear) and • one piece 3/4' x 4" x i 4" [far sockets); vyenge^&neipiece 3/4":X 2" x'2" (for pupil or eye); aspen—one piece 3/4' x 4' x 6" (for teeth); burl walnut—one piece 3/4" x 4' x 6" {foi hase); Baltic bL>;dh pfywooa~cne piece t/8"x !4":x 14" (fopeacker board};... Tools;, scro.'i saw with assorted bicides: dtl passs.wjfh assorted and sanding, mop; belt sahdfer; oscillating spindle sandei: pneumatic d'uh; sander; rotary tool'wit-i assorted bits; bow sdnder; spKrig cianips with rubbpr tips; plug-cutters {1 /4" and 5/8") tenpo'dry-bchd. spfay adh£siv£ .'..:' 10 Fcj$t setting glue of. choice Carpenter's gie Tracing paper Waxed paper .:.:" 'd::.:. iSdndpaper, assarted grits Mi;:;-. vii- '^-' X .'. M0. CQG-O. steo! wool ii'lii; j!;j ||pjjjjj iOid nylon hosiery Uunj ililji&l ||| ipl H High gass finish coat ng Wipe-on polyurethane finish .,' - -Hanger or choice 'This praise* {0q!cs great whenyao enlarge iff fee! frets to experiment wiffi different. ■ totniqtS and Sizes. ' i:.,. ...... .;'' r Introduction The hippopotamus is the second largest land animal on Earth after the elephant. It can weigh up to 2-1/2 tons. A most surprising fact is that the predominantly vegetarian hippo accounts for more human deaths than any other mammal on the African continent. Here is our intarsia version of "The River Horse." INSTRUCTIONS Mark, cut, deburr and fit This project was made in three sections: the body/leg section, the head/neck section, and the nose/mouth section (see Fig. 1). The three sections are of varying thicknesses, which is achieved through the use of large shims. This gives the project a dimensional effect. The entire yellow portion (as shown in Fig. 2) is raised by 1 /8"; the entire pink section is raised by 1/4". Begin by studying the pattern. Decide on what woods to use, placing an emphasis on grain pattern movement and color combinations (see Fig. 3). The walnut for the body/leg, the head/neck, and the inner portion of the mouth was planed down to a 5/8" thickness (see Fig. 4). Trace the portion of the pattern to be cut onto the tracing paper. This allows you to see the grain of the wood. Once onto the tracing paper, cut away the excess paper and apply it to the wood using temporary spray adhesive (see Fig. S). Slowly and carefully cut the first piece. Make sure your blade is sharp and that it is "squared up" to the table [see Fig. 6). Upon completion of the cut, two things will become very important. The first is that you deburr (or sand the back edges of) the cut piece (see Fig. 7); this will enable the piece fo lie flat. The second is that you make sure there is a 90° angle on the cut; this is accomplished with an oscillating spindle sander or a drill press with a sanding drum on an auxiliary table (see Fig. 8). Select the wood for the next piece to be cut. Using the first piece as a template, trace the line that will form the area where the two pieces come together. Then trace the remainder of the piece from the pattern. Attach the. tracing paper to the second piece of wood and cut it out (see Fig. 9). Deburr and fit the second piece fo the first piece and make any necessary adjustments. Mark, cut, deburr, and fit all of the remaining pieces until every piece has been cut and fit together. Before proceeding, it is necessary to mention that, in addition to the two large sectional shims previously mentioned, the following individual 1 /8" shims will be required: the inner eye socket, the eyeball, the tongue, the leg, and the large bottom right tooth. continued on page 64 Creative Woodworks a Crafts January S005 • 63 |


