Creative Woodworks & crafts 2005-03, страница 19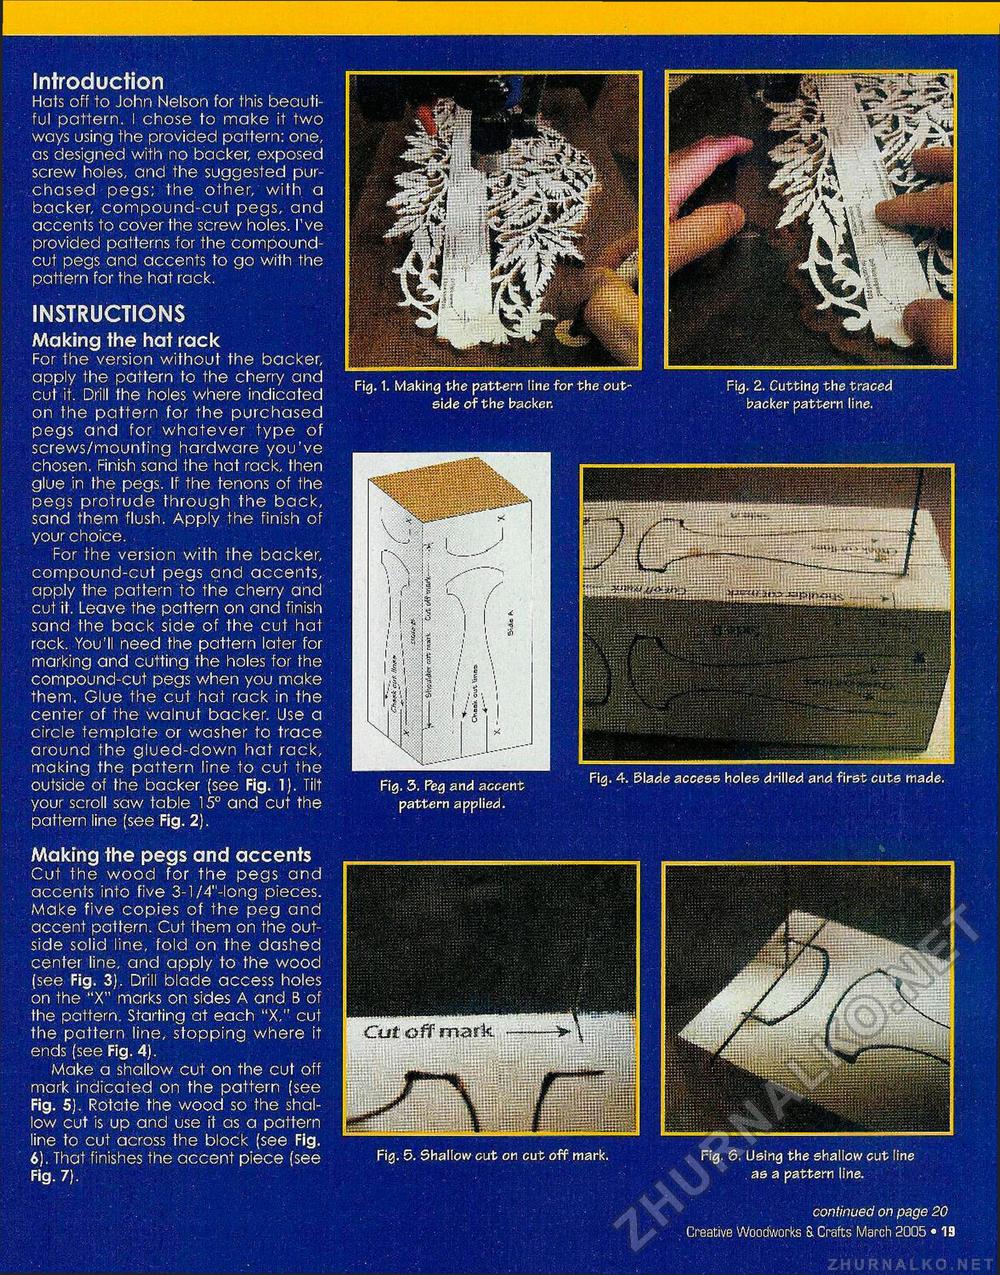
Introduction Hats off to John Nelson for this beautiful pattern, i chose to make it two ways using the provided pattern: one, as designed with no backer, exposed screw holes, and the suggested purchased pegs; the other, with a backer, compound-cut pegs, and accents to cover the screw holes. I've provided patterns for the compound-cut pegs and accents to go with the pattern for the hat rack. INSTRUCTIONS Making the hat rack For the version without the backer, apply the pattern to the cherry and cut it. Drill the holes where indicated on the pattern for the purchased pegs and for whatever type of screws/mounting hardware you've chosen. Finish sand the hat rack, then glue in the pegs. If the tenons of the pegs protrude through the back, sand them flush. Apply the finish of your choice. For the version with the backer, compound-cut pegs and accents, apply the pattern to the cherry and cut it. Leave the pattern on and finish sand the back side of the cut hat rack. You'll need the pattern later for marking and cutting the holes for the compound-cut pegs when you make them. Glue the cut hat rack in the center of the walnut backer. Use a circle template or washer to trace around the glued-down hat rack, making the pattern line to cut the outside of the backer (see Fig. 1). Tilt your scroll saw table 15° and cut the pattern line (see Fig. 2). Making the pegs and accents Cut the wood for the pegs and accents into five 3-l/4"-long pieces. Make five copies of the peg and accent pattern. Cut them on the outside solid line, fold on the dashed center line, and apply to the wood (see Fig. 3). Drill blade access holes on the "X" marks on sides A and B of the pattern. Starting at each "X," cut the pattern line, stopping where it ends (see Fig. 4). Make a shallow cut on the cut off mark indicated on the pattern (see Fig. 5). Rotate the wood so the shallow cut is up and use it as a pattern line to cut across the block (see Fig. 6). That finishes the accent piece (see Fig. 7). Fig. 1. Making the pattern line for the outside of the backer. Fig. 2. Cutting the traced backer pattern line. Fig. 4. Blade access holes drilled and first cuts made, Fig. 3, Peg and accent pattern applied. Fig. 5. Shallow cut on cut off mark, Fig. 6. Using the shallow cut line as a pattern line. continued on page 20 Creative Woodworks S. Crafts March 2005 • 19 |


