Creative Woodworks & crafts 2005-03, страница 69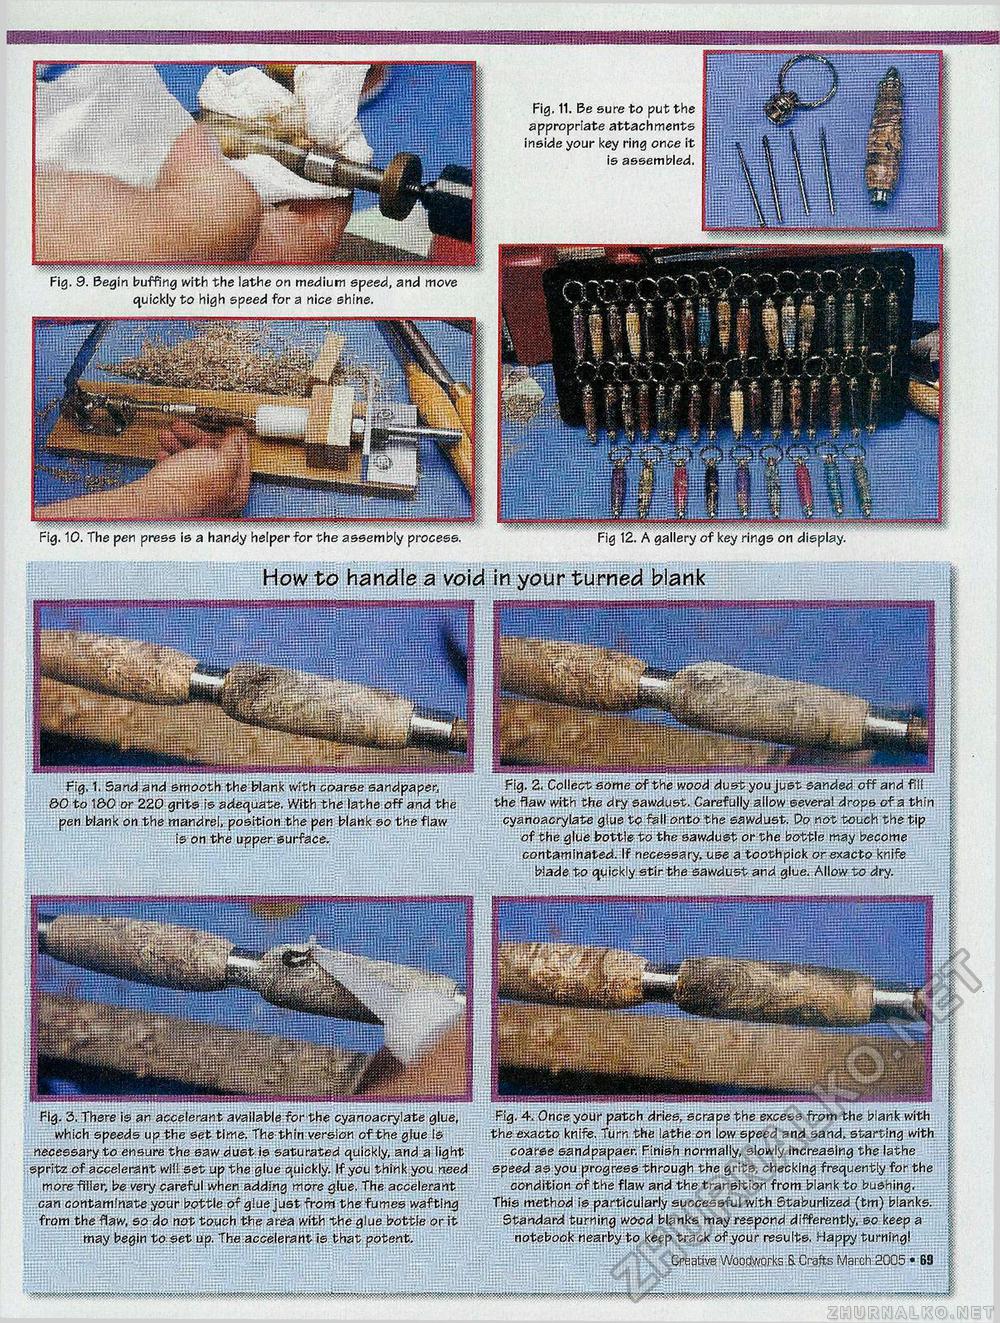
How to handle a void in your turned blank Fig. 2. Collect some of the wood dust you just sanded off and fill the flaw with the dry sawdust. Carefully allow several drops of a thfri cyanoacrylate glue to fell onto the sawdust. Do not touch the tip of the g|ue bottle to the sawdust or the bottle may become contaminated. If necessary, use a toothpick orexacto knife blade to quickly stir the sawdust and glue. Allow to dry. Fig. 1. Sand and smooth the blank with coarse sandpaper, 30 to 1&0 or 220 grits is adequate. With the lathe off and the pen blank on the mandrel, position the pen blank so the flaw is on the upper surface. Fig. 4. Once your patch dries, scrape the excess from the blank with the exacto knife. Turn the lathe on low speed and sand, starting with coarse sandpapaer. Finish normally, slowly increasing the lathe speed as you progress through the grits, checking frequently for the condition of the flaw and the transition from blank to bushing. This method is particularly successful with Staburlized (tm) blanks. Standard turning wood blanks may respond differently, so keep a notebook nearby to keep track of your results. Happy turning! Creative Woodworks & Crafts March 2005 • 69 Fig. 3. There is an accelerant available for the cyanoacrylate glue, which speeds up the set time, The thin version of the glue Is necessary to ensure the saw dust, is saturated quickly, and a light spritz of accelerant will set up the glue quickly. If you think you need more filler, be very careful when adding more glue. The accelerant can contamlnateyour bottle of glue just from the fumes wafting from the flaw, so do not touch the area with the glue bottle or it may begin to set up. The accelerant is that potent. Fig. 11. Be sure to put the appropriate attachments inside your key ring once it is assembled. |


