Creative Woodworks & crafts 2005-04, страница 43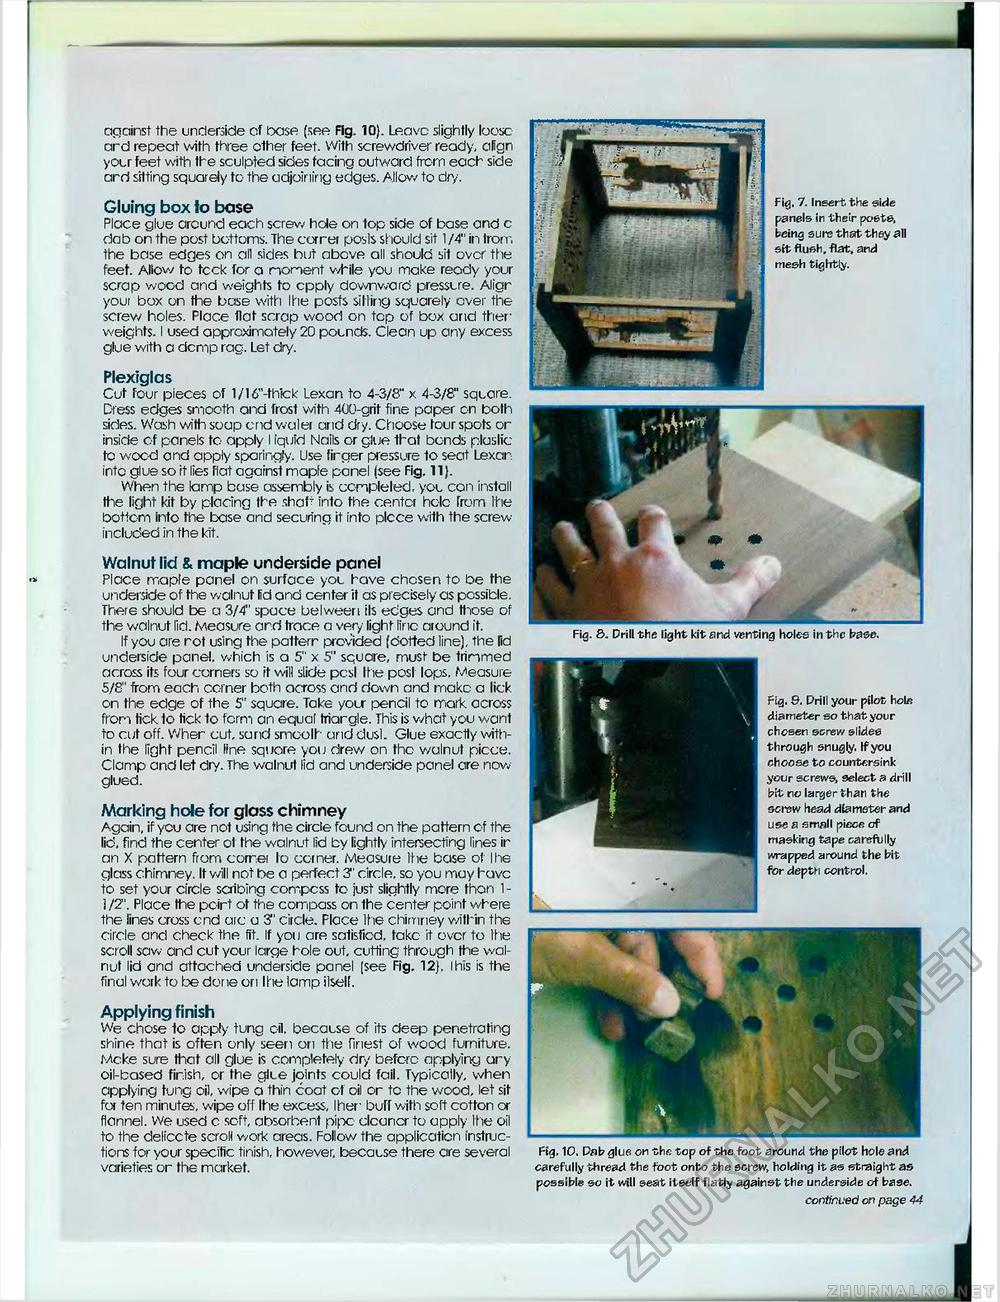
against the underside of base (see Fig. 10). Leave slightly loose ard repeat with three ether feet. With screwdriver ready, align your feet with the sculpted sides facing outward from each side ard sitting squarely to the adjoining edges. Allow to dp/. Gluing box to base Place glue around each screw hole on top side of base and c dob on the post bottoms. The corner posts should sit 1/4" in Irom the base edges on all sides but above all should sit over the feet. Allow to tcck for a moment while you make reody your scrap wood and weights to epply downward pressure. Aligr your box on the base with Ihe posts silling squarely ever the screw holes. Place flat scrap wood on top of box and ther weights. I used approximately 20 pounds. Clean up any excess glue with a demp rag. Let dry. Plexiglas Cut four pieces of 1/16"-thick Lexan to 4-3/8" x 4-3/8" square. Dress edges smooth and frost with 400-grit fine paper on both sides. Wash with soap end waler and dry. Choose tour spots or inside of panels to apply I iquid Nails or glue that bonds plaslic tc wood and apply sparingly. Use firger pressure to seat Lexar into glue so it lies flat against maple panel (see Fig. 11). When the lamp base assembly is completed, you con install the light kit by plocing the shaft Into the center hole from the bottom into the base and securing it into plcce with the screw-included in the kit. Walnut lid & maple underside panel Place maple panel on surface yot have chosen to be the underside of the walnut lid and center it as precisely as possible. There should be a 3/4" space belween lis edges and those of the walnut lid. Measure ard trace a very light line around it. If you ore rot using the patterr provided (dotted line), the lid underside panel, which is a 5" x 5" square, must be trimmed across its four corners so it will slide pesl Ihe post lops, Measure 5/8" from each corner both across and down and make a lick on the edge of the 5" square. Take your pencil to mark across from tick to tick to form an equal triargle. This is what you want to cut off. Wher cut, sand smcolh arid dusl. Glue exaclly within the light pencil line squore you drew on the walnut picce. Clamp and let dry. The walnut lid and underside pane! are now glued. Marking hole for glass chimney Again, if ycu are not using the circle found on the pattern of the lid, find the center of the walnut lid by lightly intersecting lines ir on X pattern from correi to comer. Measure Ihe base of Ihe glass chimney. It will not be a perfect 3" circle, so you may have to set your circle scribing compcss to just slightly more thon 1 -1 /2". Place the poirt ot the compass on 1he center point where the lines cross end aic a 3' circle. Place Ihe chimney within the circle and check the lit. If yon are satisfied, take it over to Ihe scroll saw and cut your large hole out, cutting through the walnut lid and attached underside panel (see Fig. 12). Ihis is the final work to be done ori Ihe lamp ilself. Applying finish We chose to apply tung oil. because of its deep penetrating shine that is often only seen on the finest of wood furniture. Mcke sure that all glue is completely dr/ before applying ary oil-based finish, or the glue joints could fail. Typically, when applying tung oil, wipe a thin coat of oil or tc the wood, let sit for ten minutes, wipe off Ihe excess, Iher buff with soft cotton or flannel. We used c soft, absorbent pipe clcancr to apply Ihe oil to the deliccte scroll work areas. Follow the application instructions for your specific finish, however, because there are several varieties or the market. Fig. 7. Insert the side panels in their poets, being sure that they all sit flush, flat, and mesh tightly. 1 Fig. &. Drill the light kit and venting holes in the base. Fig. 9. Prill your pilot hole diameter so that your chosen screw slides through snugly, tf you choose to countersink your screws, select a drill bit no larger than the screw head diameter and use a small piece of masking tape carefully wrapped around the bit for depth control. Fig. 10. Pab glue on the top of the foot around the pilot hole and carefully thread the foot onto the screw, holding it as straight as possible so it will seat itself flatly against the underside ot base. continued or page 44 |


