Creative Woodworks & crafts 2005-04, страница 44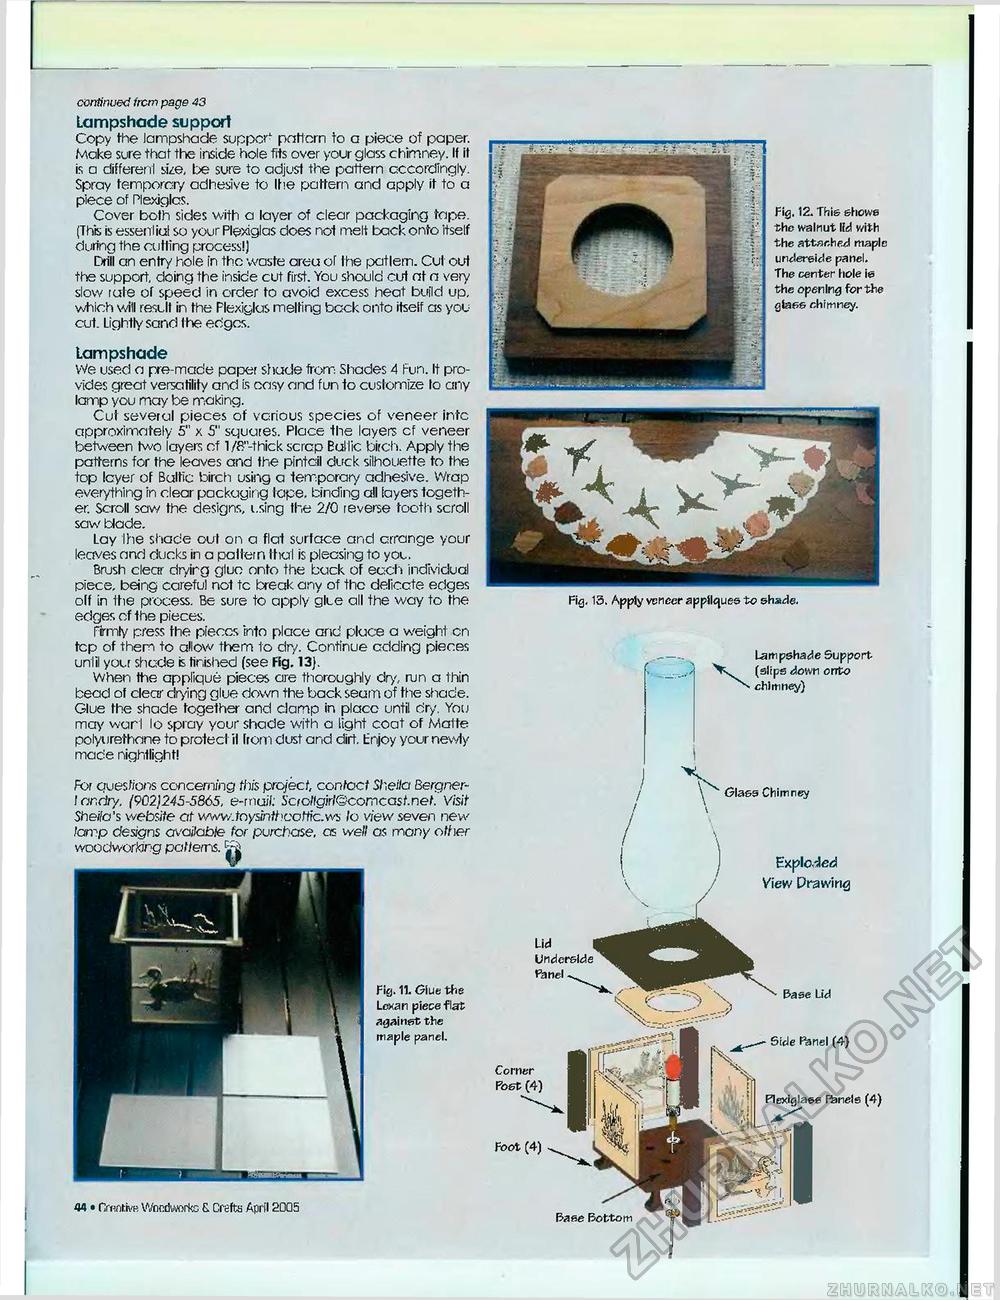
44 • nrnntivB Wncdworkc 8. Crefts April 2DQ5 Fig. 11. Glue the Lcxan piece flat against the maple panel. Fig. 13, Apply veneer appliques tc shade. Lampshade Support V. (slips down onto chimney} Fig. 12. This shows the walnut lid with the attached maple underside panel. The center hole is the opening for the glass chimney. continued frcm page 43 Lampshade support Copy the lampshade supper1' pattern to a piece of paper. Make sure that the inside hole fits over your glass chimney. If it is a different size, be sure to adjust the pattern accordingly. Spray temporary adhesive to Ihe pattern and apply if to a piece of Plexiglas. Cover both sides with a layer of clear packaging tape. (This is essential so your Plexiglas does not melt back onto itself during the cutting process!) Dtill an entry hole in the waste areu of the patlem. Cut out the support, doing the inside cut first. You should cut at a very slow rule of speed in order to avoid excess heat build up, which will result in the Plexiglas melting back onto itself as you cut. Lightly sand the edges. Lampshade We used a pre-made paper shude from Shades 4 Fun. It provides great versatility and is easy and fun to customize lo any lamp you may be making. Cut several pieces of various species of veneer jntc approximately 5" x 5" squares. Place the layers cf veneer between two layers of 1/f?"-thick scrap Bui lie birch. Apply the patterns for the leaves and the pintail duck silhouette to the top layer of Bultic birch using a temporary adhesive. Wrap everything In clear packaging tape, binding all layers together. Scroll saw the designs, using the 2/0 reverse tooth scroll saw blade. Lay Ihe shade out on a flat surface and arrange your leaves and ducks in a paltern thai is pleasing to you. Brush clear dryirg glue onto the back of each individual piece, being careful not tc break any of the delicate edges olf in the process. Be sure to apply glue all the way to the edges cf the pieces. Firmly press the pieccs into place and pluce a weight on tcp of them to allow them to dry. Continue adding pieces until your shade is finished (see Fig. 13). When Ihe applique pieces are thoroughly dry, run a thin bead of eleer drying glue down the back seum of the shade. Glue the shade together and clamp in placo until dry. You may warl lo spray your shade with a light coat of Matte polyurethane to protect il Irom dust and dirt. Enjoy your newly made nightlight! For questions concerning this project, contact Sheila Bergner-I on dry, (902)245-5865, e-muifc Scfoflgirl@comcasf.net." Visit Sheila's website of www.toysintf>coftfc.w5 lo view seven new tomp designs available for purchase, as well as many otfier woodworking pat/ems. Corner Post (4) Foot (4) Rase Bottom Lid Underside fijnel \ Glass Chimney Exploded View Drawing |


