Creative Woodworks & crafts 2005-04, страница 41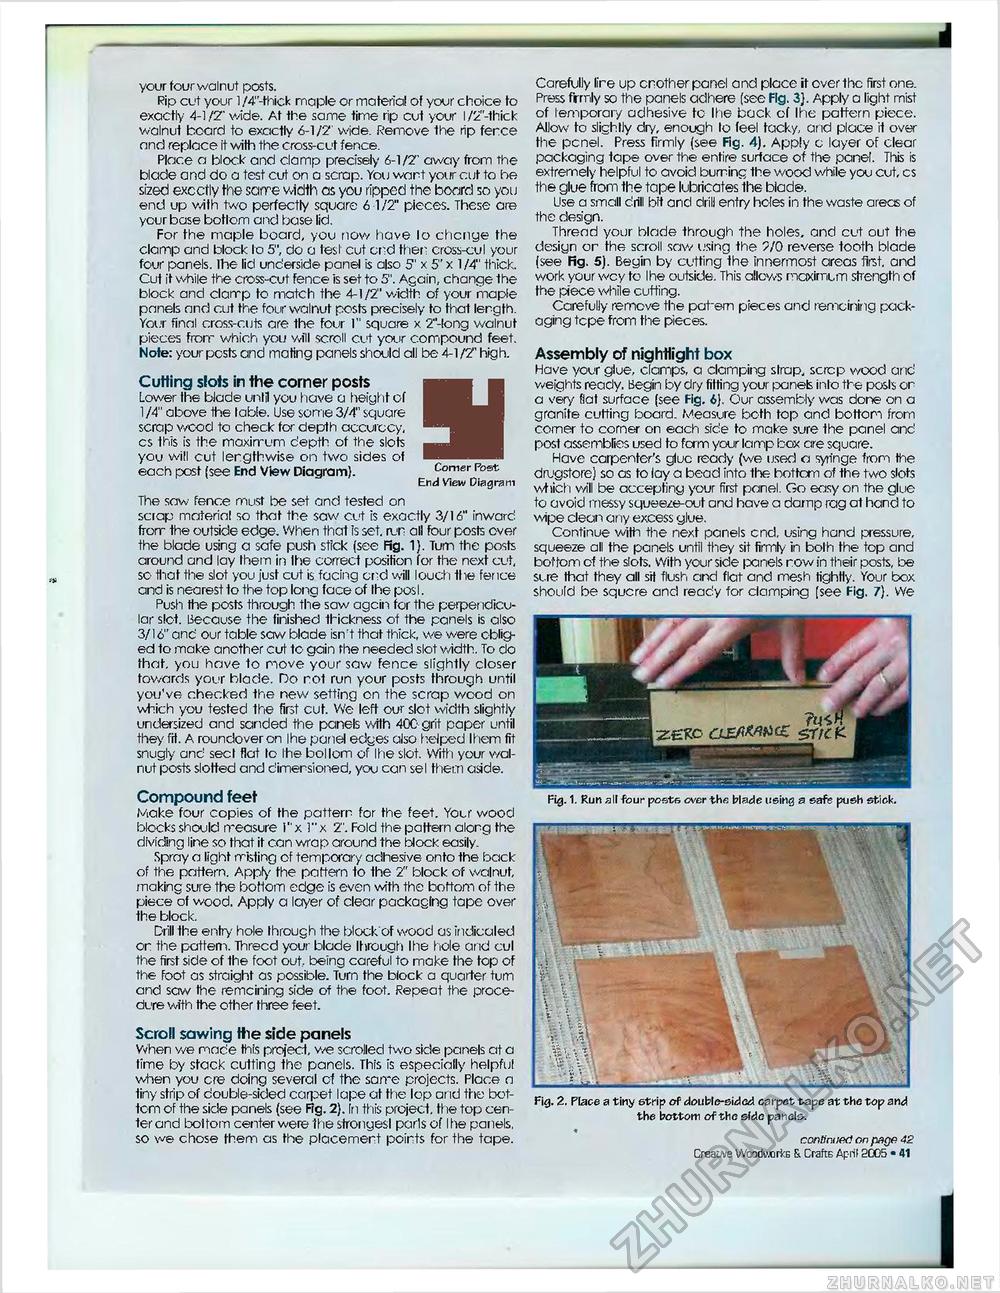
your four walnut posts. Rip cut your l/4"-thick maple or materia! of your choice to exactly 4-1 /Z' wide. At the same time rip cut your l/2"-thick walnut board to exactly 6-1/2' wide. Remove the rip fence nnd replace it with the cross-cut fence. Place a block and clamp precisely 6-1/2' away from the blade and do a test cut on a scrap. You want your cut to he sized excctly the same width as you ripped the board so you end up with two perfectly square 6 1 /2" pieces. These are your base bottom and base lid. For the maple board, you now have lo chcnge the clamp and block lo 5", do a lest cut end then cross-cul your four panels. Ihe lid underside panel is also 5' x 5" x 1/4" thick. Cut it while the cross-cut fence is set to 5". Again, change the block and clarrp to match the 4-1 /2" width of your maple panels end cut the four walnut posts precisely to that length. Your final cross-cuts are the four 1" square x 2"-long walnut pieces from which you will scroll cut your compound feet. Note: your pests and mating panels should all be 4-1 /2" high. Cutting slois in the corner posts Lower the blade unlil you have a height of 1/4" above the Icible. Use some 3/4" square scrap wcod to check for depth accuracy, cs this is the maximum depth of the slots you will cut lengthwise on two sides of each post (see End View Diagram). End View Diagram The saw fence must be set and tested on scrap materia! so that the saw cut is exactly 3/16" inward from the outside edge. When that is set, run all four posts over the blade using a safe push stick (see Fig. 1). Turn the posts around and lay Ihem in Ihe correct position for the next cut, so that the slot you just cut is facing end will louch the fence and is nearest to the top long face of Ihe posl. Push the posts through the saw agcin for the perpendicular slot. Because the finished thickness of the panels is also 3/16" and our table saw blade isn't that thick, we were obliged to make another cut to gain the needed slot width. To do that, you have to move your saw fence slightly closer towards your blade. Ho rot run your posts through until you've checked the new setting on the scrap wood on which you tested the first cut. We left our slot width slightly undersized and sanded the panels with 400 grit paper until they fit. A roundoveron Ihe panel edges also helped litem fit snugly and seel flat lo Ihe bollom of Ihe slot. With your walnut posts slotted and dimensioned, you can sel them aside. Compound feet Make four copies of the pattern for the feet. Your wood blocks should measure 1" x 1" x 2". Fold the pattern along the dividing line so that it can wrap around the block easily. Spray a light misting of temporary adhesive onto the back of the pattern. Apply the pattern to the 2" block of walnut, making sure the bottom edge is even with the bottom of the piece of wood. Apply a layer of clear packaging tape over the block. Drill the entry hole through the block'of wood as indicaled or the pattern. Threcd your blade through llie hole arid cul the first side of the foot out, being careful to make the top of the Foot as straight as possible. Turn the block a quarter turn and saw the remcining side of the foot. Repeat the procedure with the other three feet. Scroll sawing Hie side panels When we made this project, we scrolled two side panels at a time by stack cutting the panels. This is especially helpful when you ere doing several cf the same projects. Place n tiny strip of double-sided carpet lape at the lop and the bottom of the side panels (see F?g. 2). in this project, the top center and bolfom center were the strongesl parls of Ihe panels, so we chose them as the placement points for the tape. Carefully lire up cnother panel and place it over the first one. Press frrrily so the panels adhere (see Fig. 3], Apply a light mist of temporary adhesive to Ihe back of Ihe pattern piece. Allow to slighlly dry, enough lo feel tacky, and place it over the pcnel. Press firmly (see Fig. 4). Apply c layer of clear packaging tape over the entire surface of the panel. This is extremely helpful to avoid burring the wood v/hile you cut, cs the glue from the tape lubricates the blade. Use a small drill bit and drill entry holes in the waste areas of the design. Thread your blade through the holes, and cut out the design or the scroll saw using the 2/0 reverse tooth blade (see fig. 5). Begin by cutting the innermost areas first, and work your wcy to Ihe outside. This allows maximum strength of the piece while cutting. Carefully remove the pat-em pieces and remcining packaging tcpe from the pieces. Assembly of nightlight box Have your glue, clamps, a clamping strap, scrcp wood and weights ready. Begin by dry fitting your panels into the posls or a very fiat surface (see Fig. 6). Our assembly was done on a granite cutting board. Measure both fop and bottom from comer to corner on each side to make sure the panel and post assemblies used to fcrm your lamp box are square. Have carpenter's glue ready (we used a syringe from the drugstore) so as to lay a bead into 1he bottom of the two slots which will be accepting your first panel. Go easy on the glue to avoid messy squeeze-out and have a damp rag at hand to wipe clean any excess glue. Continue with the next panels end, using hand pressure, squeeze all the panels until they sit firmly in both the top and bottom of the slots. With your side panels row in their posts, be sure that they all sit flush and flat and mesh tightly. Your box should be squcre and ready for clamping (see Fig. 7). We Fig. 1. Run alt four posts over th« blade using a safe push stick. Fig. 2. Place a tiny ©trip of double-sided carpet tape at the top and the bottom of the side panels-. continued on page 42 Creative Waatteorte & Crafts April 2035 • 41 |


