Creative Woodworks & crafts 2005-06, страница 73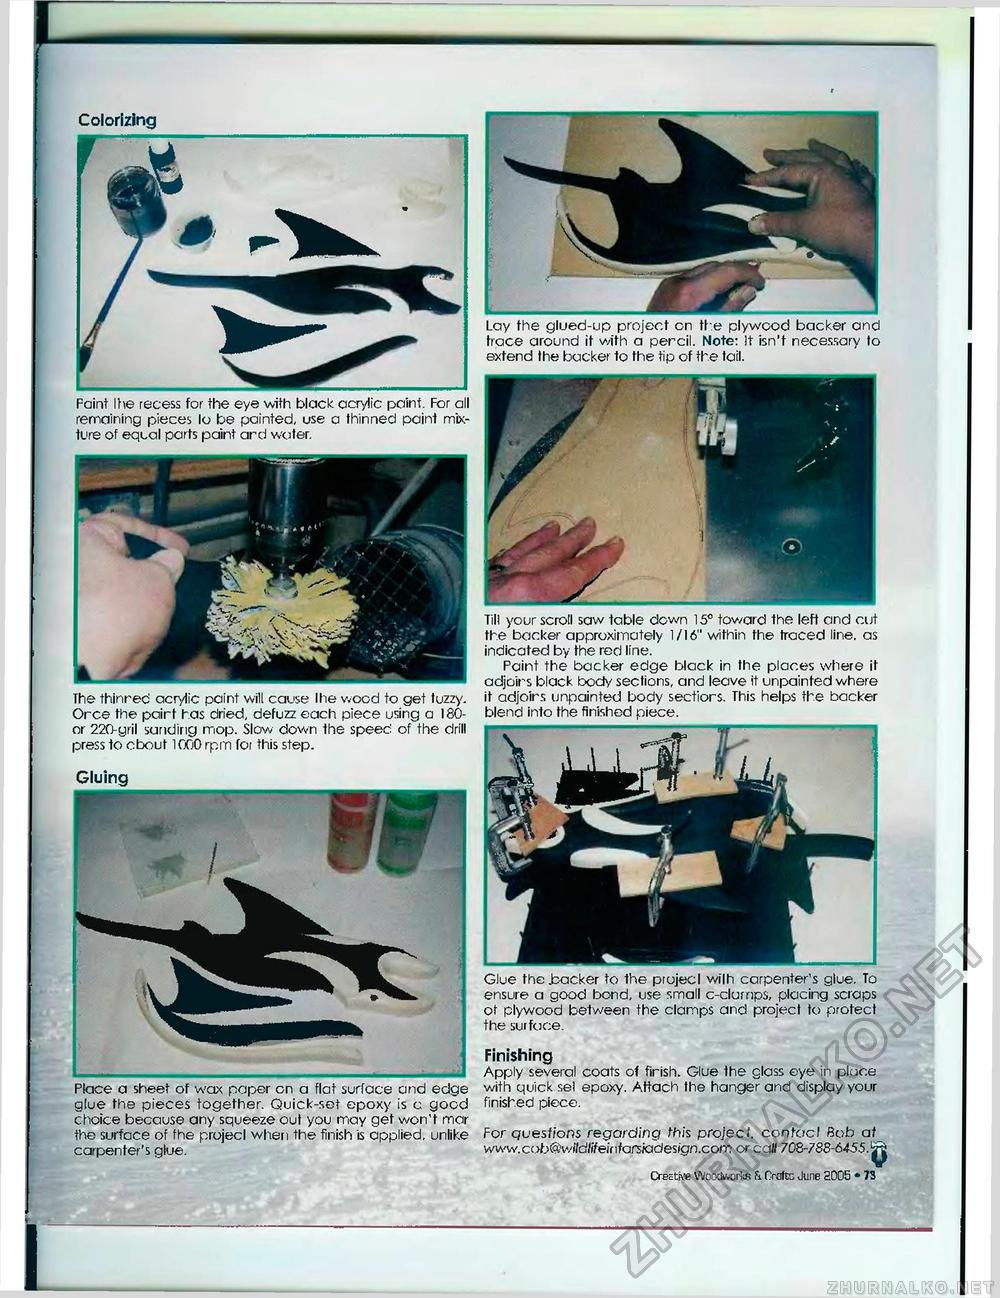
Colorizing Lay the glued-up project on the plywood backer and trace around it with a percil. Note: It isn't necessary to extend the backer to the tip of the tail. Faint Ihe recess for the eye with black acrylic paint. For all remaining pieces lo be painted, use a thinned paint mixture of equal parts paint and water. Til! your scroll saw table down 15° toward the left and cut the backer approximately 1/16" within the traced line, as indicated by the red line. Paint the backer edge black in the places where it adjoins black body sections, and leave it unpainfed where it adjoirs unpainted body sectiors. This helps the backer blend into the finished piece. The thinrec' acrylic paint will cause Ihe wood to get tuzzy. Orce the pairt has dried, defuzz each piece using a 180-or 220-yril sanding mop. Slow down the speed of the drill press to about 1000 rpm for this step. Gluing Glue the backer to the piojecl wilh carpenter's glue. To ensure a good bond, use small c-clumps, placing scraps ot plywood between the clamps and project to protect the surface. Finishing Place a sheet of wax paper cn a flat surface and edge glue the pieces together. Quick-set epoxy is c good choice because any squeeze out you may get won't mar the surface of the projecl when the finish is applied, unlike carpenter's glue. Apply several coats of firish. Glue the glass eye in place with quick sel epoxy. Attach the hanger and display your finished piece. For questions regarding this project, confocJ Bob at www.cub@witdlifeirifarsiadesign.com or call 708-788-645.5.^ Creative Woodworks a Crafts June 2005 • 73 |


