Creative Woodworks & crafts 2005-09, страница 50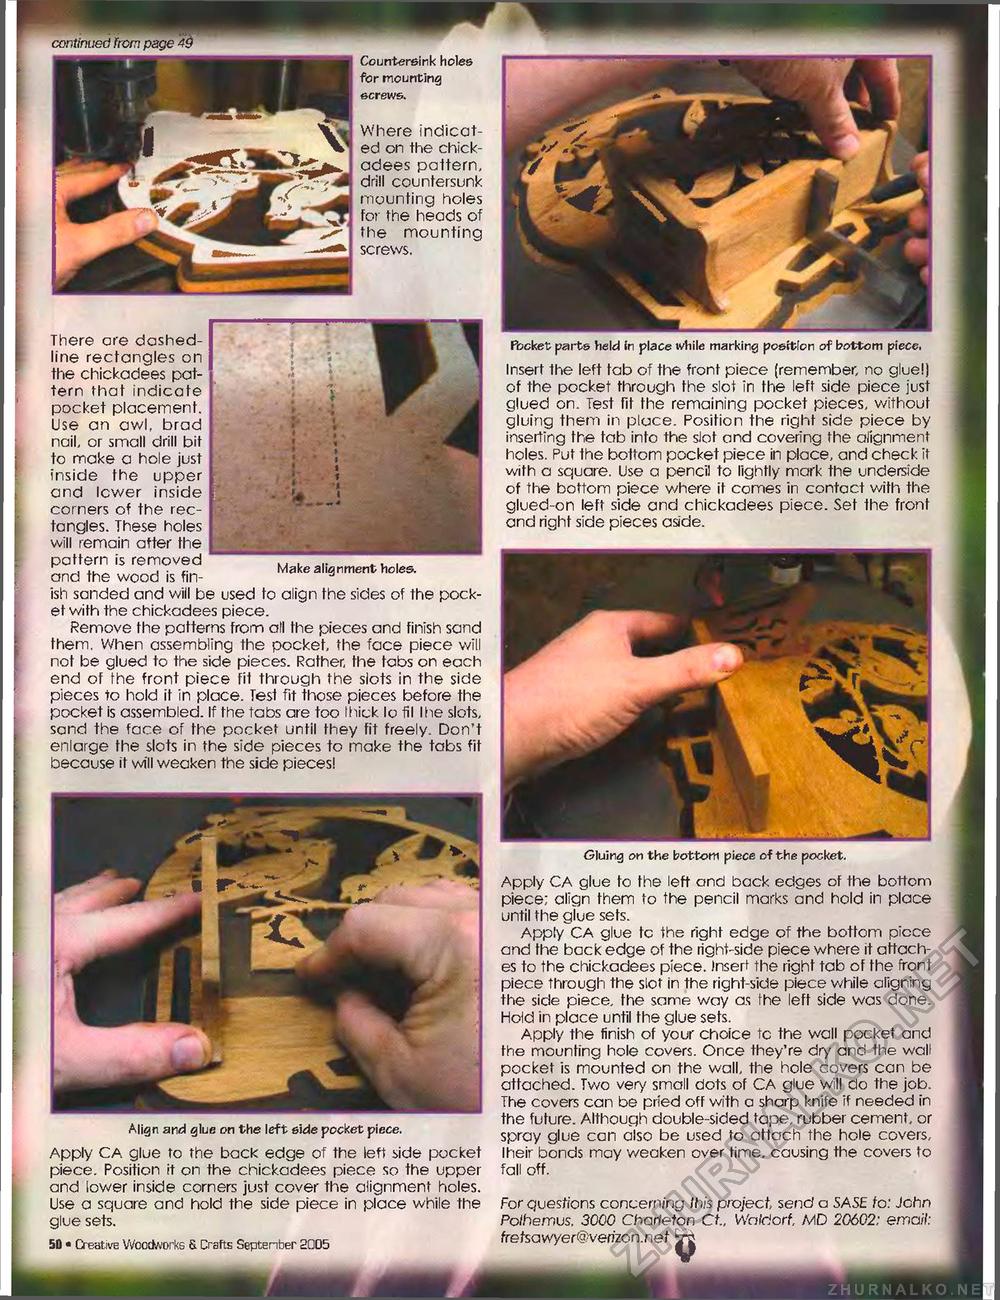
Insert the left tab of the front piece (remember, no glue!) of the pocket through the slot in the left side piece just glued on. Test fit the remaining pocket pieces, without gluing them in place. Positio n the right side piece by inserting the tab into the slot and covering the alignment holes. Put the bottom pocket piece in place, and check it with a square. Use a pencil to lightly mark the underside of the bottom piece where it comes in contact with the glued-on left side and chickadees piece. Set fhe front and right side pieces aside. Gluing on the bottom piece of the pocket. Apply CA glue to the left and back edges of the bottom piece; align them to the pencil marks and hold in place until the glue sets. Apply CA glue tc the right edge of the bottom picce and the back edge of the right-side piece where it attaches to the chickadees piece. Insert the right tab of the front piece through the slot in the right-side piece while aligning the side piece, fhe same way as the left side was done. Hold in place until the glue sets. Apply the finish of your choice tc the wall pocket and the mounting hole covers. Once they're dry and the wall pocket is mounted on the wall, the hole covers can be attached. Two very small dots of CA glue will ao the job. The covers can be pried off with a sharp knife if needed in the future. Although double-sided tape, rubber cement, or spray glue can also be used to atlach the hole covers, Iheir bonds may weaken over time, causing the covers to fall off. For questions concerning this project send a SASE to: John Polhemus. 3000 Charleton Ct, Waldorf, MD 20602: email: fretsawyer@verizon.net Jjnj Pocket parts held in place ivhile marking position of bottom piece, There are dashed-line rectangles on the chickadees pattern that indicate pocket placement. Use an awl, brad noil, or small drill bit to make a hole just inside the upper and lower inside corners of the rectangles. These holes will remain after the pattern is removed and the wood is fin- Make alignment holes. ish sanded and will be used to align the sides of the pocket with the chickadees piece. Remove the patterns from all the pieces and finish sand them. When assembling the pocket, the face piece will not be glued to the side pieces. Rather, the tabs on each end of the front piece fit through the slots in the side pieces to hold it in place. Test fit those pieces before the pocket is assembled. If fhe tabs are too thick lo fil Ihe slots, sand the face of the pocket until they fit freely. Don't enlarge the slots in the side pieces to make the tabs fit because it will weaken the side pieces! Align and glue on the left side pocket piece. Apply CA glue to the back edge of the left side pocket piece. Position it on the chickadees piece so the upper and lower inside corners just cover the alignment holes. Use a square and hold the side piece in place while the glue sets. 62 • Creative Woodworks 6 Crafts September 2005 continued from page 50 Where indicated on the chickadees paltern, drill countersunk mounting holes for the heads of the mounting screws. Countersink holes for mounting screws. |


