Creative Woodworks & crafts 2005-09, страница 53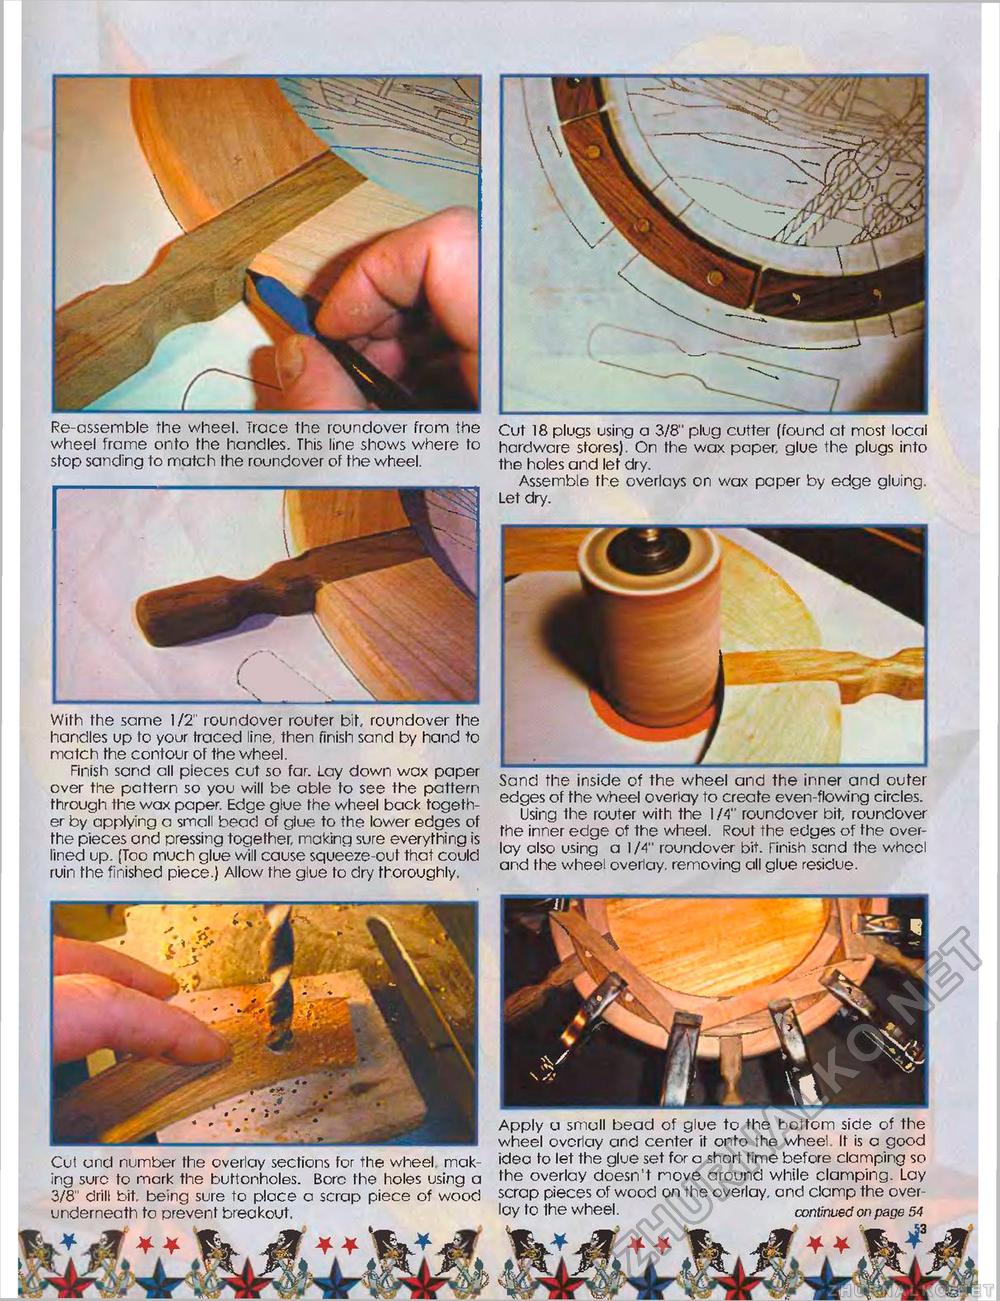
With the same 1/2" roundover router bit, roundover the handles up to your traced line, then finish sand by hand to match the contour of the wheel. Finish sand all pieces cut so far. Lay down wax paper over the pattern so you will be able to see the pattern through the wax paper. Edge glue the wheel back together by applying a small bead of glue to the lower edges of the pieces and pressing together, making sure everything is lined up. (Too much glue will cause squeeze-out that could ruin the finished piece.} Allow the glue to dry thoroughly. Sand the inside of the wheel and the inner and outer edges of the wheel overlay to create even-flowing circles. Using the router with the I /4" roundover bit, roundover the inner edge of the wheel. Rout the edges of the overlay also using a 1/4" roundover bit. finish sand the wheel and the wheel overlay, removing all glue residue. Re-assemble the wheel. Trace the roundover from the wheel frame onto the handles. This line shows where to stop sanding to match the roundover of the wheel. Cut 18 plugs using a 3/8" plug cutter (found at most local hardware stores). On the wax paper, glue the plugs into the holes and let dry. Assemble the overlays on wax paper by edge gluing. Let dry. Cut and number the overlay sections for the wheel making sure to mark the buttonholes. Bore the holes using a 3/8" drill bit. being sure to place a scrap piece of wood underneath to prevent breakout. Apply a small bead of glue to the bottom side of the wheel overlay and center it onto the wheel. It is a good idea to let the glue set for a short time before clamping so the overlay doesn't move around while clamping. Lay scrap pieces of wood on the overlay, and clamp the overlay to the wheel. continued on page 54 |


