Creative Woodworks & crafts 2005-11, страница 39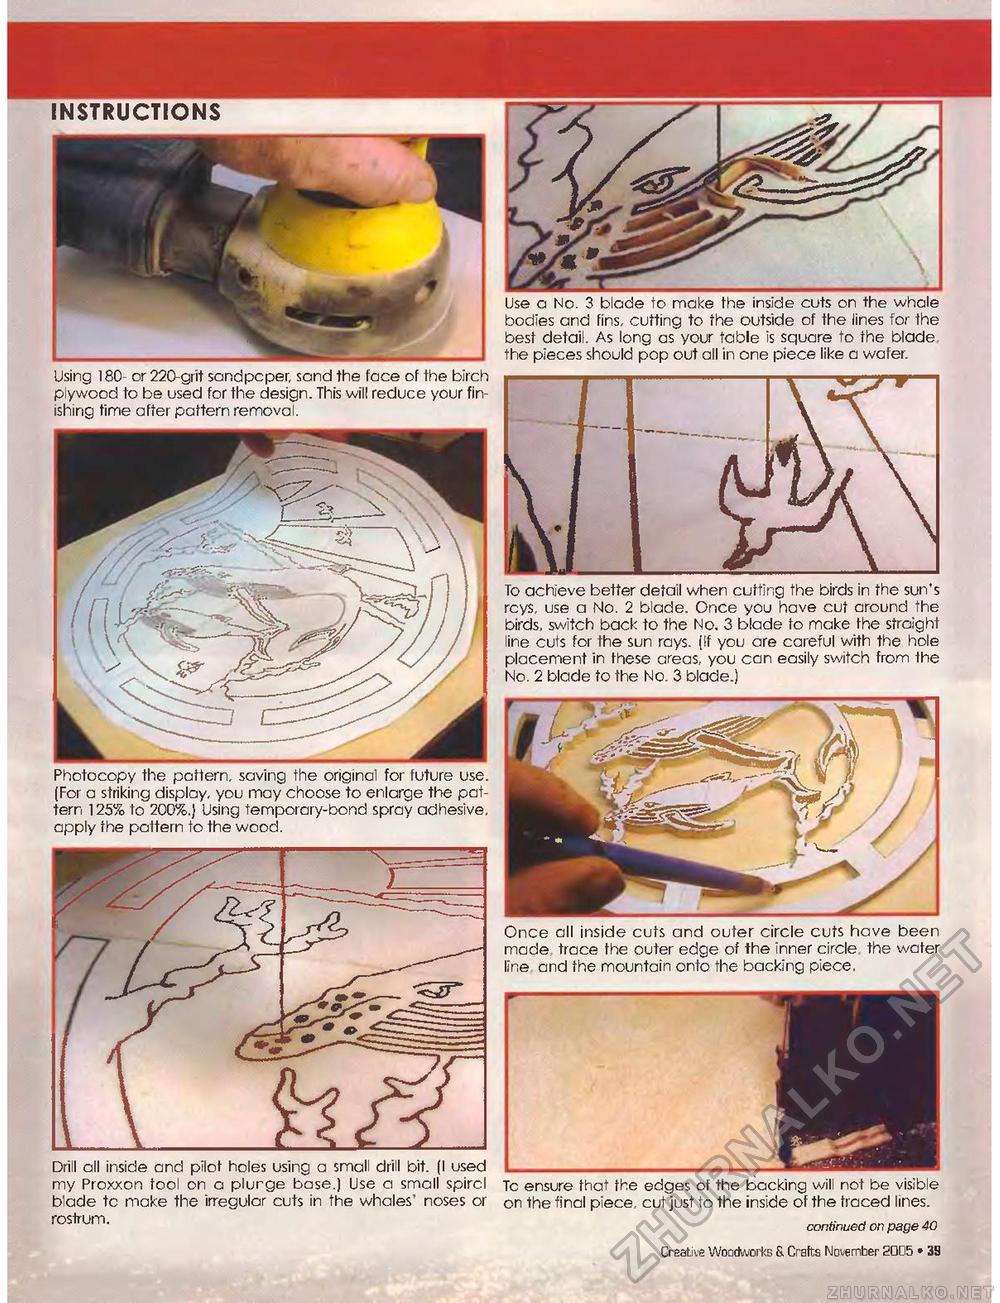
INSTRUCTIONS Use o No. 3 blade to make the inside cuts on the whale bodies and fins, cutting to the outside of the lines for the best detail. As long as your table is square to fhe blade the pieces should pop out all in one piece like a wafer. Using 180- or 220-grit sandpcper, sand the face of the birch plywood to be used for the design. This will reduce your finishing time after pattern removal. To achieve better detail when cutting the birds in the sun's rcys, use a No. 2 blade. Once you have cut around the birds, switch back to the No. 3 blade to make the straight line cuts for the sun rays. (If you are careful with the hole placement in these areas, you can easily switch from the No. 2 blade to the No. 3 blade.) Photocopy the pattern, saving the original for future use. (For a striking display, you may choose to enlarge the pattern 125% to 200%.) Using temporary-bond spray adhesive, apply fhe pattern to the wood. Once all inside cuts and outer circle cuts have been made trace fhe outer edge of the inner circle the water line and fhe mountain onto the backing piece. Drill all inside and pilot holes using a small drill bit. (I used my Proxxon tool on a plurge base.) Use a small spircl blade to make the irregular cuts in the whales' noses or rostrum. To ensure that fhe edges of the backing will not be visible on the final piece, cut just to the inside of the traced lines. continued on page 40 Creative Woodworks 6. Crafts November 2005 « 39 |


