Creative Woodworks & crafts 2009-04, страница 45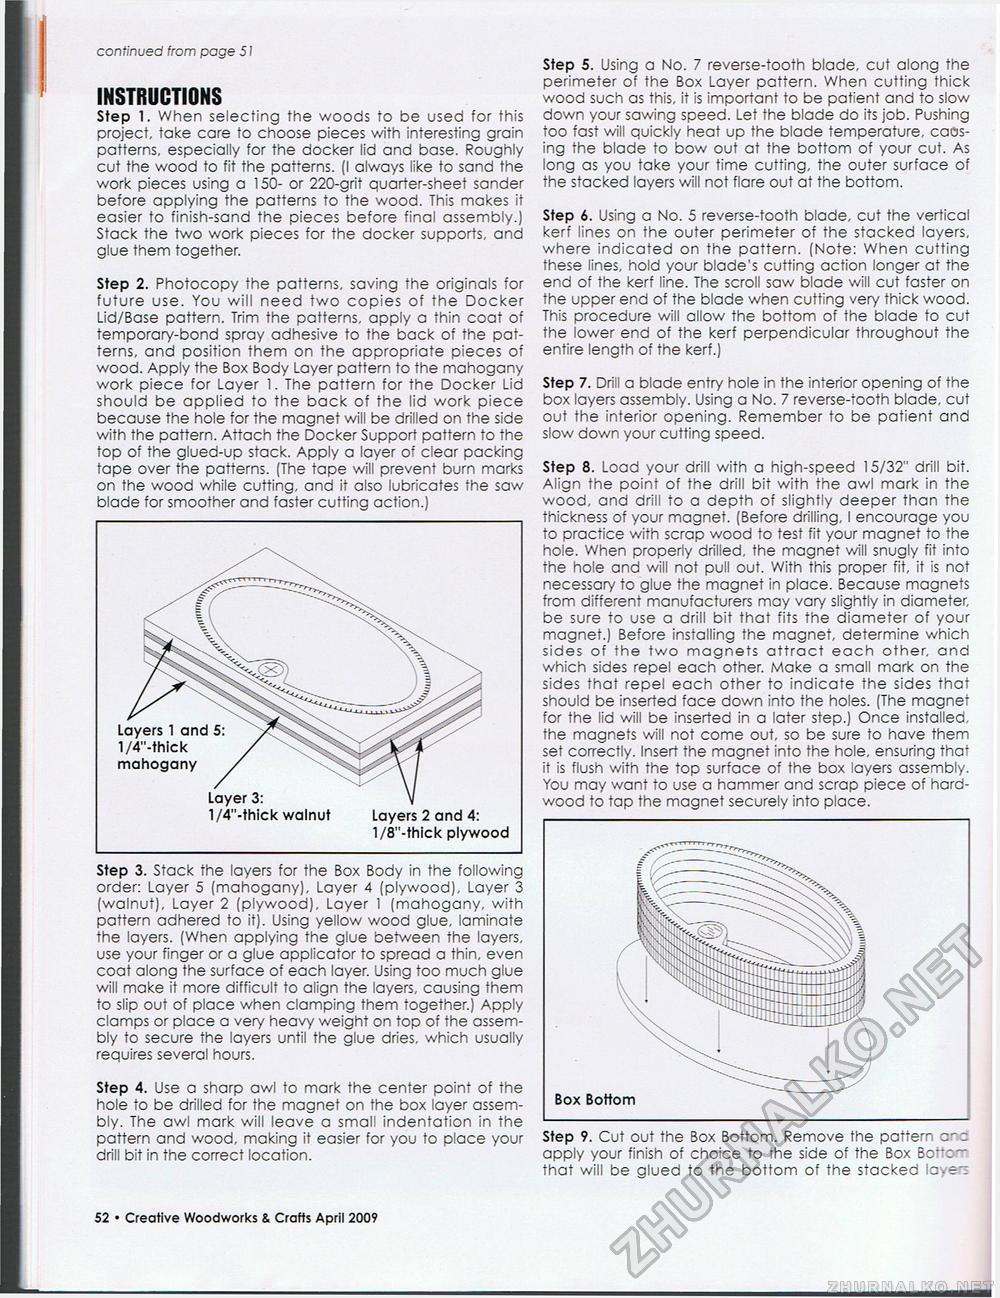
continued from page 51 INSTRUCTIONS Step 1. When selecting the woods to be used for this project, take care to choose pieces with interesting grain patterns, especially for the docker lid and base. Roughly cut the wood to fit the patterns. (I always like to sand the work pieces using a 150- or 220-grit quarter-sheet sander before applying the patterns to the wood. This makes it easier to finish-sand the pieces before final assembly.) Stack the two work pieces for the docker supports, and glue them together. Step 2. Photocopy the patterns, saving the originals for future use. You will need two copies of the Docker Lid/Base pattern. Trim the patterns, apply a thin coat of temporary-bond spray adhesive to fhe back of the patterns, and position them on the appropriate pieces of wood. Apply the Box Body Layer pattern to the mahogany work piece for Layer 1. The pattern for the Docker Lid should be applied to the back of the lid work piece because the hole for the magnet will be drilled on the side with the pattern. Attach the Docker Support pattern to the top of the glued-up stack. Apply a layer of clear packing tape over the patterns. (The tape will prevent burn marks on the wood while cutting, and it also lubricates the saw blade for smoother and faster cutting action.) 1/8"-thick plywood Step 3. Stack the layers for the Box Body in the following order: Layer 5 (mahogany). Layer 4 (plywood). Layer 3 (walnut). Layer 2 (plywood). Layer 1 (mahogany, with pattern adhered to it). Using yellow wood glue, laminate the layers. (When applying the glue between the layers, use your finger or a glue applicator to spread a thin, even coat along the surface of each layer. Using too much glue will make it more difficult to align the layers, causing them to slip out of place when clamping them together.) Apply clamps or place a very heavy weight on top of the assembly to secure the layers until the glue dries, which usually requires several hours. Step 4. Use a sharp awl to mark the center point of the hole to be drilled for the magnet on the box layer assembly. The awl mark will leave a small indentation in the pattern and wood, making it easier for you to place your drill bit in the correct location. Step 5. Using a No. 7 reverse-tooth blade, cut along the perimeter of the Box Layer pattern. When cutting thick wood such as this, it is important to be patient and to slow down your sawing speed. Let the blade do its job. Pushing too fast will quickly heat up the blade temperature, caos-ing the blade to bow out at the bottom of your cut. As long as you take your time cutting, the outer surface of the stacked layers will not flare out at the bottom. Step 6. Using a No. 5 reverse-tooth blade, cut the vertical kerf lines on the outer perimeter of the stacked layers, where indicated on the pattern. (Note: When cutting these lines, hold your blade's cutting action longer at the end of the kerf line. The scroll saw blade will cut faster on the upper end of the blade when cutting very thick wood. This procedure will allow the bottom of the blade to cut the lower end of the kerf perpendicular throughout the entire length of the kerf.) Step 7. Drill a blade entry hole in the interior opening of the box layers assembly. Using a No. 7 reverse-tooth blade, cut out the interior opening. Remember to be patient and slow down your cutting speed. Step 8. Load your drill with a high-speed 15/32" drill bit. Align the point of the drill bit with the awl mark in the wood, and drill to a depth of slightly deeper than the thickness of your magnet. (Before drilling, I encourage you to practice with scrap wood to test fit your magnet to the hole. When properly drilled, the magnet will snugly fit into the hole and will not pull out. With this proper fit, it is not necessary to glue the magnet in place. Because magnets from different manufacturers may vary slightly in diameter, be sure to use a drill bit that fits the diameter of your magnet.) Before installing the magnet, determine which sides of the two magnets attract each other, and which sides repel each other. Make a small mark on the sides that repel each other to indicate the sides that should be inserted face down into the holes. (The magnet for the lid will be inserted in a later step.) Once installed, the magnets will not come out, so be sure to have them set correctly. Insert the magnet into the hole, ensuring that it is flush with the top surface of the box layers assembly. You may want to use a hammer and scrap piece of hardwood to tap the magnet securely into place. Box Bottom Step 9. Cut out the Box Bottom. Remove the pattern a^z apply your finish of choice to the side of the Box Bo"c~ that will be glued to the bottom of the stacked layen 78 • Creative Woodworks & Crafts April 2009 |


