Creative Woodworks & crafts 2009-04, страница 42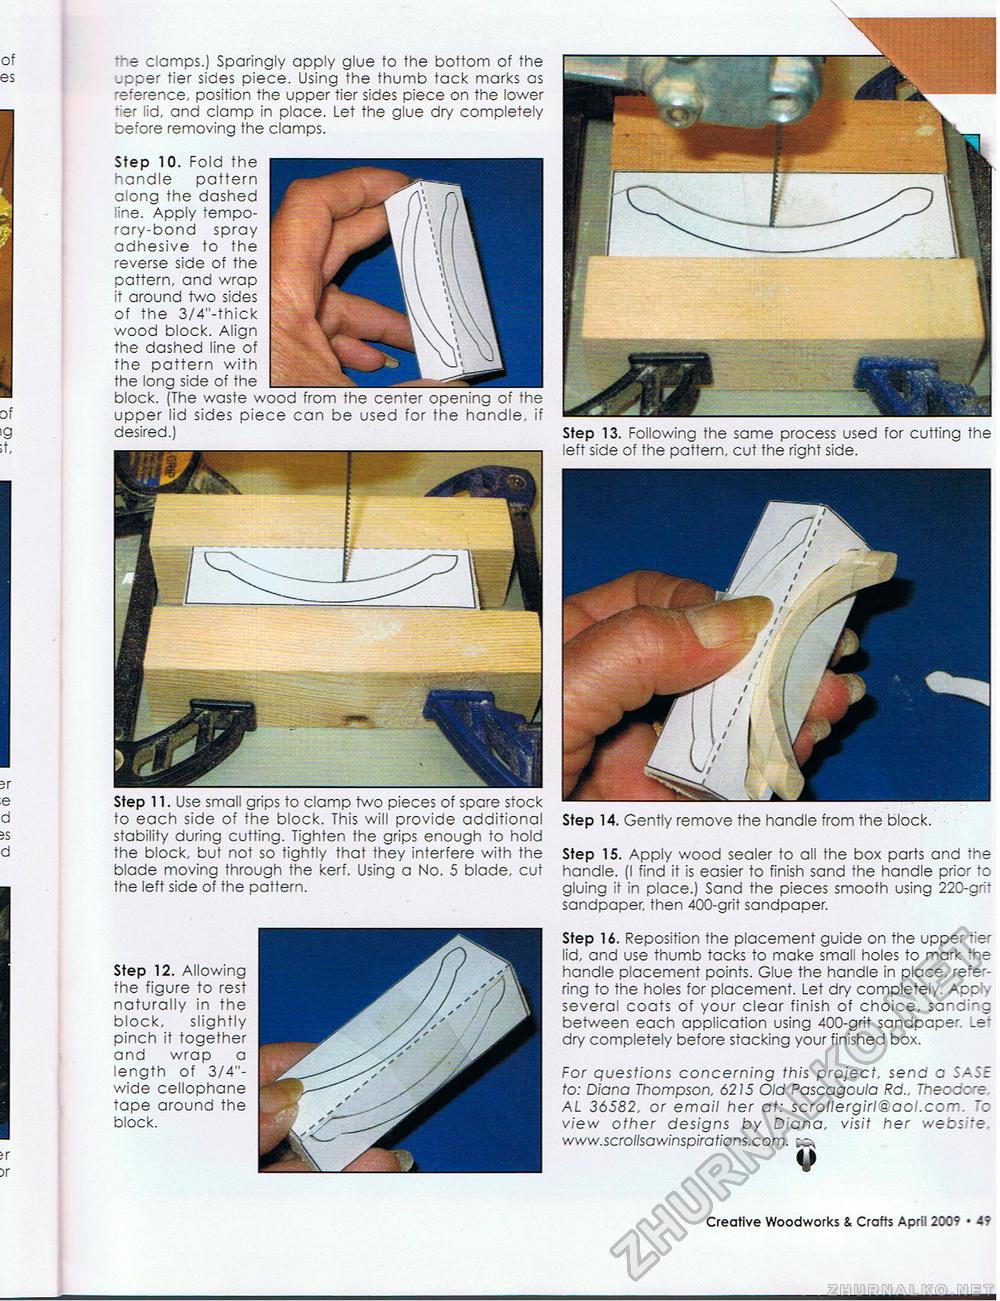
Step 13. Following the some process used for cutting the left side of the pattern, cut the right side. Step 15. Apply wood sealer to all the box parts and the handle. (I find it is easier to finish sand the handle prior to gluing it in place.) Sand the pieces smooth using 220-grit sandpaper, then 400-grit sandpaper. Step 16. Reposition the placement guide on the upper tier lid, and use thumb tacks to make small holes to mark the handle placement points. Glue the handle in place, rearing to the holes for placement. Let dry completely. Apply several coats of your clear finish of choice, sand ng between each application using 400-grit sandpaper. _e* dry completely before stacking your finished box. For questions concerning this project, send a SASE to: Diana Thompson, 6215 Old Pascagoula Rd„ Theodore AL 36582, or email her at: scrollergirl@aol.corr. To view other designs by Diana, visit her webs 'e www.scrollsawinspirations.com. -he clamps.) Sparingly apply glue to the bottom of the _oper tier sides piece. Using the thumb tack marks as reference, position the upper tier sides piece on the lower -er lid, and clamp in place. Let the glue dry completely before removing the clamps. Step 10. Fold the handle pattern along the dashed line. Apply temporary-bond spray adhesive to the reverse side of the pattern, and wrap it around two sides of the 3/4"-thick wood block. Align the dashed line of the pattern with the long side of the block. (The waste wood from the center opening of the upper lid sides piece can be used for the handle, if desired.) Step 11. Use small grips to clamp two pieces of spare stock to each side of the block. This will provide additional stability during cutting. Tighten the grips enough to hold the block, but not so tightly that they interfere with the blade moving through the kerf. Using a No. 5 blade, cut the left side of the pattern. Step 12. Allowing the figure to rest naturally in the block, slightly pinch it together and wrap a length of 3/4"-wide cellophane tape around the block. Step 14. Gently remove the handle from the block, Creative Woodworks & Crafts April 2009 • 11 |


