Creative Woodworks & crafts 2009-04, страница 40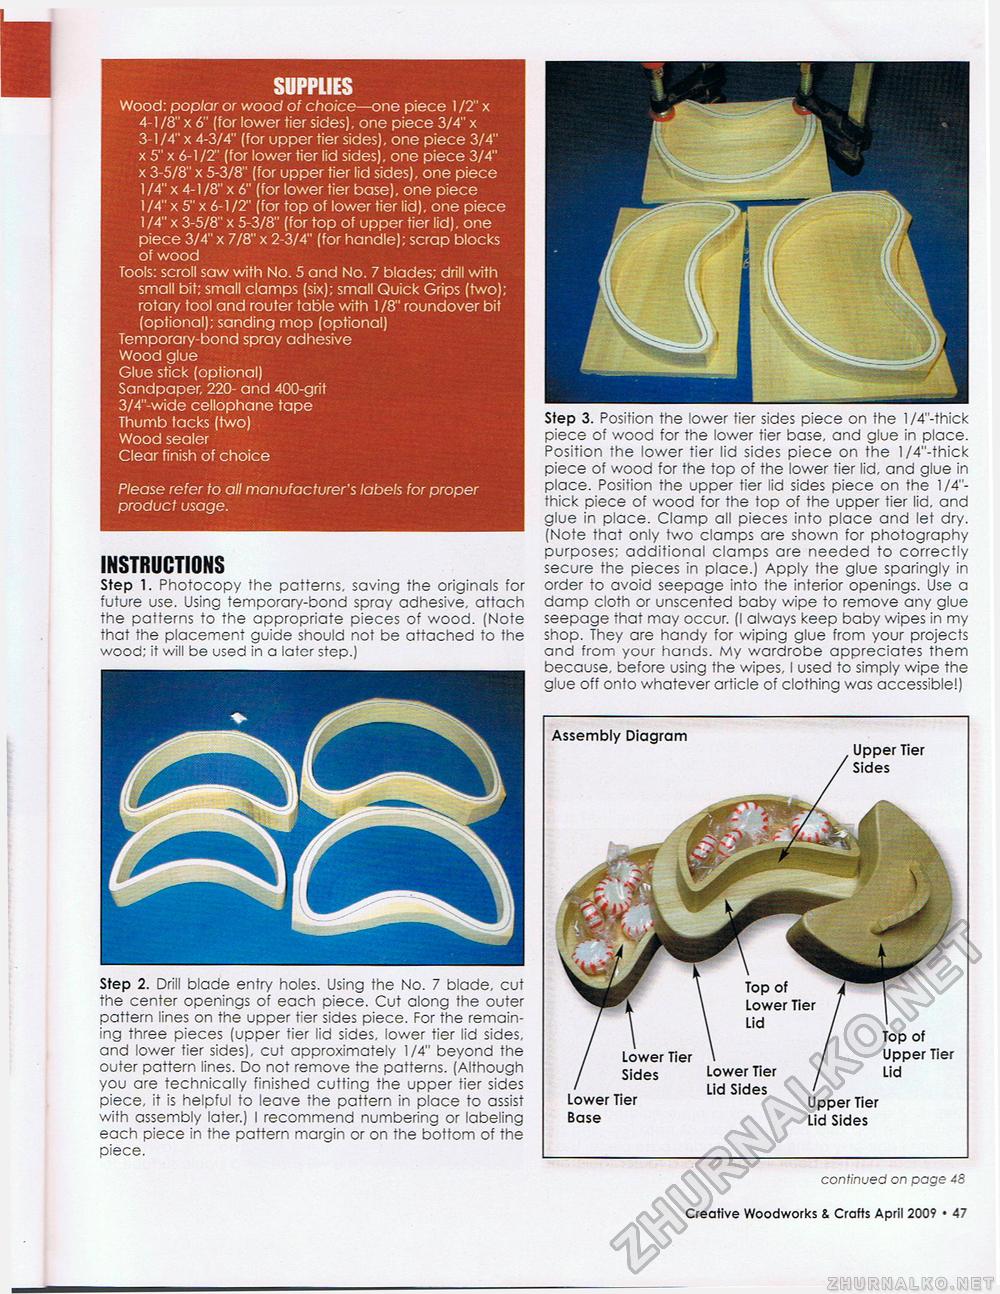
SUPPLIES Wood: poplar or wood of choice—one piece 1 /2" x 4-1/8" x 6" (for lower tier sides), one piece 3/4" x 3-1/4" x 4-3/4" (for upper tier sides), one piece 3/4" x 5" x 6-1/2" (for lower tier lid sides), one piece 3/4" x 3-5/8" x 5-3/8" (for upper tier lid sides), one piece 1 /4" x 4-1/8" x 6" (for lower tier base), one piece 1 /A" x 5" x 6-1 /2" (for top of lower tier lid), one piece 1 /A" x 3-5/8" x 5-3/8" (for top of upper tier lid), one piece 3/4" x 7/8" x 2-3/4" (for handle): scrap blocks of wood Tools: scroll saw with No. 5 and No. 7 blades; drill with small bit; small clamps (six); small Quick Grips (two); rotary tool and router table with 1 /8" roundover bit (optional); sanding mop (optional) Temporary-bond spray adhesive Wood glue Glue stick (optional) Sandpaper, 220- and 400-grit 3/4"-wide cellophane tape Thumb tacks (two) Wood sealer Clear finish of choice Please refer to all manufacturer's labels for proper product usage. Step 3. Position the lower tier sides piece on the l/4"-thick piece of wood for the lower tier base, and glue in place. Position the lower tier lid sides piece on the l/4"-thick piece of wood for the top of the lower tier lid, and glue in place. Position the upper tier lid sides piece on the 1/4"-thick piece of wood for the top of the upper tier lid, and glue in place. Clamp all pieces into place and let dry. (Note that only two clamps are shown for photography purposes; additional clamps are needed to correctly secure the pieces in place.) Apply the glue sparingly in order to avoid seepage into the interior openings. Use a damp cloth or unscented baby wipe to remove any glue seepage that may occur. (I always keep baby wipes in my shop. They are handy for wiping glue from your projects and from your hands. My wararobe appreciates them because, before using the wipes, I used to simply wipe the glue off onto whatever article of clothing was accessible!) INSTRUCTIONS Step 1. Photocopy the patterns, saving the originals for future use. Using temporary-bond spray adhesive, attach the patterns to the appropriate pieces of wood. (Note that the placement guide should not be attached to the wood; it will be used in a later step.) Step 2. Drill blade entry holes. Using the No. 7 blade, cut the center openings of each piece. Cut along the outer pattern lines on the upper tier sides piece. For the remaining three pieces (upper tier lid sides, lower tier lid sides, and lower tier sides), cut approximately 1/4" beyond the outer pattern lines. Do not remove the patterns. (Although you are technically finished cutting the upper tier sides piece, it is helpful to leave the pattern in place to assist with assembly later.) I recommend numbering or labeling each piece in the pattern margin or on the bottom of the piece. Assembly Diagram Upper Tier Sides Top of Upper Tier Lid Lower Tier Base Upper Tier Lid Sides continued on page 40 Creative Woodworks & Crafts April 2009 • 19 |


