Creative Woodworks & Crafts-050-1998-winter, страница 28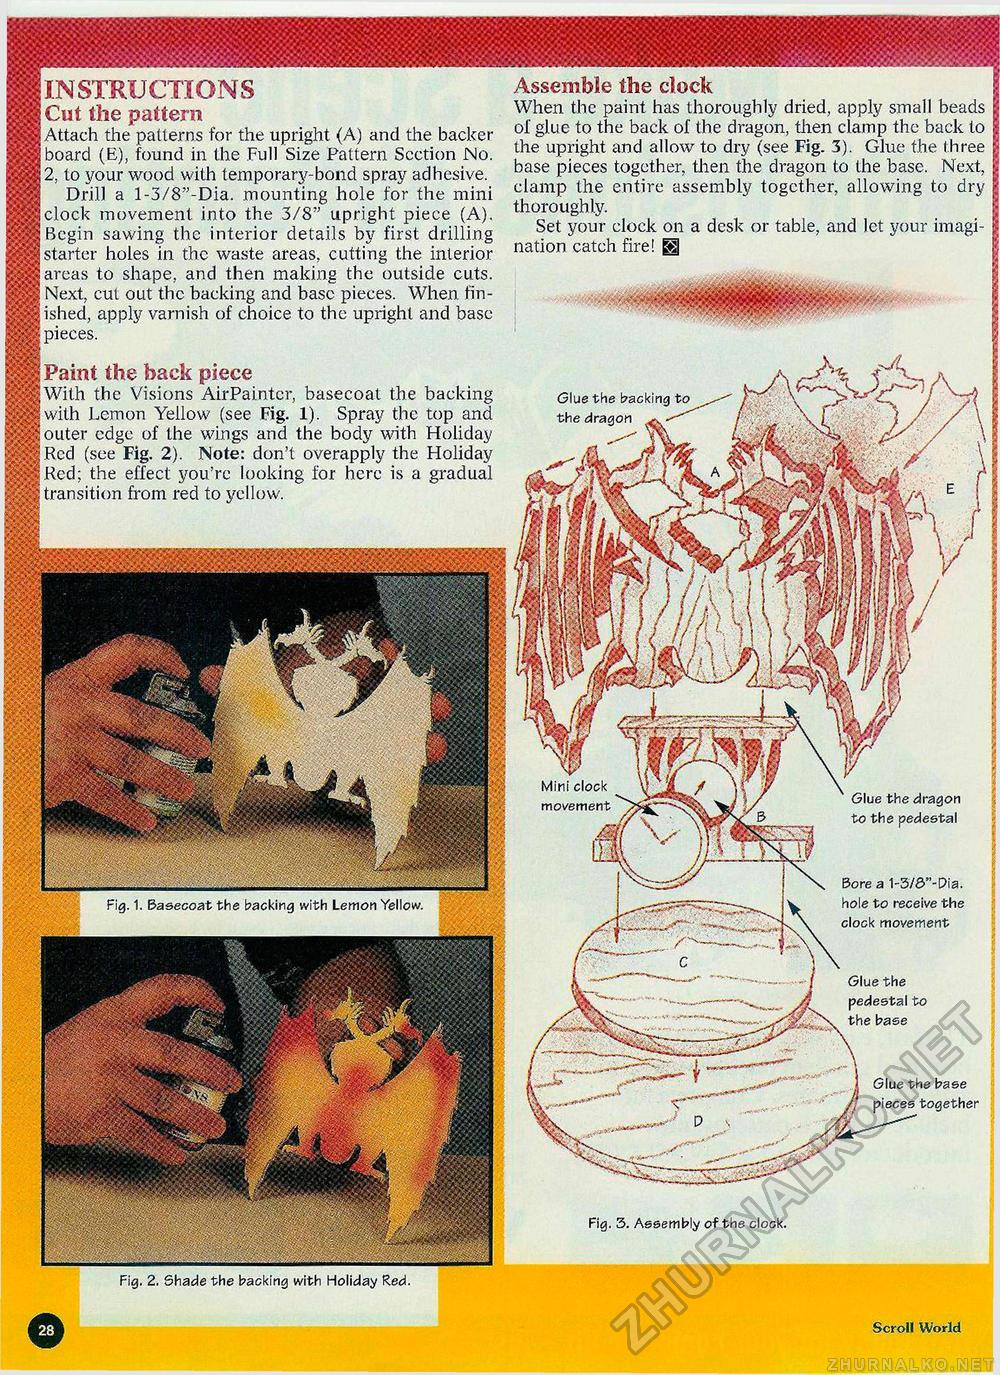
Assemble the clock When the paint has thoroughly dried, apply small beads oi glue to the back of the dragon, then clamp the back to the upright and allow to dry (see Fig. 3). Glue the three base pieces together, then the dragon to the base. Next, clamp the entire assembly together, allowing to dry thoroughly. Set your clock on a desk or table, and let your imagination catch fire! m Glue the backing to the dragon ■instructions IfflCut the pattern |§|j| Attach the patterns for the upright (A) and the backer llll board (E), found in the Full Size Pattern Scction No. i||| 2. to your wood with temporary-bond spray adhesive, mn Drill a l-3/8"-Dia. mounting hole for the mini ||Pclock movement into the 3/8" upright piece (A). SB Begin sawing the interior details by first drilling starter holes in the waste areas, cutting the interior llll areas to shape, and then making the outside cuts. |p| Next, cut out the backing and base pieces. When fin-j§ggished, apply varnish of choice to the upright and base lllll pieces. ?|jp Paint the back piece lljlllWith the Visions AirPaintcr, basecoat the backing with Lemon Yellow (see Fig. 1). Spray the top and |it§ outer edge of the wings and the body with Holiday JlJff Red (see Fig. 2). Note: don't overapply the Holiday Sh®Red; the effect you're looking for here is a gradual £<>vj transition from red to yellow. Mini clock movement Glue the dragon to the pedestal Bore a 1-3/3 -Dia. hole to receive the clock movement Fig. 1. Basecoat the backing with Lemon Yellow Glue the pedestal to the base , Glue the base Jj pieces together Fig. 3. Assembly of the clock. Fig, 2. Shade the backing with Holiday Red. Scroll World |


