Creative Woodworks & Crafts-050-1998-winter, страница 30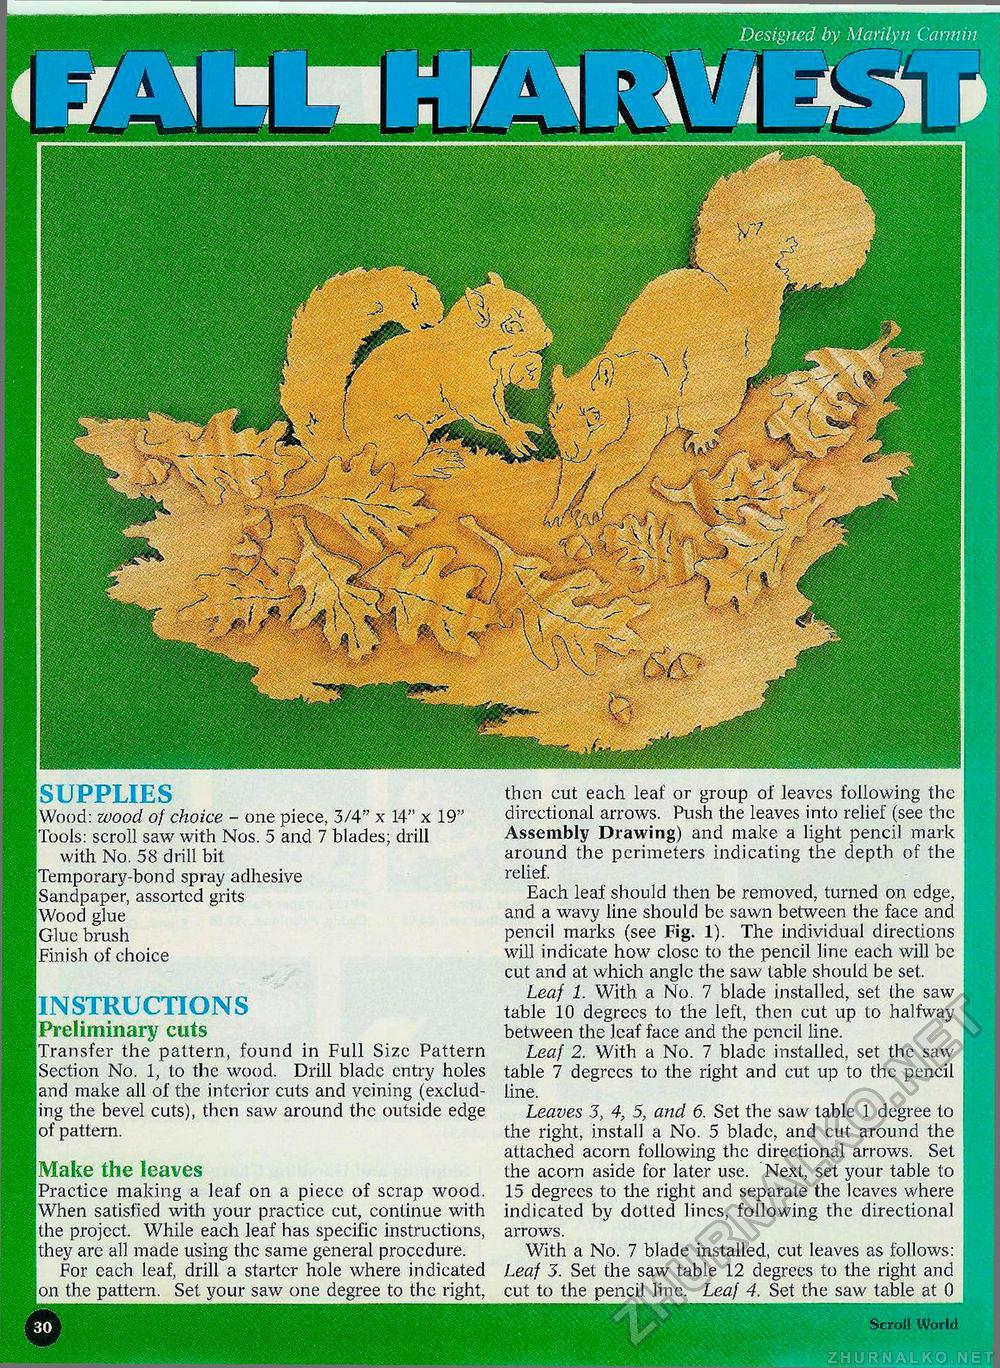
Designed by Marilyn Cam SUPPLIES Wood: wood of choice - one piece, 3/4" x 14" x 19: Tools: scroll saw with Nos. 5 and 7 blades; drill with No. 58 drill bit Temporary-bond spray adhesive | Sandpaper, assorted grits IWood glue Glue brush Finish of choice then cut each leaf or group of leaves following the directional arrows. Push the leaves into relief (see the Assembly Drawing) and make a light pencil mark around the perimeters indicating the depth of the relief. Each leaf should then be removed, turned on edge, and a wavy line should be sawn between the face and pencil marks (see Fig. 1). The individual directions will indicate how close to the pencil line each will be cut and at which angle the saw table should be set. Leaf 1. With a No. 7 blade installed, set the saw table 10 degrees to the left, then cut up to halfway between the leaf face and the pencil line. Leaf 2. With a No. 7 blade installed, set the saw table 7 degrees to the right and cut up to the pencil line. Leaves 3, 4, 5, and 6. Set the saw table 1 degree to the right, install a No. 5 blade, and cut around the attached acorn following the directional arrows. Set the acorn aside for later use. Next, set your table to 15 degrees to the right and separate the leaves where indicated by dotted lines, following the directional arrows. With a No. 7 blade installed, cut leaves as follows: Leaf 3. Set the saw table 12 degrees to the right and cut to the pencil line. Leaf 4. Set the saw table at 0 INSTRUCTIONS Preliminary cuts Transfer the pattern, found in Full Size Pattern [Section No. 1, to the wood. Drill blade entry holes and make all of the interior cuts and veining (excluding the bevel cuts), then saw around the outside edge of pattern. Make the leaves [Practice making a leaf on a piece of scrap wood. When satisfied with your practice cut, continue with the project. While each leaf has specific instructions, they arc all made using the same general procedure. For each leaf, drill a starter hole where indicated on the pattern. Set your saw one degree to the right, |


