Creative Woodworks & Crafts-050-1998-winter, страница 40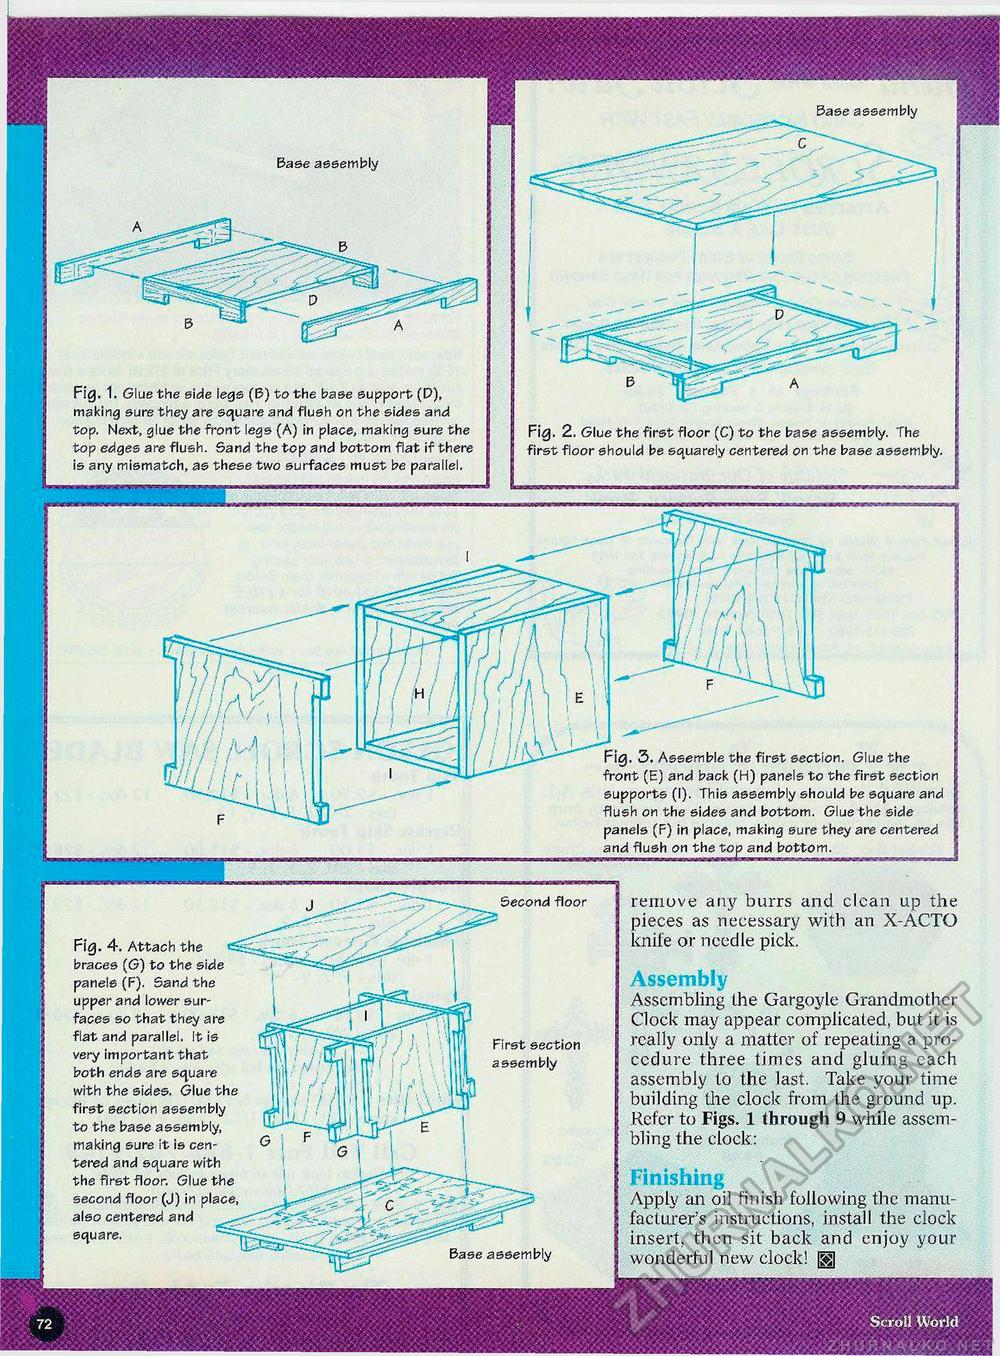
Base assembly Base assembly Fig. 1. Glue the side legs (B) to the base support (P), making sure they are square and flush on the sides and top. Next, glue the front legs (A) in place, making sure the top edges are flush. Sand the top and bottom flat if there is any mismatch, as these two surfaces must be parallel. Fig. 2, Glue the first floor (C) to the base assembly. The first floor should be squarely centered on the base assembly. Fig. 3. Assemble the first section. Glue the front (E) and back (H) panels to the first section supports (I). This assembly should be square and flush on the sides and bottom. Glue the side panels (F) in place, making sure they are centered and flush on the top and bottom. remove any burrs and clcan up the pieces as necessary with an X-ACTO knife or needle pick. Assembly Assembling the Gargoyle Grandmother Clock may appear complicated, but it is really only a matter of repeating a procedure three times and gluing each assembly to the last. Take your time building the clock from the ground up. Refer to Figs. 1 through 9 while assembling the clock: Finishing Apply an oil finish following the manufacturers instructions, install the clock insert, then sit back and enjoy your wonderful new clock! H Second floor Fig. 4. Attach the tS braces (G) to the side panels (F). Sand the upper and lower surfaces so that they are fiat and parallel, It is very important that both ends are square with the sides. Glue the first section assembly to the base assembly, making sure it is centered and square with the first floor. Glue the second floor (J) in place, also centered and square. First section assembly Base assembly |


