Creative Woodworks & Crafts-050-1998-winter, страница 41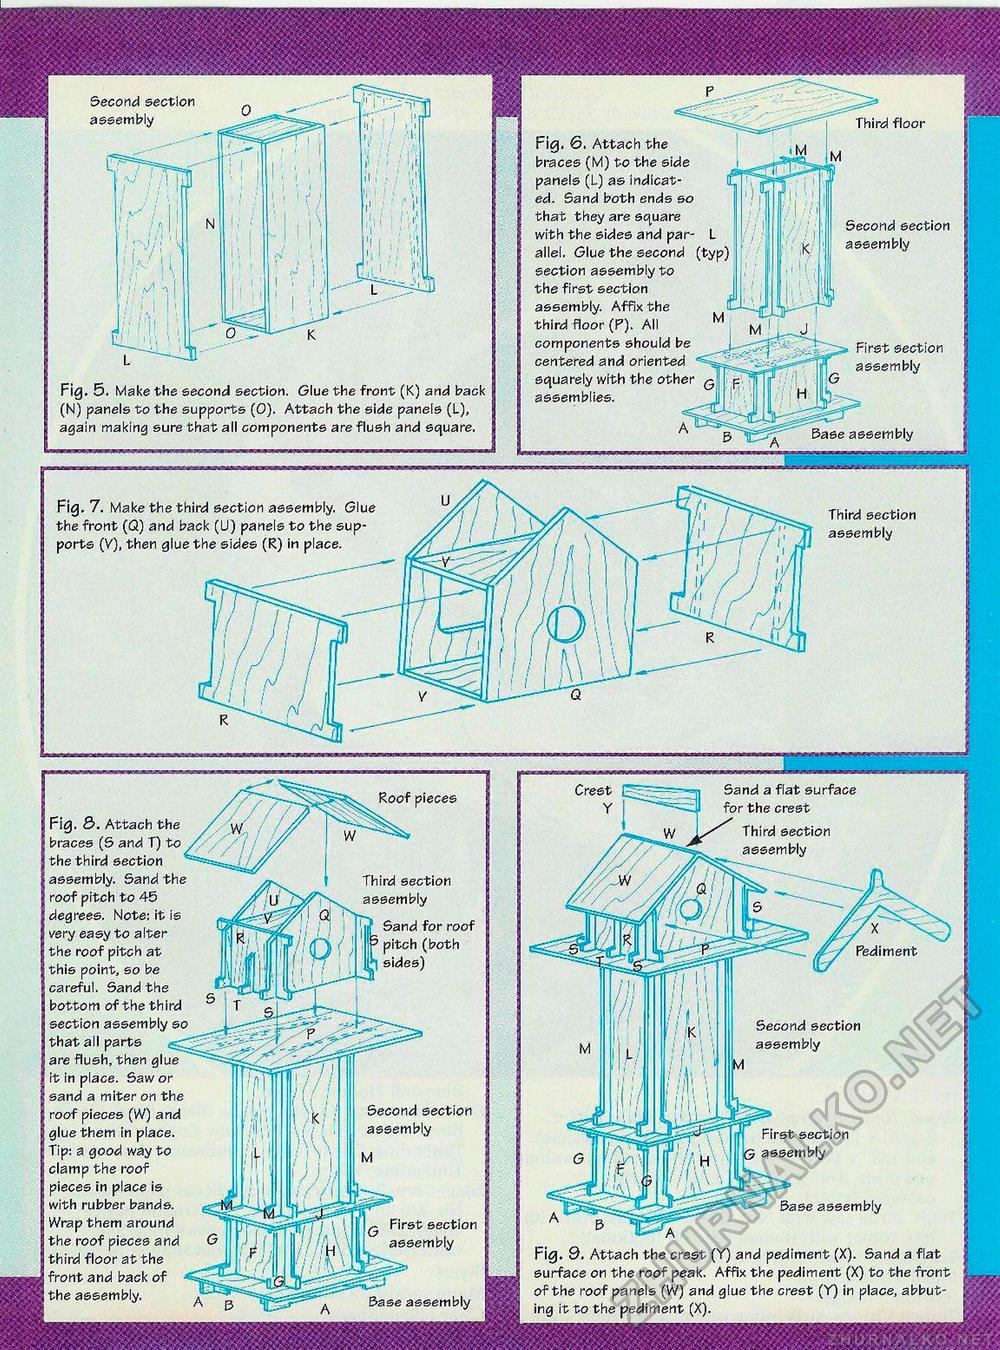
Roof pieces Fig. 3. Attach the braces (S and T) to , the third section assembly. Sand the roof pitch to 45 degrees. Note: it is very easy to alter the roof pitch at this point, so be careful. Sand the bottom of the third section assembly so that all parts . • are flush, then glue it in place. Saw or sand a miter on the roof pieces (W) and glue them in place. Tip: a good way to clamp the roof pieces in place is with rubber bands. Wrap them around the roof pieces and third floor at the front and back of the assembly. Third section assembly Second section assembly First section assembly Base assembly Second section assembly Second section assembly Third section assembly Fig. 5. Make the second section. Glue the front (K) and back (N) panels to the supports (0). Attach the side panels (L), again making sure that all components are flush and square. Fig. 7. Make the third section assembly. Glue the front (Q) and back (U) panels to the supports (V), then glue the sides (R) in place. Fig. 6. Attach the braces (M) to the side panels (L) as indicated. Sand both ends so that they are square with the sides and par- L allel, Glue the second (typ) section assembly to the first section assembly. Affix the third floor (P). All components should be centered and oriented squarely with the other assemblies. First section assembly Base assembly Crest Sand a flat surface for the crest Third section assembly Pediment Second section assembly First section G assembly Base assembly Fig. 9. Attach the crest (V) and pediment (X). Sand a flat surface on the roof peak. Affix the pediment (X) to the front l^m of the roof panels (W) and glue the crest (Y) in place, abbut- Hiss ing it to the pediment (X). |


