Creative Woodworks & Crafts-059-1998-Fall, страница 19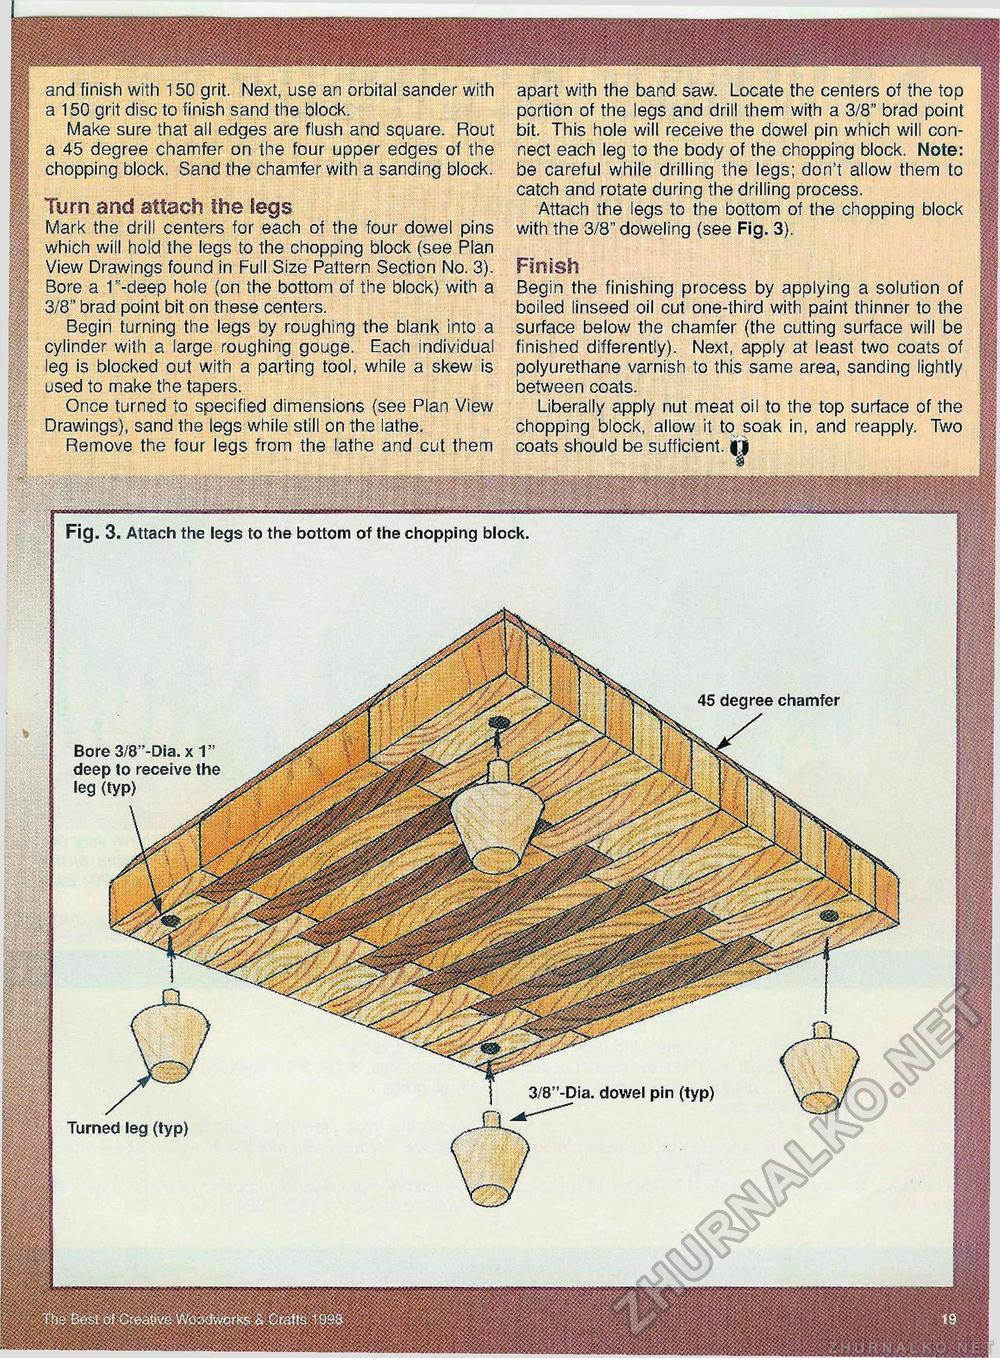
and finish with 150 grit. Next, use an orbital sander with a 150 grit disc to finish sand the block. Make sure that all edges are flush and square. Rout a 45 degree chamfer on the four upper edges of the chopping block. Sand the chamfer with a sanding block. Turn and attach the iegs Mark the drill centers for each of the four dowel pins which will hold the legs to the chopping block (see Plan View Drawings found in Full Size Pattern Section No. 3). Bore a 1"-deep hole (on the bottom of the block) with a 3/8" brad point bit on these centers. Begin turning the legs by roughing the blank into a cylinder with a large roughing gouge. Each individual leg is blocked out with a parting tool, while a skew is used to make the tapers. Once turned to specified dimensions (see Plan View Drawings), sand the legs while still on the lathe. Remove the four legs from the lathe and cut them apart with the band saw. Locate the centers of the top # portion of the legs and drill them with a 3/8" brad point p bit. This hole will receive the dowel pin which will connect each leg to the body of the chopping block. Note: §| be careful while drilling the legs; don't allow them to catch and rotate during the drilling process. Attach the legs to the bottom of the chopping block §| with the 3/8" doweling (see Fig. 3). Finish Begin the finishing process by applying a solution of boiled linseed oil cut one-third with paint thinner to the p surface below the chamfer (the cutting surface will be p; finished differently). Next, apply at least two coats of mi polyurethane varnish to this same area, sanding lightly |f between coats. Liberally apply nut meat oil to the top surface of the -chopping block, allow it to soak in, and reapply. Two f§ coats should be sufficient. mmmmmmm Fig. 3. Attach the legs to the bottom of the chopping block, 45 degree chamfer 3/8"-Dia. dowel pin (typ) Turned leg (typ) |


