Creative Woodworks & Crafts-059-1998-Fall, страница 30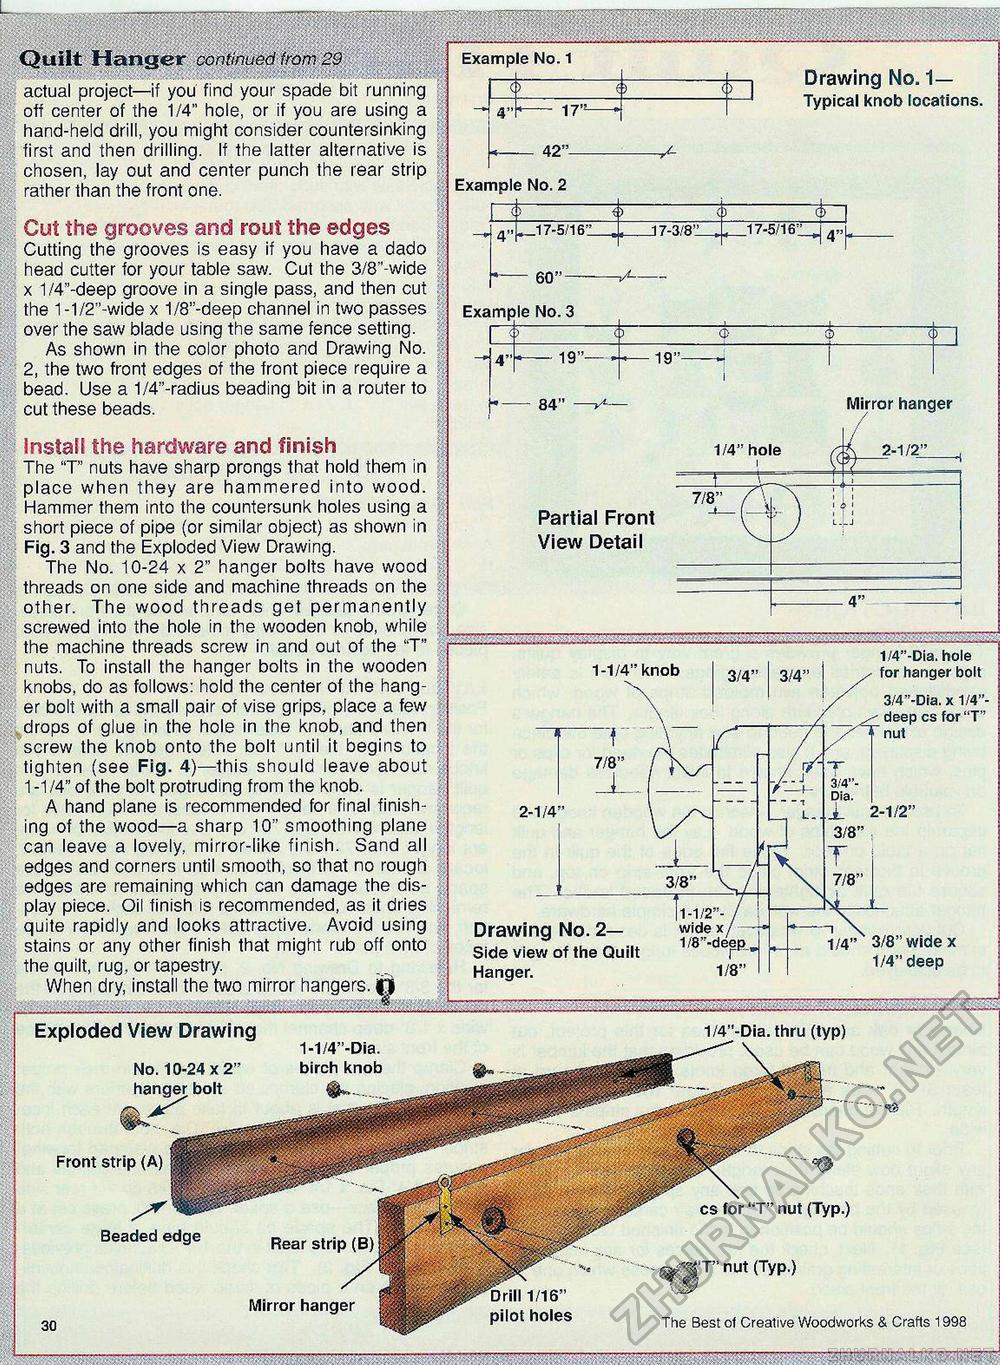
. ........ Quilt Hanger ...... ..... :•". : actual project—if you find your spade bit running off center of the 1/4" hole, or if you are using a hand-held drill, you might consider countersinking first and then drilling. If the latter alternative is chosen, lay out and center punch the rear strip rather than the front one. Cut the grooves and rout the edges Cutting the grooves is easy if you have a dado head cutter for your table saw. Cut the 3/8"-wide x 1/4"-deep groove in a single pass, and then cut the 1-1/2"-wide x 1/8"-deep channel in two passes over the saw blade using the same fence setting. As shown in the color photo and Drawing No. 2, the two front edges of the front piece require a bead. Use a 1/4"-radius beading bit in a router to cut these beads. Install the hardware and finish The "T" nuts have sharp prongs that hold them in place when they are hammered into wood. Hammer them into the countersunk holes using a short piece of pipe (or similar object) as shown in Fig. 3 and the Exploded View Drawing. The No. 10-24 x 2" hanger bolts have wood threads on one side and machine threads on the other. The wood threads get permanently screwed into the hole in the wooden knob, while the machine threads screw in and out of the "T" nuts. To install the hanger bolts in the wooden knobs, do as follows: hold the center of the hanger bolt with a small pair of vise grips, place a few drops of glue in the hole in the knob, and then screw the knob onto the bolt until it begins to tighten (see Fig. 4)—this should leave about 1 -1/4" of the bolt protruding from the knob. A hand plane is recommended for final finishing of the wood—a sharp 10" smoothing plane can leave a lovely, mirror-like finish. Sand all edges and corners until smooth, so that no rough edges are remaining which can damage the display piece. Oil finish is recommended, as it dries quite rapidly and looks attractive. Avoid using stains or any other finish that might rub off onto the quilt, rug, or tapestry. When dry, install the two mirror hangers, jp „.________.............................................................*........ Drawing No. 1— Typical knob locations. 42" Example No. 2 fc- 3= .17-5/161 .J 7-3/8'i. ir _17-5/1r 60" Example No. 3 1) 19" 19" Mirror hanger Partial Front View Detail Mirror hanger
1-1/4" knob 1/4"-Dia. hole for hanger bolt 3/4"-Dia, x 1/4"- 2-1/4 Drawing No. 2— Side view of the Quilt Hanger. 1/4"-Dia. hole for hanger bolt 3/4"-Dia, x 1/4"-
: Exploded View Drawing No. 10-24x2" hanger bolt 1-1/4"-Dia. birch knob 1/4"-Dia. thru (typ) Front strip (A) 30 Beaded edge Rear strip (B) Mirror hanger ill 1/16" pilot holes cs for "T" nut (Typ.) -^||"r'nut (Typ.) The Best of Creative Woodworks & Crafts 1998 |
||||||||||||||||||||||||||||||||||||


