Creative Woodworks & Crafts-059-1998-Fall, страница 75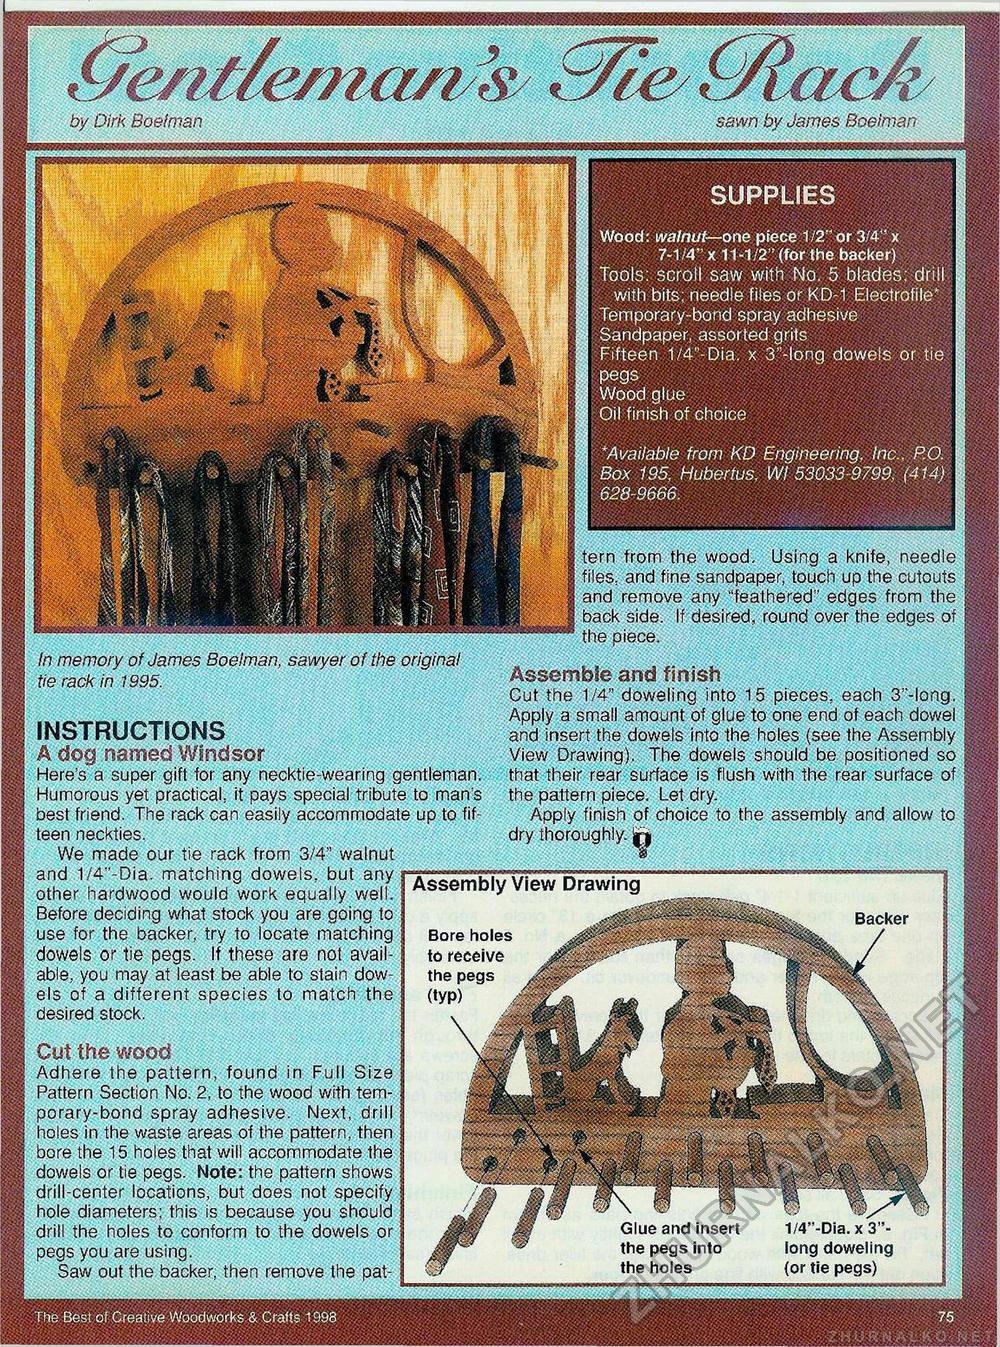
SUPPLIES Wood: walnut—one piece 1/2" or 3/4" x 7-1/4" x 11-1/2" (for the backer) Tools: scroll saw with No. 5 blades: drill with bits: needle files or KD-1 Electrofile* Temporary-bond spray adhesive Sandpaper, assorted grits Fifteen 1/4"-Dia. x 3"-long dowels or tie pegs Wood glue Oil finish of choice * Available from KD Engineering, Inc., P.O. Box 195. Hubertus, Wl 53033-9799. (414) 628-9666. by Dirk Boelman sawn by James Boelman E/vf ( tern from the wood. Using a knife, needle files, and fine sandpaper, touch up the cutouts By, and remove any "feathered" edges from the |§ backside. If desired, round over the edges of the piece. Assemble and finishCut the 1/4" doweling into 15 pieces, each 3;'-long. vmwt-mMXm Apply a small amount of glue to one end of each dowel INSTRUCTIONS and insert the dowels into the holes (see the Assembly A dog named Windsor view Drawing). The dowels should be positioned so Here's a super gift for any necktie-wearing gentleman, that their rear surface is flush with the rear surface of Humorous yet practical, it pays special tribute to man s the pattern piece. Let dry. best friend. The rack can easily accommodate up to fif- Apply finish of choice to the assembly and allow to teen neckties. dry thoroughly. |j We made our tie rack from 3/4" walnut and 1/4"-Dia. matching dowels, but any other hardwood would work equally well. Before deciding what stock you are going to use for the backer, try to locate matching Bore holes dowels or tie pegs. If these are not avail- to receive able, you may at least be able to stain dow- the pegs , els of a different species to match the (typ) M desired stock. . ^pS \ /iSp Cut the wood j \Mf|Adhere the pattern, found in Full Size Vf . Pattern Section No. 2, to the wood with tem- j ;M«JL*Jj porary-bond spray adhesive. Next, drill I holes in the waste areas of the pattern, then j bore the 15 holes that will accommodate the P^^tt dowels or tie pegs. Note: the pattern shows ' drill-center locations, but does not specify /m j hole diameters; this is because you should jiw J drill the holes to conform to the dowels or \ MM 0 pegs you are using. mr Saw out the backer, then remove the pat- In memory of James Boelman, sawyer of the original tie rack in 1995. Assembly View Drawing Backer pT 'I 1/4"-Dia. x 3"-long doweling (or tie pegs) Glue and insert the pegs into the holes |


