Creative Woodworks & Crafts-059-1998-Fall, страница 76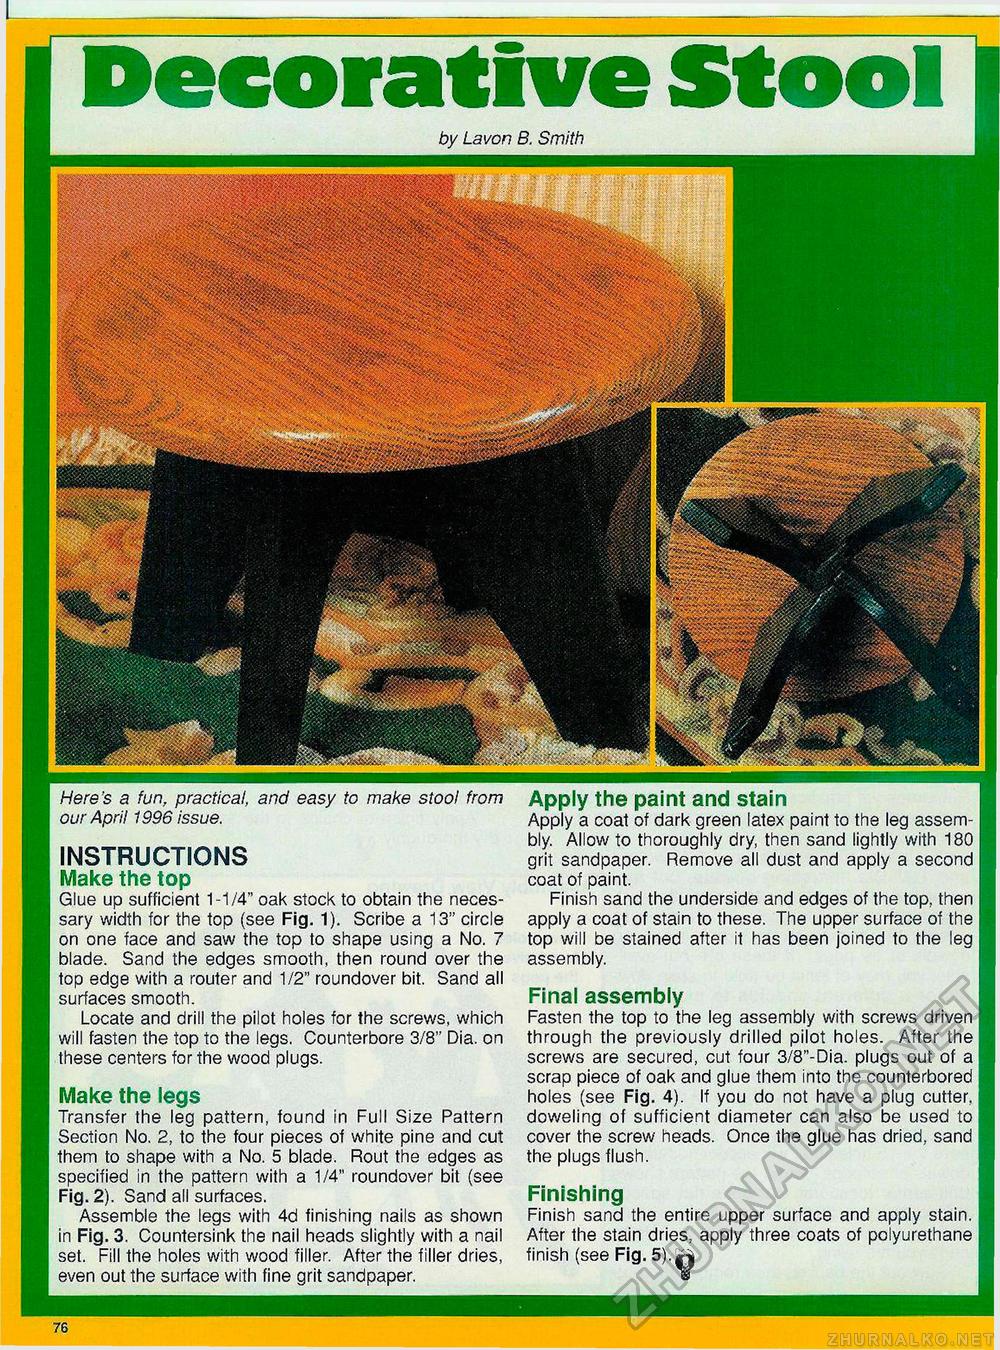
Decorative Stool Here's a fun, practical, and easy to make stool from our April 1996 issue. INSTRUCTIONS Make the topGlue up sufficient 1-1/4" oak stock to obtain the necessary width for the top (see Fig. 1). Scribe a 13" circle on one face and saw the top to shape using a No. 7 blade. Sand the edges smooth, then round over the top edge with a router and 1/2" roundover bit. Sand all surfaces smooth. Locate and drill the pilot holes for the screws, which will fasten the top to the legs. Counterbore 3/8" Dia. on these centers for the wood plugs. Make the legsTransfer the leg pattern, found in Full Size Pattern Section No. 2, to the four pieces of white pine and cut them to shape with a No. 5 blade. Rout the edges as specified in the pattern with a 1/4" roundover bit (see Fig. 2). Sand all surfaces. Assemble the legs with 4d finishing nails as shown in Fig. 3. Countersink the nail heads slightly with a nail set. Fill the holes with wood filler. After the filler dries, even out the surface with fine grit sandpaper. Apply the paint and stainApply a coat of dark green latex paint to the leg assembly. Allow to thoroughly dry, then sand lightly with 180 grit sandpaper. Remove all dust and apply a second coat of paint. Finish sand the underside and edges of the top, then apply a coat of stain to these. The upper surface of the top will be stained after it has been joined to the leg assembly. Final assemblyFasten the top to the leg assembly with screws driven through the previously drilled pilot holes. After the screws are secured, cut four 3/8"-Dia. plugs out of a scrap piece of oak and glue them into the counterbored holes (see Fig. 4). If you do not have a plug cutter, doweling of sufficient diameter can also be used to cover the screw heads. Once the glue has dried, sand the plugs flush. FinishingFinish sand the entire upper surface and apply stain. After the stain dries, apply three coats of polyurethane finish (see Fig. 5).^ 76 |


