Creative Woodworks & Crafts-059-1998-Fall, страница 77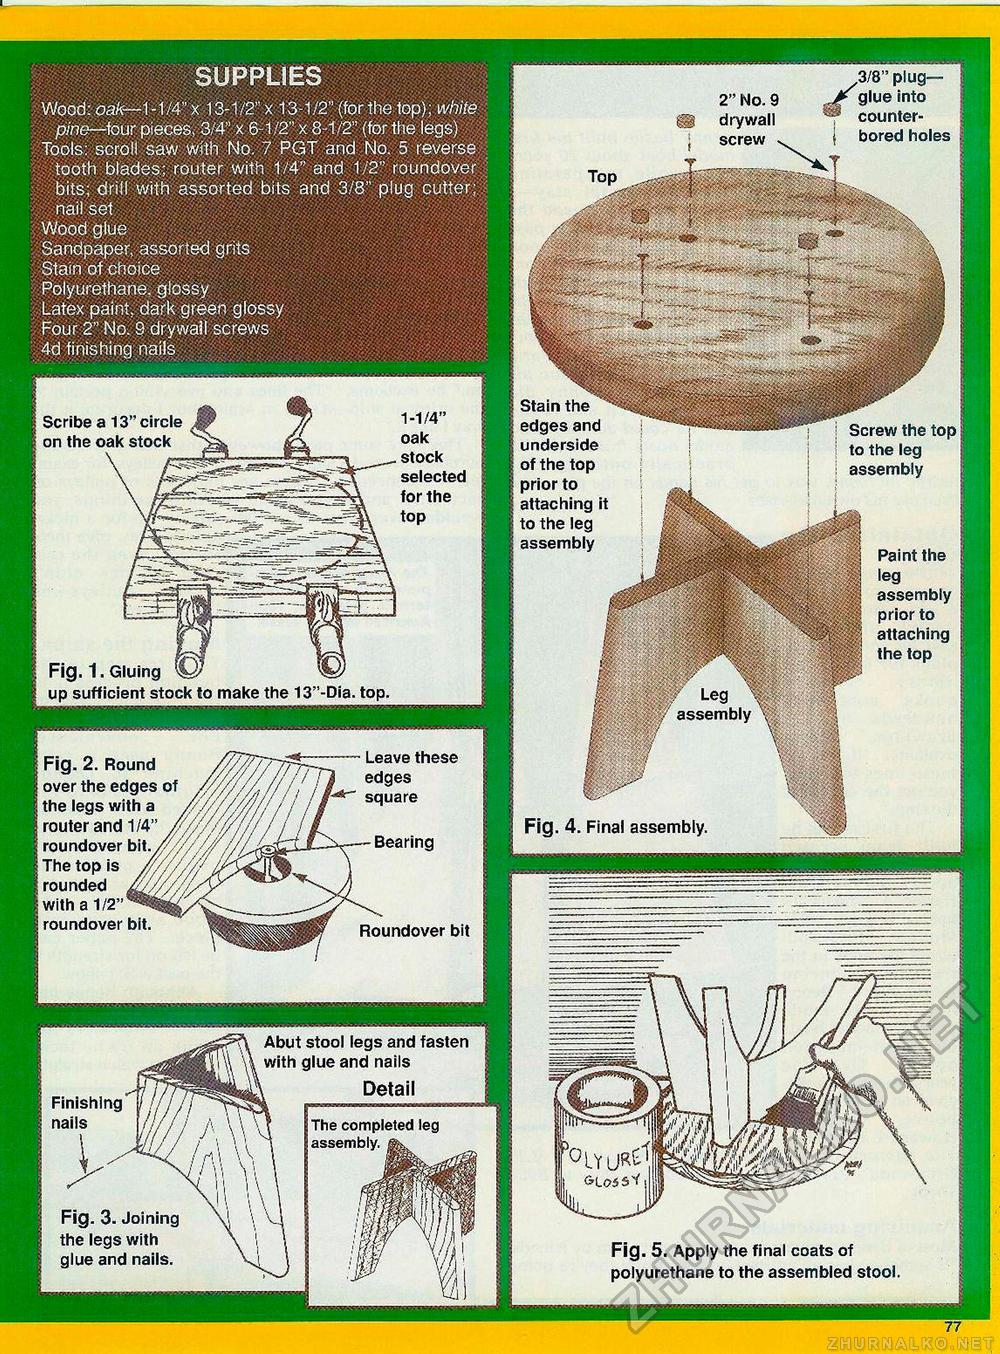
SUPPLIES Wood: oak—1-1/4" x 13-1/2" x 13-1/2" (for the top); white pine—four pieces, 3/4" x 6-1/2" x 8-1/2" (for the legs) Tools: scroll saw with No. 7 PGT and No. 5 reverse tooth blades; router with 1/4" and 1/2" roundover bits; drill with assorted bits and 3/8" plug cutter; nail set Wood glue Sandpaper, assorted grits Stain of choice Polyurethane, glossy Latex paint, dark green glossy Four 2" No. 9 drywail screws 4d finishing nails 2" No. 9 dry wall screw 3/8" plug— y glue into 'S® rm inter- counter-bored holes Scribe a 13" circle on the oak Fig. 1. Gluing up sufficient stock to make the 13"-Dia. top. 1-1/4 stock selected for the Fig. 2. Round | over the edges of | the legs with a j router and iroundover I The top is ! rounded s with a 1/2" I roundover bit Leave these edges square Bearing Roundover bit the Stain edges and underside of the top prior to attaching it to the leg assembly Screw the top jj to the leg assembly Paint the leg assembly prior to attaching the top Fig. 4. Final assembly, Fig. 5. Apply the final coats of polyurethane to the assembled stool. Finishing nails Fig. 3. Joining the legs with glue and nails. Abut stool legs and fasten with glue and nails Detail The completed leg assembly. 77 |


