Creative Woodworks & crafts-103-2004-Holiday, страница 10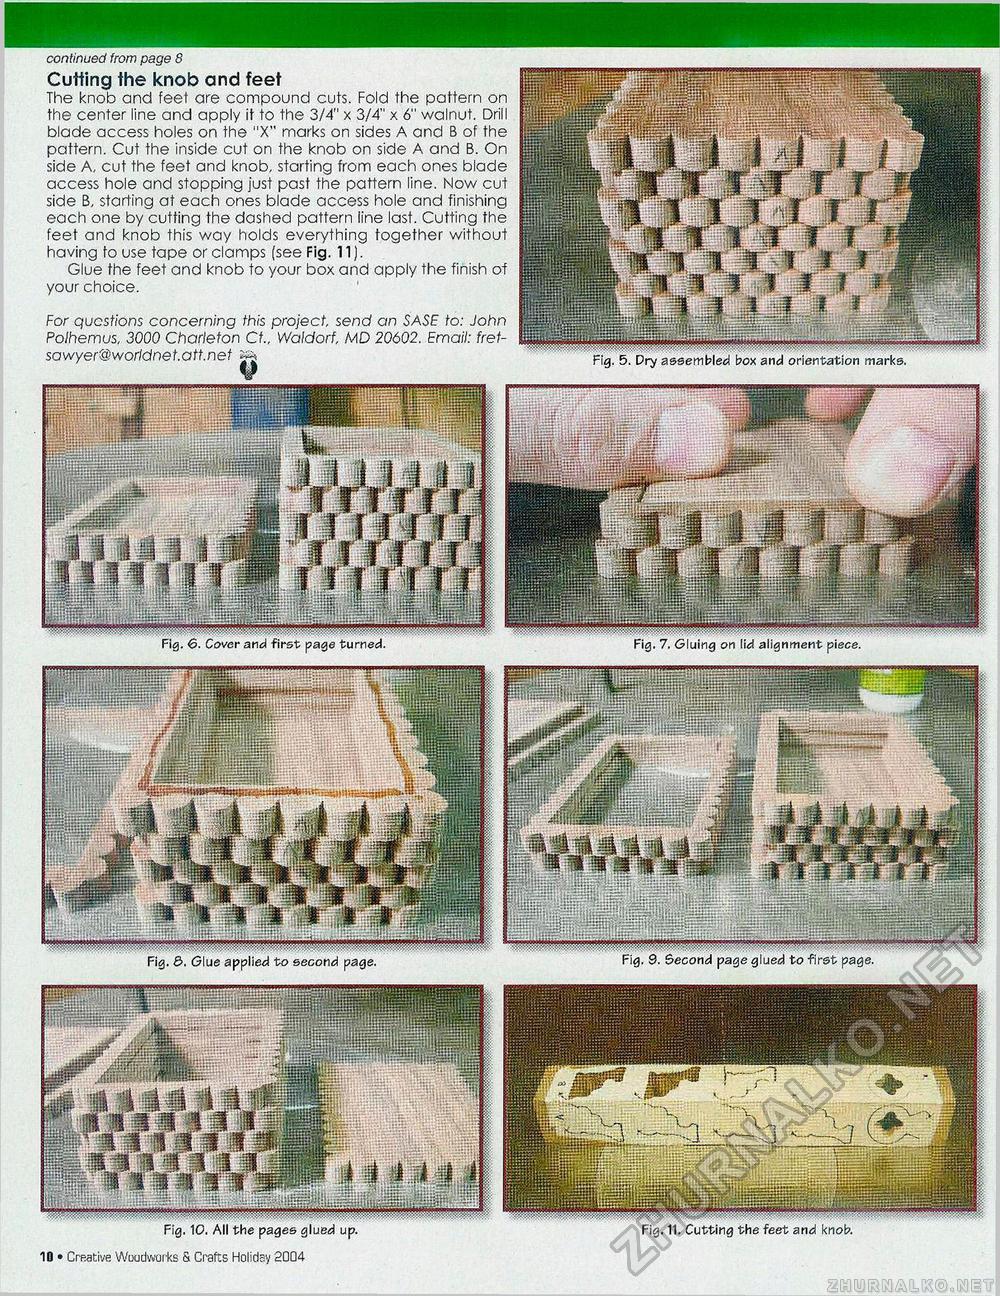
continued from page 8 Cutting the knob and feet The knob and feet are compound cuts. Fold the pattern on the center line and apply it to the 3/4" x 3/4" x 6" walnut. Drill blade access holes on the "X" marks on sides A and B of the pattern. Cut the inside cut on the knob on side A and B. On side A, cut the feet and knob, starting from each ones blade access hole and stopping just past the pattern line. Now cut side B, starting at each ones blade access hole and finishing each one by cutting the dashed pattern line last. Cutting the feet and knob this way holds everything together without having to use tape or clamps (see Fig. 11). Glue the feet and knob to your box and apply the finish of your choice. For questions concerning this project, send an SASE to: John Polhemus, 3000 Charleton Ct„ Waldorf, MD 20602. Email: fref-sawyer@worldnet.att.net ^ Fig. 5. Dry assembled box and orientation marks. Fig. €>■ Cover and first page turned. 11111 Fig. 7. Gluing on lid alignment piece. ...|l,llll<llll.-[l[______i.!.,ll..J)UIII»|Hg iitei'isiNiS 1111 ^^MliMIt..... _afegygn-h " , _ m^Jlliir si M Fig. &. Glue applied to second page. Fig. 9. Second page glued to first page. Mlfe' l|[j||g fsSH -a ninijEEf slfi m | J m ww J^^H I Fig. 10. All the pages glued up. Creative Woodworks & Craft:; Holiday 2004 • 15 Fig. 11. Cutting the feet and knob. |


