Creative Woodworks & crafts-111-2005-Holiday, страница 14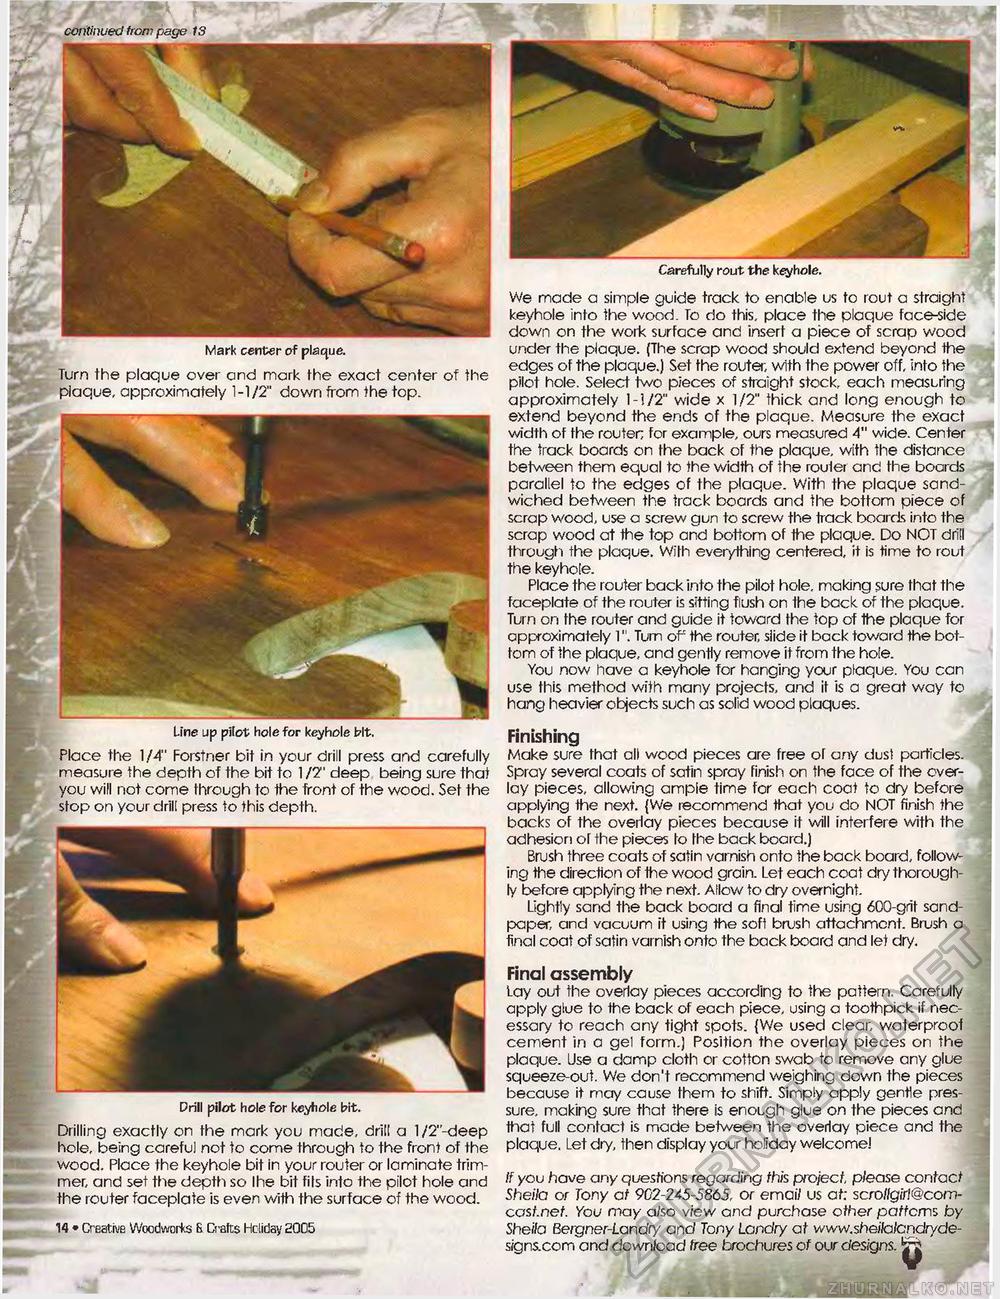
continued from page IS Carefully rout the keyhole. Mark center of plaque. Turn the plaque over and mark the exact center of the plaque, approximately 1-1/2" down from the top. We made a simple guide track to enable us to rout a straight keyhole into the wood. To do this, place the plaque face-side down on the work surface and insert a piece of scrap wood under the plaque. (The scrap wood should extend beyond the edges of the plaque.) Set the router, with the power off, into the pilot hole. Select two pieces of straight stock, each measuring approximately 1-1/2" wide x 1/2" thick and long enough to extend beyond the ends of the plaque. Measure the exact width of the router; for example, ours measured 4" wide. Center the track boards on the back of the plaque, with the distance between them equal to the width of the rouler and the boards parallel to the edges of the plaque. With the plaque sandwiched between the track boards and the bottom piece of scrap wood, use a screw gun to screw the track boards into the scrap wood at the top and bottom of the plaque. Do NOT drill through the plaque. With everything centered, it is time to rout the keyhole. Place the router back into the pilot hole, making sure that the faceplate of the router is sitting flush on the back of the plaque. Turn on the router and guide it toward the top of 1he plaque for approximately 1". Turn of the router, slide it back toward the bottom of the plaque, and gently remove it from the hole. You now have a keyhole for hanging your plaque. You can use this method with many projects, and it is a great way to hang heavier objects such as solid wood plaques. Line up pilot hole for keyhole bit. Place the 1 /4" Forstner bit in your drill press and carefully measure the depth of the bit to 1 /2" deep being sure that you will not come through to the front of the wood. Set the stop on your drill press to this depth. Finishing Make sure that all wood pieces are free of any dust particles. Spray several coats of satin spray finish on the face of the overlay pieces, allowing ample time for each coat to dry before applying the next. (We recommend that you do NOT finish the backs of the overlay pieces because it will interfere with the adhesion ol the pieces lo the back board.) Brush three coats of satin varnish onto the back board, following the direction of the wood grain. Let each coat dry thoroughly before applying the next. Allow to dry overnight. Lightly sand the back board a final time using 600-grit sandpaper, and vacuum it using the soft brush attachment. Brush a final coat of satin varnish onto the back board and let dry. Drill pilot hole for keyhole bit. Drilling exactly on the mark you made, drill a l/2"-deep hole, being careful not to come through to the front of the wood. Place the keyhole bit in your router or laminate trimmer, and set the depth so I he bit fils into the pilot hole and the router faceplate is even with the surface of the wood. i flfl • Creative Woodworks & Crafts Holiday S005 Final assembly Lay out the overlay pieces according to the pattern. Carefully apply glue to the back of each piece, using a toothpick if necessary to reach any tight spots. {We used clear, waterproof cement in a gel form.) Position the overlay pieces on the plaque. Use a damp cloth or cotton swab to remove any glue squeeze-out. We don't recommend weighing down the pieces because it may cause them to shift. Simply apply gentle pressure, making sure that there is enoLgh glue on the pieces and that full contact is made between the overlay piece and the plaque. Let dry, then display your holiday welcome! If you have any questions regarding this project, please contact Sheila or Tony of 902-245 5865, or emai/ us at: scro//girl@com-cast.net. You may a/so view and purchase other patterns by Sheila Bergner-Londry and Tony Landry at www.sheilalcndryde-signs.com and dowri/oad tree brochures of our designs, (jrij |


