Creative Woodworks & crafts-111-2005-Holiday, страница 11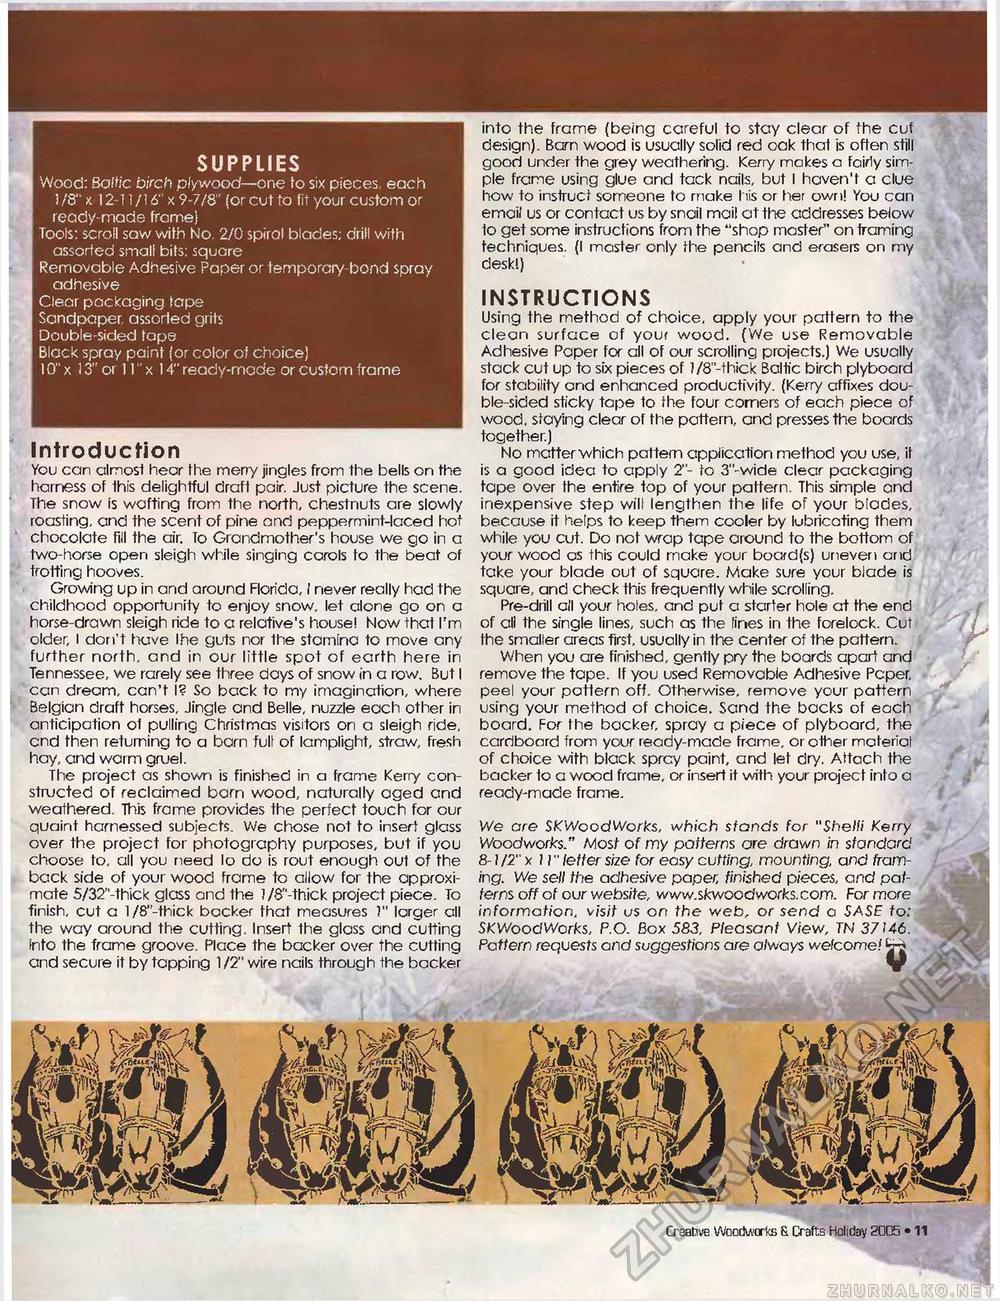
SUPPLIES Wood: Baltic birch plywood—one to six pieces, each !/8" x 12-11/16" x 9-7/8" (or cut to fit your custom or ready-made frame) Toots: scroll saw with No. 2/0 spiral blades; drill with assorted small bits: square Removable Adhesive Paper or temporary bond spray adhesive Clear packaging tape Sandpaper, assorted grits Double-sided tape Black spray paint (or color of choice) 10" x 13" or 11" x 14" ready-mode or custom frame Introduction You can almost hear the merry jingles from the bells on the harness of this delightful drafl pair. Just picture the scene. The snow is wafting from the north, chestnuts are slowly roasting, and the scent of pine and peppermint-laced hot chocolate fill the air. To Grandmother's house we go in a two-horse open sleigh while singing carols to the beat of trotting hooves. Growing up in and around Florida, I never really had the childhood opportunity to enjoy snow, let alone go on a horse-drawn sleigh ride to a relative's house! Now that I'm older, l don't have Ihe guts nor the stamina to move any further north, and in our little spot of earth here in Tennessee, we rarely see three days of snow in a row. But I can dream, can't I? So back to my imagination, where Belgian draft horses, Jingle and Belle, nuzzle each other in anticipation of pulling Christmas visitors on a sleigh ride, and then returning to a barn full of lamplight, straw, fresh hay, and warm gruel. The project as shown is finished in a frame Kerry constructed of reclaimed bam wood, naturally aged and weathered. This frame provides the perfect touch for our quaint harnessed subjects. We chose not to insert glass over the project for photography purposes, but if you choose to, all you need lo do is rout enough out of the back side of your wood frame to allow for the approximate 5/32"-thick glass and the l/8"-thick project piece. To finish, cut a l/8"-thick backer that measures 5" larger all the way around the cutting. Insert the glass and cutting into the frame groove. Place the backer over the cutting and secure it by tapping 1/2" wire nails through the backer into the frame (being careful to stay clear of the cuf design). Barn wood is usually solid red oak that is often still good under the grey weathering. Kerry makes a fairly simple frame using glue arid tack nails, but I haven't a clue how to instruct someone to rnake his or her own! You can email us or contact us by snail mail at the addresses below 1o get some instructions from the "shop master" on framing techniques. (I master only the pencils and erasers on my desk!) INSTRUCTIONS Using the method of choice, apply your pattern to the clean surface of your wood. (We use Removable Adhesive Paper for all of our scrolling projects.) We usually stack cut up to six pieces of )/8"-thick Baltic birch plyboard for stability and enhanced productivity. (Kerry affixes dou-ble-sided sticky tape to the four corners of each piece of wood, staying clear of the pattern, and presses the boards together.) No matterwhich pattern application method you use, it is a good idea to apply 2"- to 3"-wide clear packaging tape over the entire top of your pattern. This simple and inexpensive step will lengthen the life of your blades, because it helps to keep them cooler by lubricating them while you cut. Do not wrap tape around to the bottom of your wood as this could make your board(s) uneven and take your blade out of square. Make sure your blade is square, and check this frequently while scrolling. Pre-drill all your holes, and put a starter hole at the end of all the single lines, such as the lines in the forelock. Cut the smaller areas first, usually in the center of the pattern. When you are finished, gently pry the boards apart arid remove the tape. If you used Removable Adhesive Paper, peel your pattern off. Otherwise, remove your pattern using your method of choice. Sand the backs of each board. For the backer, spray a piece of plyboard, the cardboard from your ready-made frame, or other material of choice with black sprcy paint, and let dry. Attach the backer to a wood frame, or insert it with your project into a ready-made frame. We are SKWoodWorks, which stands for "Shelii Kerry Woodworks." Most of my patterns are drawn in standard 8-1/2" x 11" letter size for easy cutting, mounting, and framing. We sell the adhesive paper, finished pieces, and patterns off of our website, www.skwoodworks.com. For more informaNon, visit us on the web, or send a SASE to: SKWoodWorks, P.O. Box 583, Pleasant View, TN 37146. Pattern requests and suggestions are always welcome! ^ Creative Woodworks 8. Crafts Holiday 2Q05 • 75 |


