Creative Woodworks & crafts-111-2005-Holiday, страница 19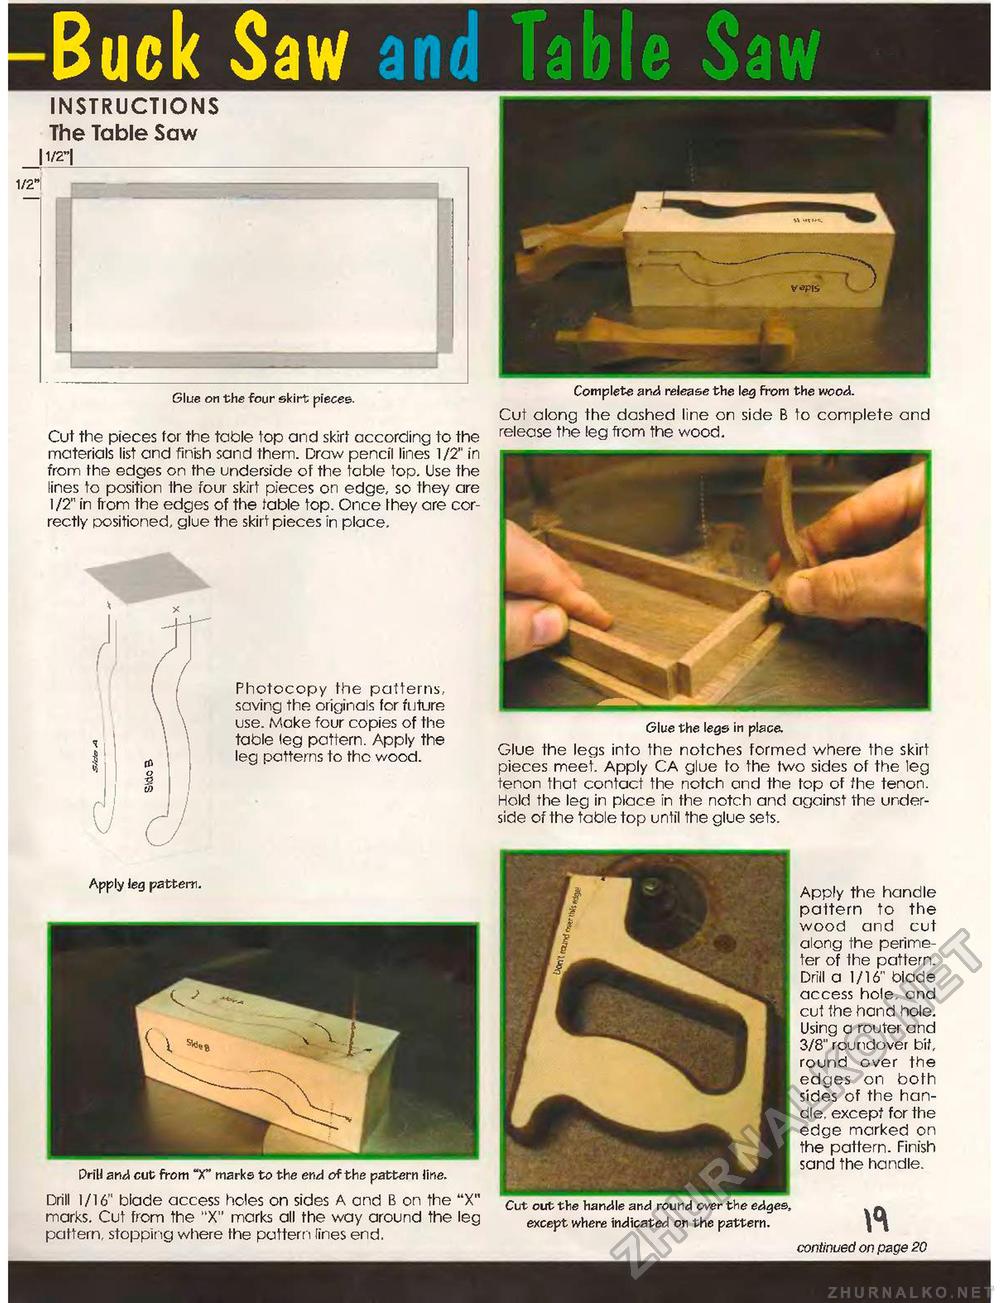
Buck Saw and Table SawINSTRUCTIONS The Table Saw 11/2"| Apply leg pattern. Drill and cut from "X" marks to the end of the pattern line. Drill 1/16" blade access holes on sides A and B on the "X" marks. Cut from the "X" marks all the way around the leg pattern, stopping where the pattern lines end. Apply the handle pattern to the wood and cut along the perimeter of the pattern. Drill a 1/16" blade access hole, and cut the hand hole. Using a router and 3/8" roundover bit, round over the edges on both sides of the handle. except for the edge marked on the pattern. Finish sand the handle. Cut out the handle and round over the edges, except where indicated on the pattern. continued on page 20 Complete and release the leg from the wood. Cut along the dashed line on side B to complete and release the leg from the wood. Glue on the four skirt pieces. Cut the pieces for the table top and skirt according to the materials list and finish sand them. Draw pencil lines 1/2" in from the edges on the underside of the table top. Use the lines to position the four skirt pieces on edge, so they are 1/2" in from the edges of the fable top. Once they are correctly positioned, glue the skirt pieces in place. Photocopy the patterns, saving the originals for future use. Make four copies of the table leg pattern. Apply the leg patterns to the wood. Glue the legs in place. Glue the legs into the notches formed where the skirt pieces meet. Apply CA glue to the two sides of the leg tenon that contact the notch and the top of the tenon. Hold the leg in place in the notch and against the underside of the table top until the glue sets. |


