Creative Woodworks & crafts-111-2005-Holiday, страница 34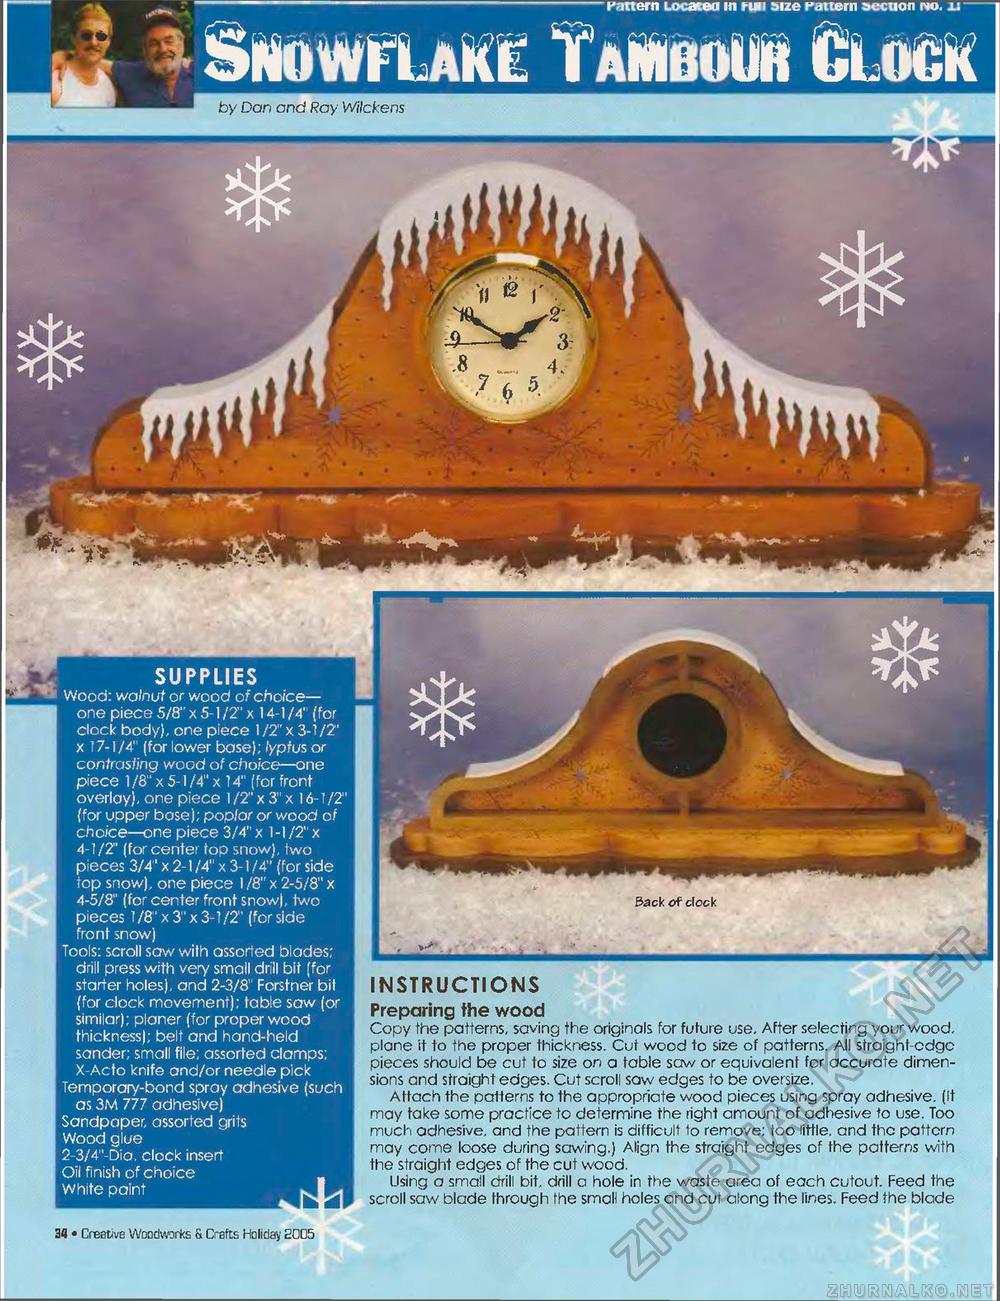
SUPPLIES Wood: walnut or wood of choice— one piece 5/8"x5-l/2"x 14-1/4" (for clock body), one piece 1/2" x 3-1/2' x 17-1/4" (for lower base); lypfus or contrasting wood of choice—one piece 1 /8" x 5-1 /4" x 14" (for front overlay), one piece 1 /2" x 3" x 16-1/2" {for upper base); poplar or wood of choice—one piece 3/4" x 1-1/2"x 4-1/2" (for center top snow), two pieces 3/4" x 2-11 A" x 3-1 /4" (for side top snow), one piece 1 /8" x 2-5/8" x 4-5/8" (for center front snow), two pieces 1/8" x 3" x 3-1/2" (for side front snow) Tools: scroll saw wilh assorted blades; drill press with very small drill bit (for starter holes), and 2-3/8' Forstner bit {for clock movement): table saw (or similar); planer (for proper wood thickness); belt and hand-held sander; small file; assorted clamps; X-Acto knife and/or needle pick Temporary-bond spray adhesive (such as 3M 777 adhesive) Sandpaper, assorted grits Wood glue 2-3/4"-Dio, clock insert Oil finish of choice White paint kJ Back of dock INSTRUCTIONS Preparing the wood Copy the patterns, saving the originals for future use. After selecting your wood, plane it to the proper thickness. Cut wood to size of patterns. All straight-edge pieces should be cut to size on a fable saw or equivalent for accurate dimensions and straight edges. Cut scroll saw edges to be oversize. Attach the palterns to the appropriate wood pieces using spray adhesive, (it may take some practice to determine the right amount of adhesive to use. Too much adhesive, and the pattern is difficult to remove; too little, and the pattern may corne loose during sawing.) Align the straight edges of the patterns with the straight edges of the cut wood. Using a small drill bit, drill a hole in the waste area of each cutout. Feed the scroll saw blade through the small holes and cut along the lines. Feed the blade i flfl • Creative Woodworks & Crafts Holiday S005 by Dan and Ray Wilckens |


