Creative Woodworks & crafts-111-2005-Holiday, страница 36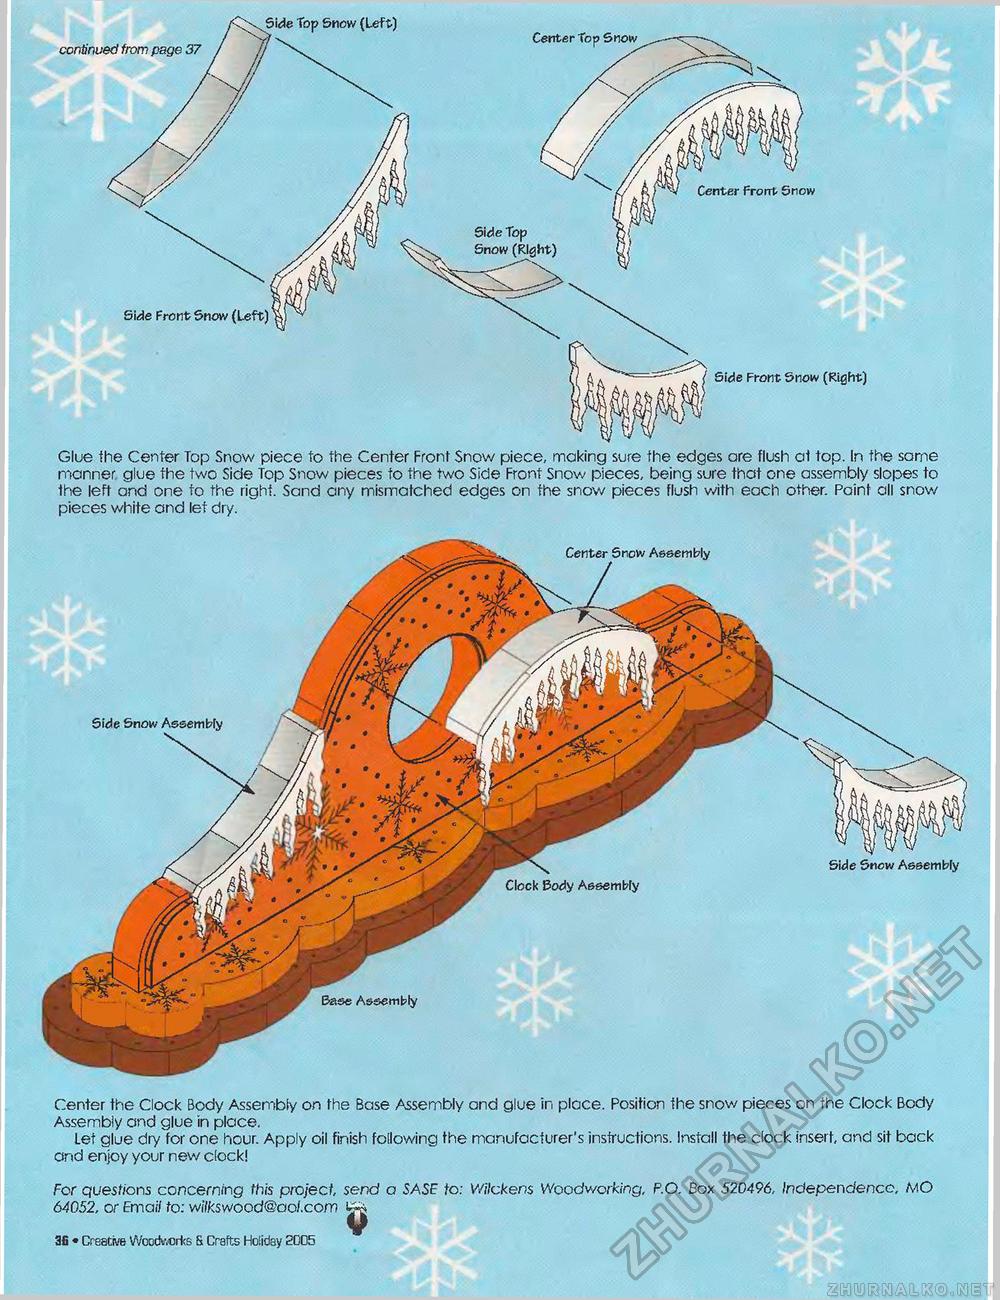
Glue the Center Top Snow piece to the Center Front Snow piece, making sure the edges are flush at top. In the same manner glue the two Side Top Snow pieces to the two Side Front Snow pieces, being sure that one assembly slopes to the left and one to the right. Sand any mismatched edges on the snow pieces flush with each other. Paint all snow pieces white and let dry. Side Snow Assembly Base Assembly Side Snow Assembly Clock Body Assembly Center Snow Assembly Center the Clock Body Assembly on the Base Assembly and glue in place. Position the snow pieces on the Clock Body Assembly and glue in place. Let glue dry for one hour. Apply oil finish following the manufacturer's instructions. Install the clock insert, and sit back and enjoy your new clock! For questions concerning this project, send a SASF to: V/ilckens Woodv/orking, P.O. Box 520496, /ndependencc, MO 64052, or Emai/ fo: wilkswood@ool.com i flfl • Creative Woodworks & Crafts Holiday S005 |


