Popular Woodworking 2000-01 № 112, страница 56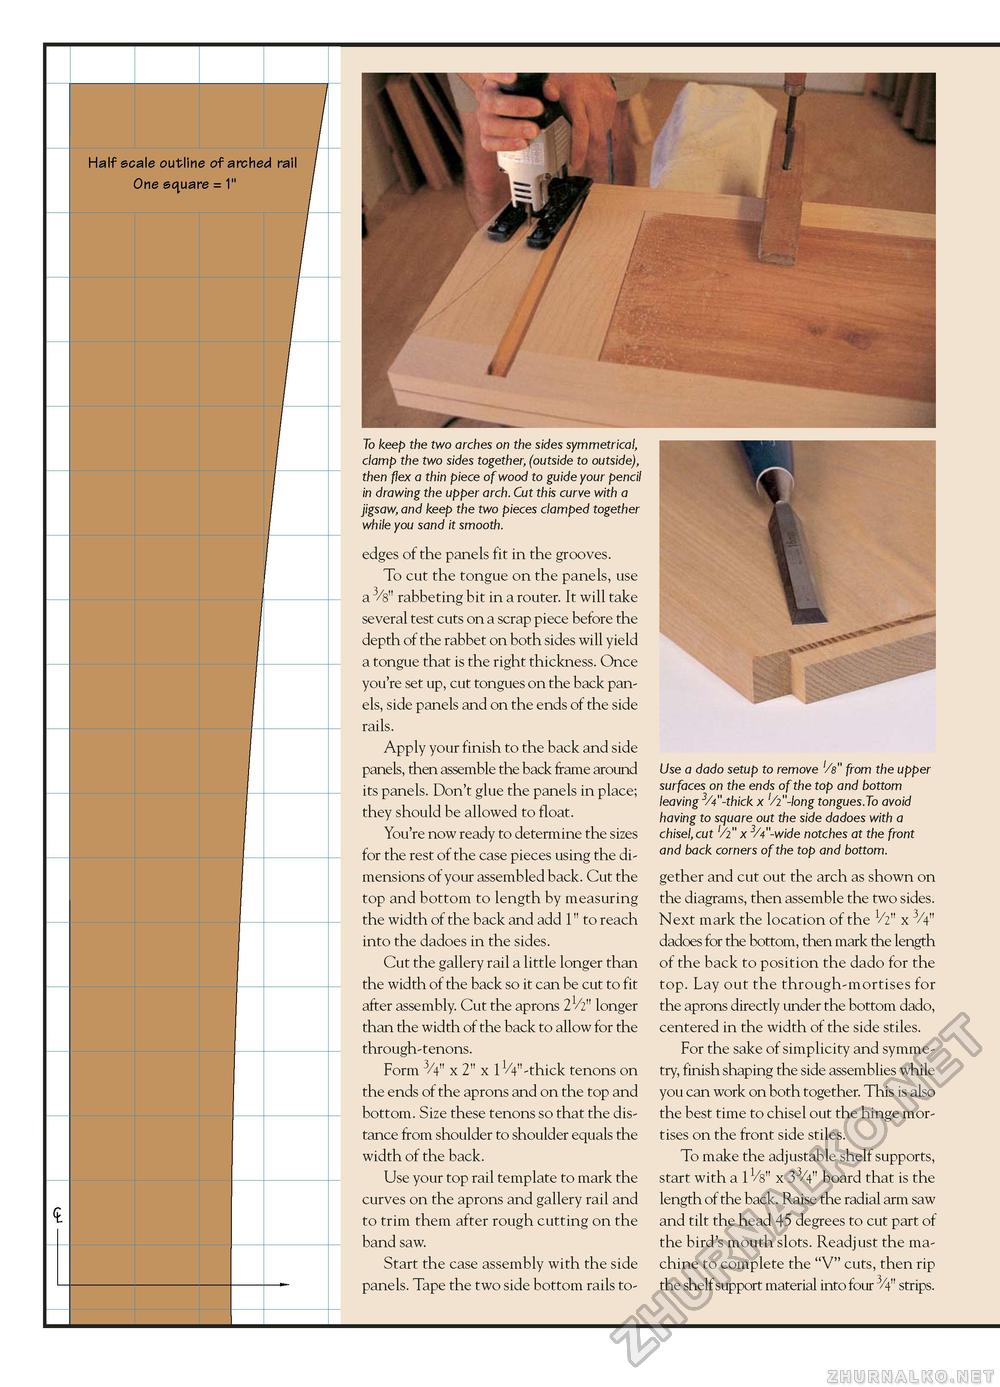
Half scale outline of arched rail One square = 1" To keep the two arches on the sides symmetrical, clamp the two sides together, (outside to outside), then flex a thin piece of wood to guide your pencil in drawing the upper arch. Cut this curve with a jigsaw, and keep the two pieces clamped together while you sand it smooth. edges of the panels fit in the grooves. To cut the tongue on the panels, use a 3/8" rabbeting bit in a router. It will take several test cuts on a scrap piece before the depth of the rabbet on both sides will yield a tongue that is the right thickness. Once you're set up, cut tongues on the back panels, side panels and on the ends of the side rails. Apply your finish to the back and side panels, then assemble the back frame around its panels. Don't glue the panels in place; they should be allowed to float. You're now ready to determine the sizes for the rest of the case pieces using the dimensions of your assembled back. Cut the top and bottom to length by measuring the width of the back and add 1" to reach into the dadoes in the sides. Cut the gallery rail a little longer than the width of the back so it can be cut to fit after assembly. Cut the aprons 2V2" longer than the width of the back to allow for the through-tenons. Form 3/4" x 2" x 1^/4"-thick tenons on the ends of the aprons and on the top and bottom. Size these tenons so that the distance from shoulder to shoulder equals the width of the back. Use your top rail template to mark the curves on the aprons and gallery rail and to trim them after rough cutting on the band saw. Start the case assembly with the side panels. Tape the two side bottom rails to- Use a dado setup to remove '/e" from the upper surfaces on the ends of the top and bottom leaving3A"-thick x '/i"-long tongues.To avoid having to square out the side dadoes with a chisel,cut vi" x 3/4"-wide notches at the front and back corners of the top and bottom. gether and cut out the arch as shown on the diagrams, then assemble the two sides. Next mark the location of the V2" x 3/4" dadoes for the bottom, then mark the length of the back to position the dado for the top. Lay out the through-mortises for the aprons directly under the bottom dado, centered in the width of the side stiles. For the sake of simplicity and symmetry, finish shaping the side assemblies while you can work on both together. This is also the best time to chisel out the hinge mortises on the front side stiles. To make the adjustable shelf supports, start with a 11/8" x 33/4" board that is the length of the back. Raise the radial arm saw and tilt the head 45 degrees to cut part of the bird's mouth slots. Readjust the machine to complete the "V" cuts, then rip the shelf support material into four 3/4" strips. |


