Popular Woodworking 2000-01 № 112, страница 54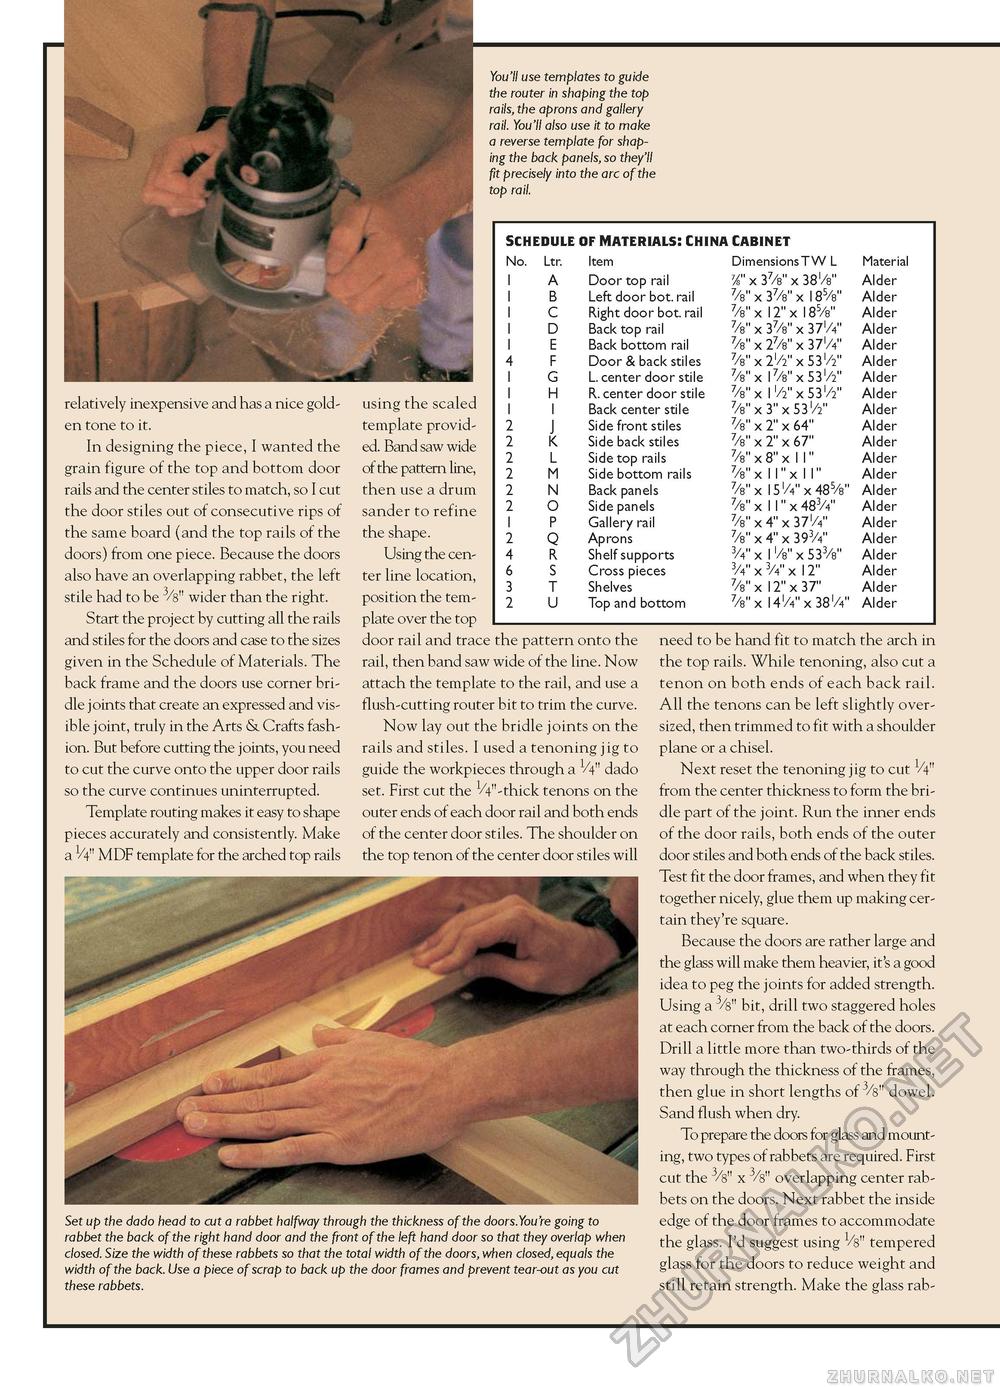
You'll use templates to guide the router in shaping the top rails, the aprons and gallery rail. You'll also use it to make a reverse template for shaping the back panels, so they'll ft precisely into the arc of the top rail. relatively inexpensive and has a nice golden tone to it. In designing the piece, I wanted the grain figure of the top and bottom door rails and the center stiles to match, so I cut the door stiles out of consecutive rips of the same board (and the top rails of the doors) from one piece. Because the doors also have an overlapping rabbet, the left stile had to be 3/s" wider than the right. Start the project by cutting all the rails and stiles for the doors and case to the sizes given in the Schedule of Materials. The back frame and the doors use corner bridle joints that create an expressed and visible joint, truly in the Arts & Crafts fashion. But before cutting the joints, you need to cut the curve onto the upper door rails so the curve continues uninterrupted. Template routing makes it easy to shape pieces accurately and consistently. Make a 1/4" MDF template for the arched top rails
using the scaled template provided. Band saw wide of the pattern line, then use a drum sander to refine the shape. Using the center line location, position the template over the top door rail and trace the pattern onto the rail, then band saw wide of the line. Now attach the template to the rail, and use a flush-cutting router bit to trim the curve. Now lay out the bridle joints on the rails and stiles. I used a tenoning jig to guide the workpieces through a V4" dado set. First cut the ^''-thick tenons on the outer ends of each door rail and both ends of the center door stiles. The shoulder on the top tenon of the center door stiles will Set up the dado head to cut a rabbet halfway through the thickness of the doors.You're going to rabbet the back of the right hand door and the front of the left hand door so that they overlap when closed. Size the width of these rabbets so that the total width of the doors, when closed, equals the width of the back. Use a piece of scrap to back up the door frames and prevent tear-out as you cut these rabbets. need to be hand fit to match the arch in the top rails. While tenoning, also cut a tenon on both ends of each back rail. All the tenons can be left slightly oversized, then trimmed to fit with a shoulder plane or a chisel. Next reset the tenoning jig to cut V4" from the center thickness to form the bridle part of the joint. Run the inner ends of the door rails, both ends of the outer door stiles and both ends of the back stiles. Test fit the door frames, and when they fit together nicely, glue them up making certain they're square. Because the doors are rather large and the glass will make them heavier, it's a good idea to peg the joints for added strength. Using a 3/s" bit, drill two staggered holes at each corner from the back of the doors. Drill a little more than two-thirds of the way through the thickness of the frames, then glue in short lengths of 3/s" dowel. Sand flush when dry. To prepare the doors for glass and mounting, two types of rabbets are required. First cut the 3/8" x 3/8" overlapping center rabbets on the doors. Next rabbet the inside edge of the door frames to accommodate the glass. I'd suggest using 1/8" tempered glass for the doors to reduce weight and still retain strength. Make the glass rab- |
||||||||||||||||||||||||||||||||||||||||||||||||||||||||||||||||||||||||||||||||||||||||||||||||||||||||||||||||||||||||||||||||||||||||||


