Popular Woodworking 2000-01 № 112, страница 57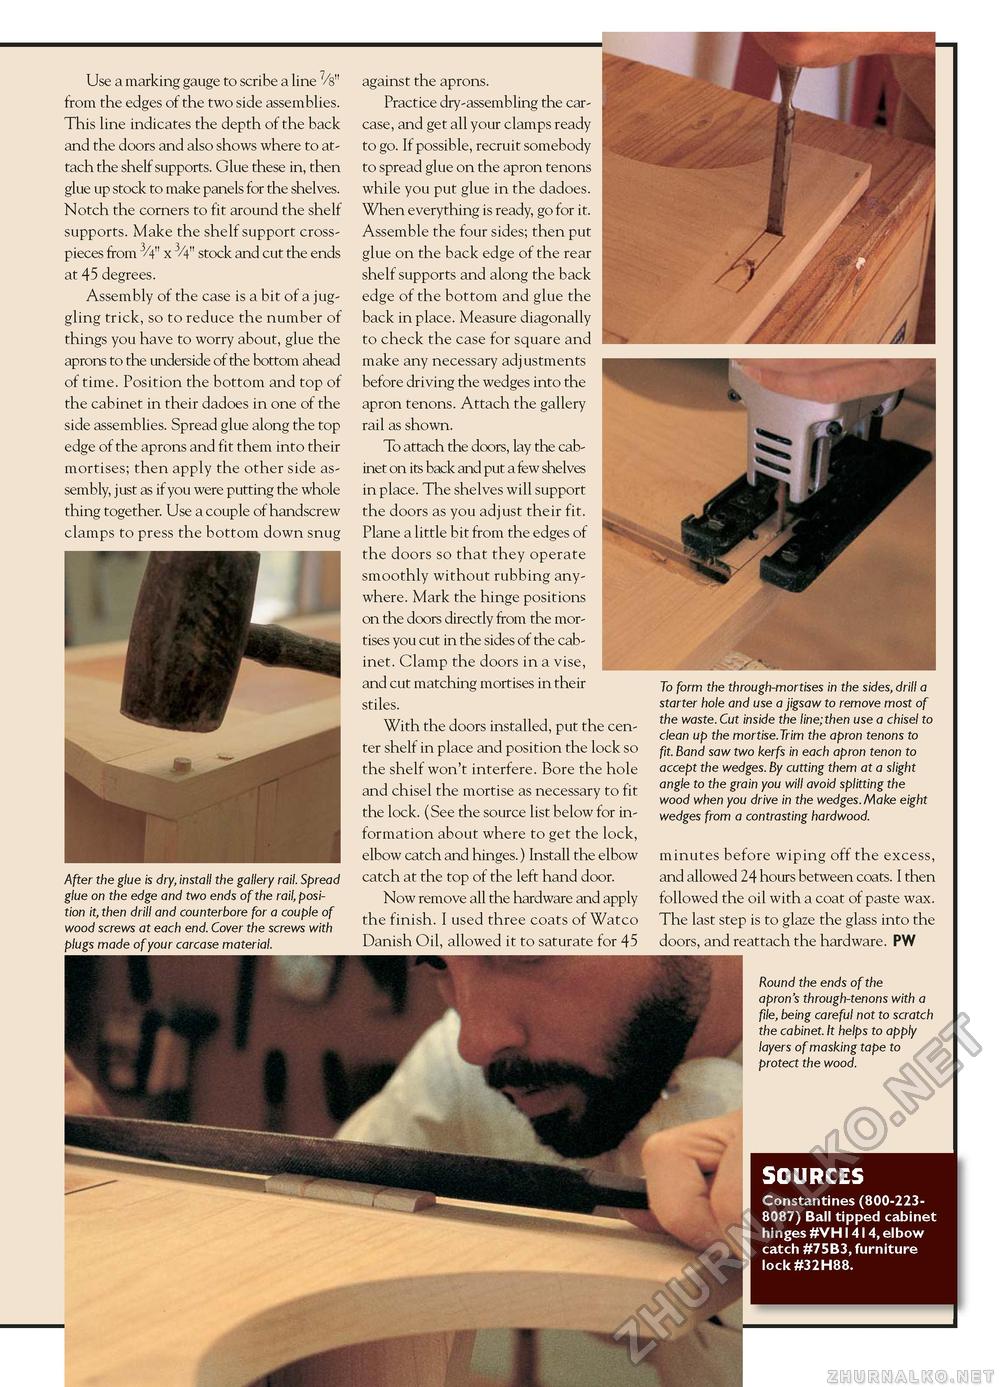
Use a marking gauge to scribe a line 7/8" from the edges of the two side assemblies. This line indicates the depth of the back and the doors and also shows where to attach the shelf supports. Glue these in, then glue up stock to make panels for the shelves. Notch the corners to fit around the shelf supports. Make the shelf support cross-pieces from 3/4" x 3/4" stock and cut the ends at 45 degrees. Assembly of the case is a bit of a juggling trick, so to reduce the number of things you have to worry about, glue the aprons to the underside of the bottom ahead of time. Position the bottom and top of the cabinet in their dadoes in one of the side assemblies. Spread glue along the top edge of the aprons and fit them into their mortises; then apply the other side assembly, just as if you were putting the whole thing together. Use a couple of handscrew clamps to press the bottom down snug After the glue is dry, install the gallery rail. Spread glue on the edge and two ends of the rail, position it, then drill and counterbore for a couple of wood screws at each end. Cover the screws with plugs made of your carcase material. against the aprons. Practice dry-assembling the carcase, and get all your clamps ready to go. If possible, recruit somebody to spread glue on the apron tenons while you put glue in the dadoes. When everything is ready, go for it. Assemble the four sides; then put glue on the back edge of the rear shelf supports and along the back edge of the bottom and glue the back in place. Measure diagonally to check the case for square and make any necessary adjustments before driving the wedges into the apron tenons. Attach the gallery rail as shown. To attach the doors, lay the cabinet on its back and put a few shelves in place. The shelves will support the doors as you adjust their fit. Plane a little bit from the edges of the doors so that they operate smoothly without rubbing anywhere. Mark the hinge positions on the doors directly from the mortises you cut in the sides of the cabinet. Clamp the doors in a vise, and cut matching mortises in their stiles. With the doors installed, put the center shelf in place and position the lock so the shelf won't interfere. Bore the hole and chisel the mortise as necessary to fit the lock. (See the source list below for information about where to get the lock, elbow catch and hinges.) Install the elbow catch at the top of the left hand door. Now remove all the hardware and apply the finish. I used three coats of Watco Danish Oil, allowed it to saturate for 45 To form the through-mortises in the sides, drill a starter hole and use a jigsaw to remove most of the waste. Cut inside the line;then use a chisel to clean up the mortise.Trim the apron tenons to fit. Band saw two kerfs in each apron tenon to accept the wedges. By cutting them at a slight angle to the grain you will avoid splitting the wood when you drive in the wedges. Make eight wedges from a contrasting hardwood. minutes before wiping off the excess, and allowed 24 hours between coats. I then followed the oil with a coat of paste wax. The last step is to glaze the glass into the doors, and reattach the hardware. PW Round the ends of the apron's through-tenons with a file, being careful not to scratch the cabinet. It helps to apply layers of masking tape to protect the wood. SOURCES Constantines (800-2238087) Ball tipped cabinet hinges #VH1414, elbow catch #75B3, furniture lock #32H88. |


