Popular Woodworking 2000-04 № 114, страница 19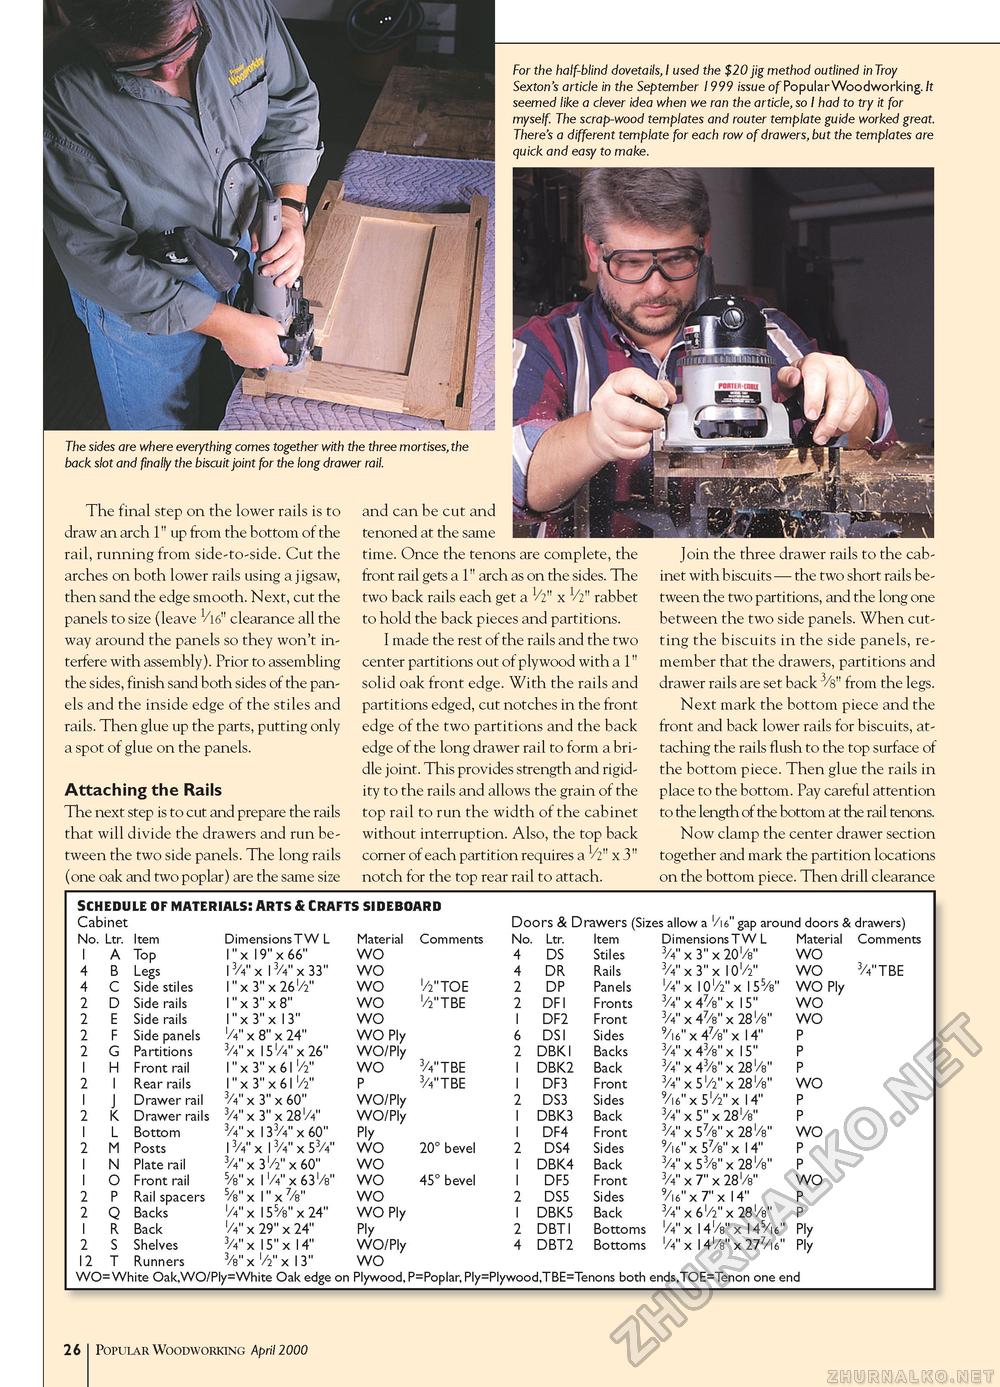
For the half-blind dovetails, I used the $20 jig method outlined in Troy Sexton's article in the September 1999 issue of Popular Woodworking.It seemed like a clever idea when we ran the article, so I had to try it for myself. The scrap-wood templates and router template guide worked great. There's a different template for each row of drawers, but the templates are quick and easy to make. The sides are where everything comes together with the three mortises, the back slot and finally the biscuit joint for the long drawer rail. The final step on the lower rails is to draw an arch 1" up from the bottom of the rail, running from side-to-side. Cut the arches on both lower rails using a jigsaw, then sand the edge smooth. Next, cut the panels to size (leave 1/l6" clearance all the way around the panels so they won't interfere with assembly). Prior to assembling the sides, finish sand both sides of the panels and the inside edge of the stiles and rails. Then glue up the parts, putting only a spot of glue on the panels. Attaching the Rails The next step is to cut and prepare the rails that will divide the drawers and run between the two side panels. The long rails (one oak and two poplar) are the same size and can be cut and tenoned at the same time. Once the tenons are complete, the front rail gets a 1" arch as on the sides. The two back rails each get a 1/2" x 1/2" rabbet to hold the back pieces and partitions. I made the rest of the rails and the two center partitions out of plywood with a 1" solid oak front edge. With the rails and partitions edged, cut notches in the front edge of the two partitions and the back edge of the long drawer rail to form a bridle joint. This provides strength and rigidity to the rails and allows the grain of the top rail to run the width of the cabinet without interruption. Also, the top back corner of each partition requires a 1/2" x 3" notch for the top rear rail to attach. Join the three drawer rails to the cabinet with biscuits — the two short rails between the two partitions, and the long one between the two side panels. When cutting the biscuits in the side panels, remember that the drawers, partitions and drawer rails are set back 3/s" from the legs. Next mark the bottom piece and the front and back lower rails for biscuits, attaching the rails flush to the top surface of the bottom piece. Then glue the rails in place to the bottom. Pay careful attention to the length of the bottom at the rail tenons. Now clamp the center drawer section together and mark the partition locations on the bottom piece. Then drill clearance
12 Popular Woodworking April 2000 |
|||||||||||||||||||||||||||||||||||||||||||||||||||||||||||||||||||||||||||||||||||||||||||||||||||||||||||||||||||||||||||||||||||||||||||||||||||||||||||||||||||||||||||||||||||||||||||||||||||||||||||||||||||||||||||||||||||||||||||||||||||||||||||||||||||||||||||||||||||||||||||||||


