Popular Woodworking 2000-04 № 114, страница 33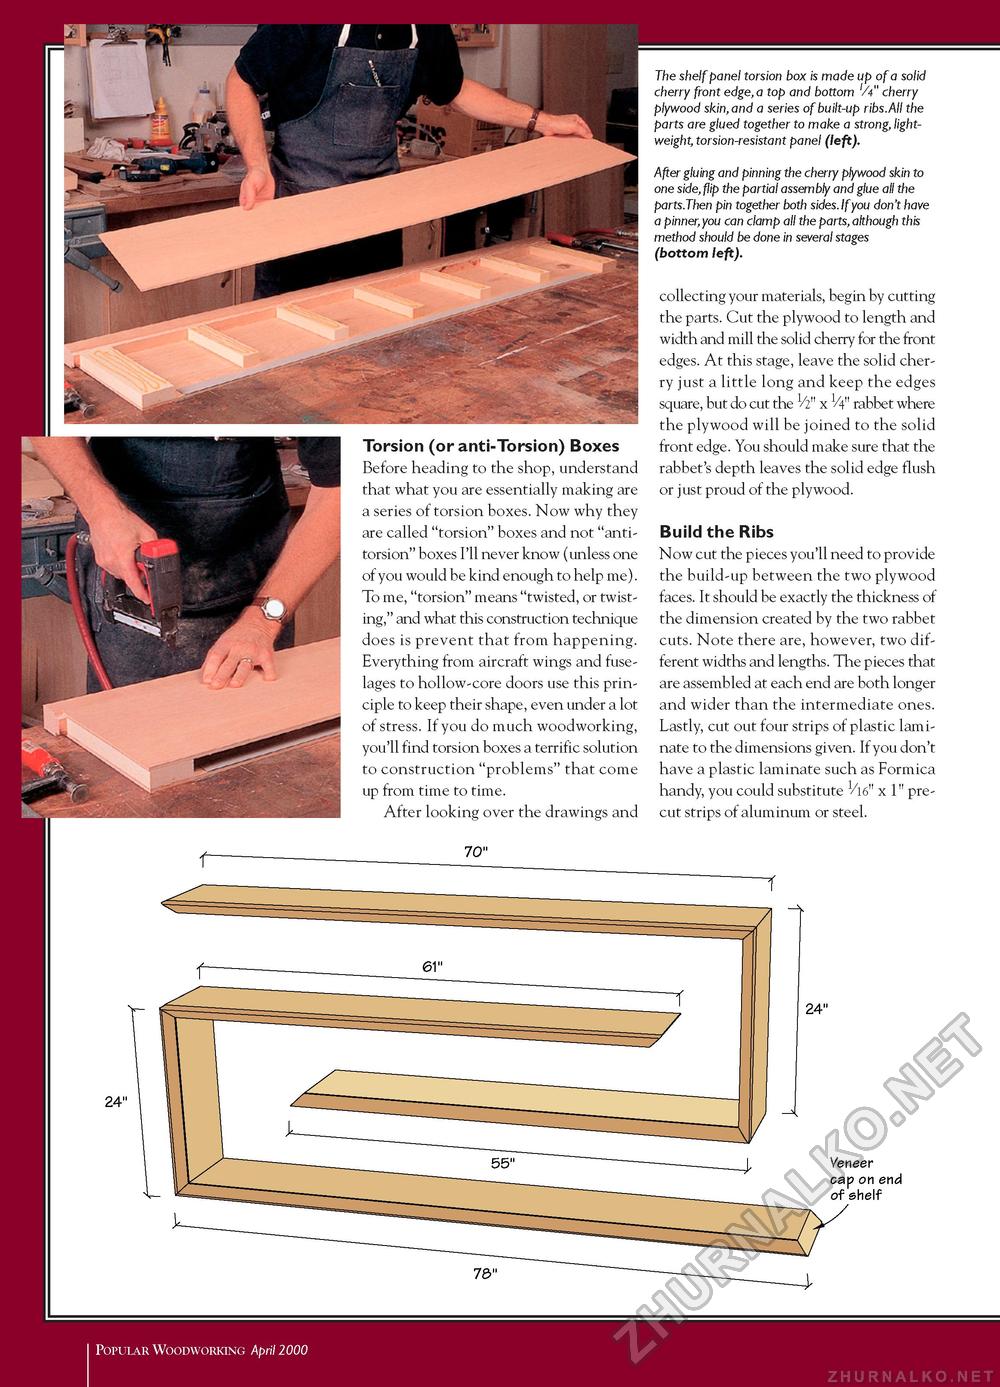
Torsion (or anti-Torsion) Boxes Before heading to the shop, understand that what you are essentially making are a series of torsion boxes. Now why they are called "torsion" boxes and not "anti-torsion" boxes I'll never know (unless one of you would be kind enough to help me). To me, "torsion" means "twisted, or twisting," and what this construction technique does is prevent that from happening. Everything from aircraft wings and fuselages to hollow-core doors use this principle to keep their shape, even under a lot of stress. If you do much woodworking, you'll find torsion boxes a terrific solution to construction "problems" that come up from time to time. After looking over the drawings and The shelf panel torsion box is made up of a solid cherry front edge,a top and bottom 'A" cherry plywood skin,and a series of built-up ribs.All the parts are glued together to make a strong, lightweight, torsion-resistant panel (left). After gluing and pinning the cherry plywood skin to one side, flip the partial assembly and glue all the parts.Then pin together both sides. If you don't have a pinner, you can clamp all the parts, although this method should be done in several stages (bottom left). collecting your materials, begin by cutting the parts. Cut the plywood to length and width and mill the solid cherry for the front edges. At this stage, leave the solid cherry just a little long and keep the edges square, but do cut the 1/2" x 1/4" rabbet where the plywood will be joined to the solid front edge. You should make sure that the rabbet's depth leaves the solid edge flush or just proud of the plywood. Build the Ribs Now cut the pieces you'll need to provide the build-up between the two plywood faces. It should be exactly the thickness of the dimension created by the two rabbet cuts. Note there are, however, two different widths and lengths. The pieces that are assembled at each end are both longer and wider than the intermediate ones. Lastly, cut out four strips of plastic laminate to the dimensions given. If you don't have a plastic laminate such as Formica handy, you could substitute 1/16" x 1" pre-cut strips of aluminum or steel. Popular Woodworking April 2000 |


