Popular Woodworking 2000-04 № 114, страница 35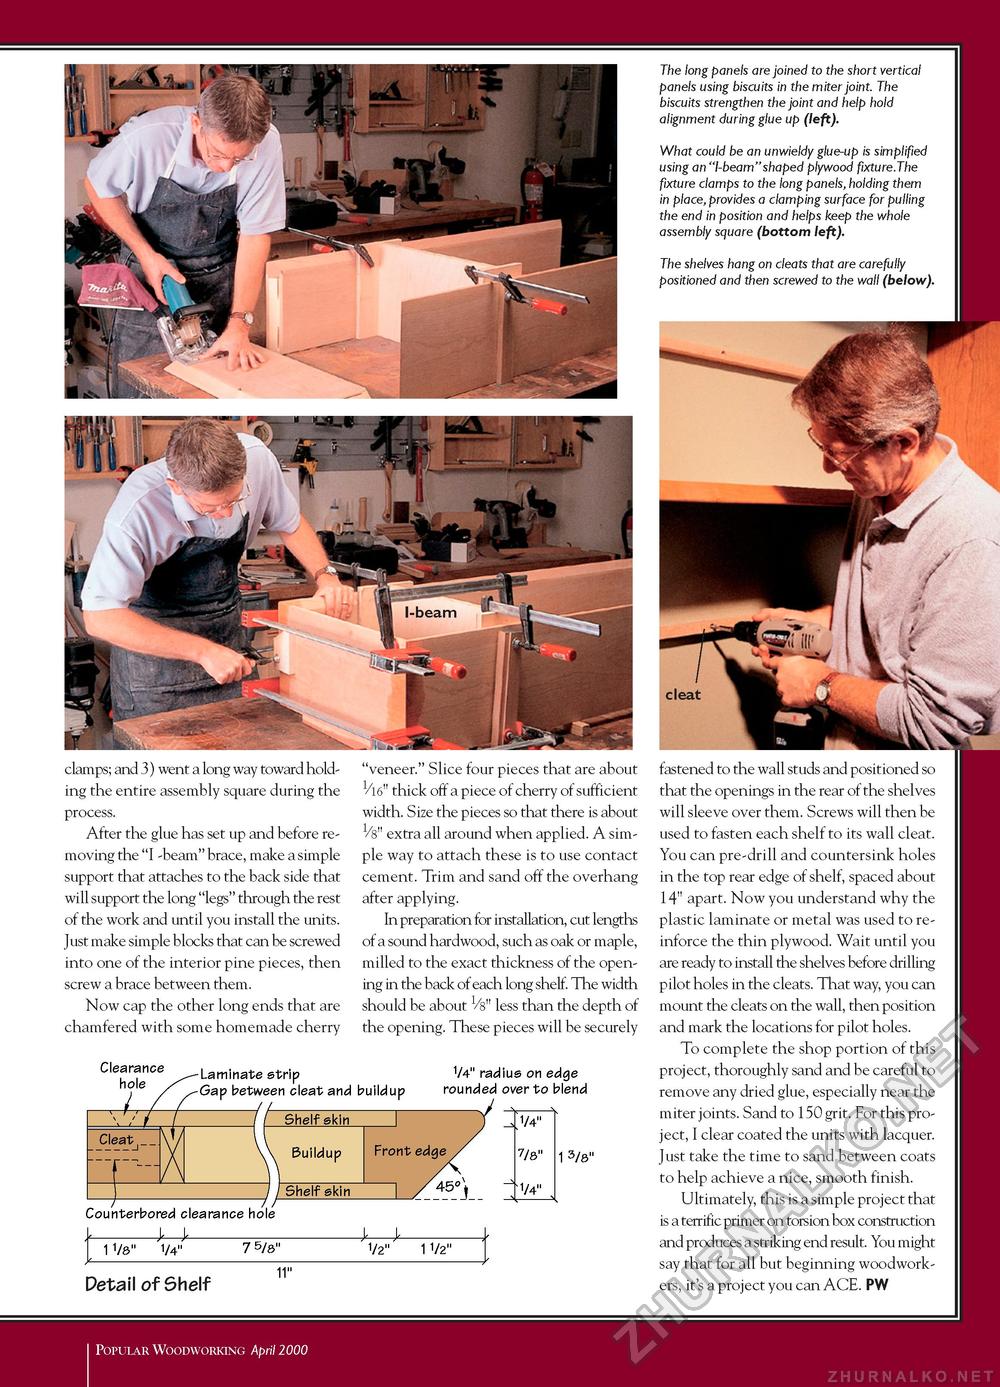
clamps; and 3) went a long way toward holding the entire assembly square during the process. After the glue has set up and before removing the "I -beam" brace, make a simple support that attaches to the back side that will support the long "legs" through the rest of the work and until you install the units. Just make simple blocks that can be screwed into one of the interior pine pieces, then screw a brace between them. Now cap the other long ends that are chamfered with some homemade cherry Laminate strip Gap between cleat and buildup 1/4" radius on edge rounded over to blend Shelf skin Buildup Shelf skin Front edge 45° j 1/4" 7/8" V4" 1 3/8" Counterbored clearance hole 1 1/8" 1/4" 7 5/8" 4—J- 1/2" 1 1/2" The long panels are joined to the short vertical panels using biscuits in the miter joint. The biscuits strengthen the joint and help hold alignment during glue up (left). What could be an unwieldy glue-up is simplified using an "I-beam"shaped plywood fixture.The fixture clamps to the long panels, holding them in place, provides a clamping surface for pulling the end in position and helps keep the whole assembly square (bottom left). The shelves hang on cleats that are carefully positioned and then screwed to the wall (below). "veneer." Slice four pieces that are about thick off a piece of cherry of sufficient width. Size the pieces so that there is about 1/8" extra all around when applied. A simple way to attach these is to use contact cement. Trim and sand off the overhang after applying. In preparation for installation, cut lengths of a sound hardwood, such as oak or maple, milled to the exact thickness of the opening in the back of each long shelf. The width should be about 1/8" less than the depth of the opening. These pieces will be securely Detail of Shelf 11" fastened to the wall studs and positioned so that the openings in the rear of the shelves will sleeve over them. Screws will then be used to fasten each shelf to its wall cleat. You can pre-drill and countersink holes in the top rear edge of shelf, spaced about 14" apart. Now you understand why the plastic laminate or metal was used to reinforce the thin plywood. Wait until you are ready to install the shelves before drilling pilot holes in the cleats. That way, you can mount the cleats on the wall, then position and mark the locations for pilot holes. To complete the shop portion of this project, thoroughly sand and be careful to remove any dried glue, especially near the miter joints. Sand to 150 grit. For this project, I clear coated the units with lacquer. Just take the time to sand between coats to help achieve a nice, smooth finish. Ultimately, this is a simple project that is a terrific primer on torsion box construction and produces a striking end result. You might say that for all but beginning woodworkers, it's a project you can ACE. PW Popular Woodworking April 2000 |


