Popular Woodworking 2000-04 № 114, страница 38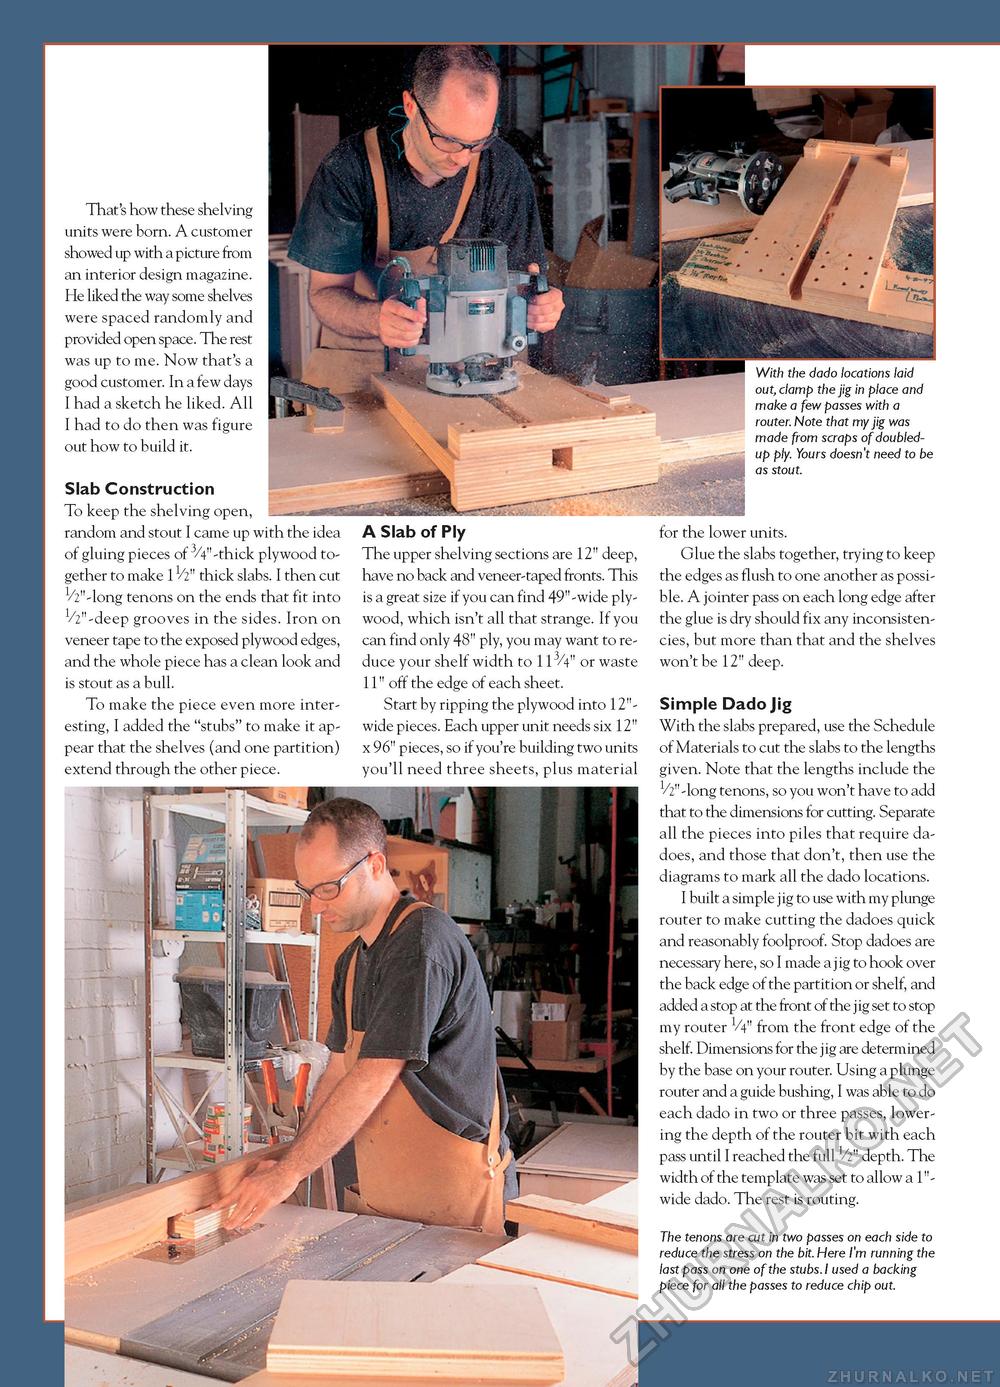
That's how these shelving units were born. A customer showed up with a picture from an interior design magazine. He liked the way some shelves were spaced randomly and provided open space. The rest was up to me. Now that's a good customer. In a few days I had a sketch he liked. All I had to do then was figure out how to build it. Slab Construction To keep the shelving open, random and stout I came up with the idea of gluing pieces of 3/4"-thick plywood together to make 1V2" thick slabs. I then cut ^"-long tenons on the ends that fit into 1/2"-deep grooves in the sides. Iron on veneer tape to the exposed plywood edges, and the whole piece has a clean look and is stout as a bull. To make the piece even more interesting, I added the "stubs" to make it appear that the shelves (and one partition) extend through the other piece. A Slab of Ply The upper shelving sections are 12" deep, have no back and veneer-taped fronts. This is a great size if you can find 49"-wide plywood, which isn't all that strange. If you can find only 48" ply, you may want to reduce your shelf width to 113/4" or waste 11" off the edge of each sheet. Start by ripping the plywood into 12"-wide pieces. Each upper unit needs six 12" x 96" pieces, so if you're building two units you'll need three sheets, plus material With the dado locations laid out, clamp the jig in place and make a few passes with a router. Note that my jig was made from scraps of doubled-up ply. Yours doesn't need to be as stout. for the lower units. Glue the slabs together, trying to keep the edges as flush to one another as possible. A jointer pass on each long edge after the glue is dry should fix any inconsistencies, but more than that and the shelves won't be 12" deep. Simple Dado Jig With the slabs prepared, use the Schedule of Materials to cut the slabs to the lengths given. Note that the lengths include the V^'-long tenons, so you won't have to add that to the dimensions for cutting. Separate all the pieces into piles that require dadoes, and those that don't, then use the diagrams to mark all the dado locations. I built a simple jig to use with my plunge router to make cutting the dadoes quick and reasonably foolproof. Stop dadoes are necessary here, so I made a jig to hook over the back edge of the partition or shelf, and added a stop at the front of the jig set to stop my router V4" from the front edge of the shelf. Dimensions for the jig are determined by the base on your router. Using a plunge router and a guide bushing, I was able to do each dado in two or three passes, lowering the depth of the router bit with each pass until I reached the full V2" depth. The width of the template was set to allow a 1"-wide dado. The rest is routing. The tenons are cut in two passes on each side to reduce the stress on the bit. Here I'm running the last pass on one of the stubs. I used a backing piece for all the passes to reduce chip out. |


