Popular Woodworking 2000-04 № 114, страница 34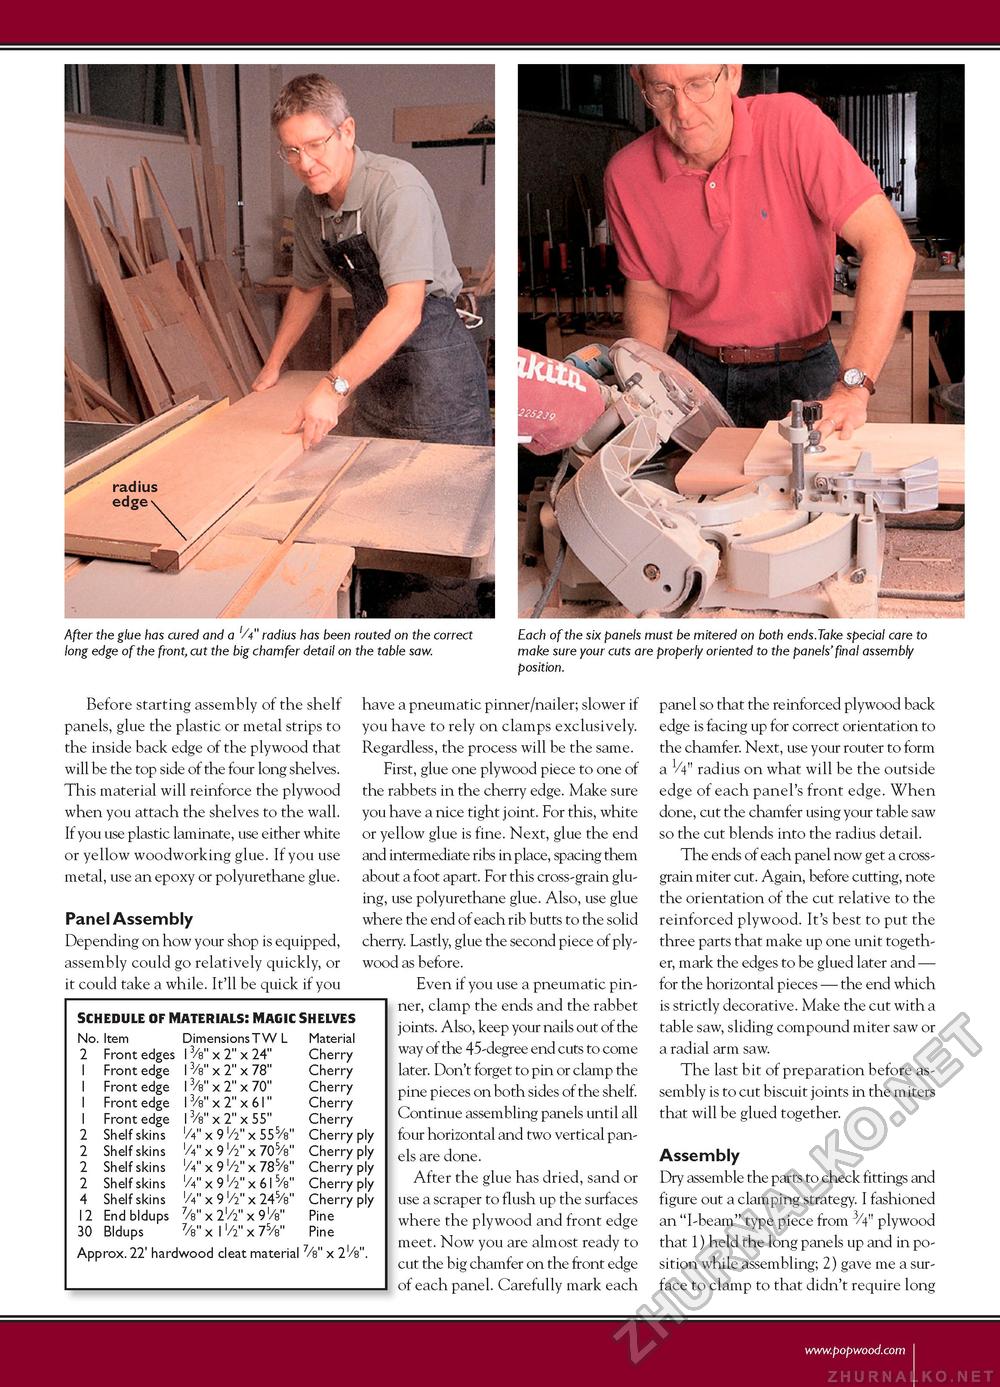
After the glue has cured and a 'A" radius has been routed on the correct long edge of the front, cut the big chamfer detail on the table saw. Each of the six panels must be mitered on both ends.Take special care to make sure your cuts are properly oriented to the panels'final assembly position. Before starting assembly of the shelf panels, glue the plastic or metal strips to the inside back edge of the plywood that will be the top side of the four long shelves. This material will reinforce the plywood when you attach the shelves to the wall. If you use plastic laminate, use either white or yellow woodworking glue. If you use metal, use an epoxy or polyurethane glue. Panel Assembly Depending on how your shop is equipped, assembly could go relatively quickly, or it could take a while. It'll be quick if you SCHEDULE OF MATERIALS! MAGIC SHELVES No. Item 2 Front edges 1 Front edge 1 Front edge 1 Front edge 1 Front edge 2 Shelf skins 2 Shelf skins 2 Shelf skins 2 Shelf skins 4 Shelf skins 12 End bldups 30 Bldups Dimensions T W L l3/8" 1 3/8" l3/8" 13/8" 13/8" x 2"x 24" x 2"x 78" x 2"x 70" x 2"x 61" x 2"x 55" /4" x 9l/2" x 555/8" /4" x 91/2" x 705/8" /4" x 91/2" x 785/8" /4" x 9 l/2" x 61 5/8" l/V' x 9l/2" x 245/8" 7/8" x 2l/2" x 9l/8" 7/8" x 11/2" x 75/8" Material Cherry Cherry Cherry Cherry Cherry Cherry ply Cherry ply Cherry ply Cherry ply Cherry ply Pine Pine Approx. 22' hardwood cleat material 7/8" x 2l/8". have a pneumatic pinner/nailer; slower if you have to rely on clamps exclusively. Regardless, the process will be the same. First, glue one plywood piece to one of the rabbets in the cherry edge. Make sure you have a nice tight joint. For this, white or yellow glue is fine. Next, glue the end and intermediate ribs in place, spacing them about a foot apart. For this cross-grain gluing, use polyurethane glue. Also, use glue where the end of each rib butts to the solid cherry. Lastly, glue the second piece of plywood as before. Even if you use a pneumatic pinner, clamp the ends and the rabbet joints. Also, keep your nails out of the way of the 45-degree end cuts to come later. Don't forget to pin or clamp the pine pieces on both sides of the shelf. Continue assembling panels until all four horizontal and two vertical panels are done. After the glue has dried, sand or use a scraper to flush up the surfaces where the plywood and front edge meet. Now you are almost ready to cut the big chamfer on the front edge of each panel. Carefully mark each panel so that the reinforced plywood back edge is facing up for correct orientation to the chamfer. Next, use your router to form a 1/4" radius on what will be the outside edge of each panel's front edge. When done, cut the chamfer using your table saw so the cut blends into the radius detail. The ends of each panel now get a cross-grain miter cut. Again, before cutting, note the orientation of the cut relative to the reinforced plywood. It's best to put the three parts that make up one unit together, mark the edges to be glued later and — for the horizontal pieces — the end which is strictly decorative. Make the cut with a table saw, sliding compound miter saw or a radial arm saw. The last bit of preparation before assembly is to cut biscuit joints in the miters that will be glued together. Assembly Dry assemble the parts to check fittings and figure out a clamping strategy. I fashioned an "I-beam" type piece from 3/4" plywood that 1) held the long panels up and in position while assembling; 2) gave me a surface to clamp to that didn't require long |


