Popular Woodworking 2000-04 № 114, страница 44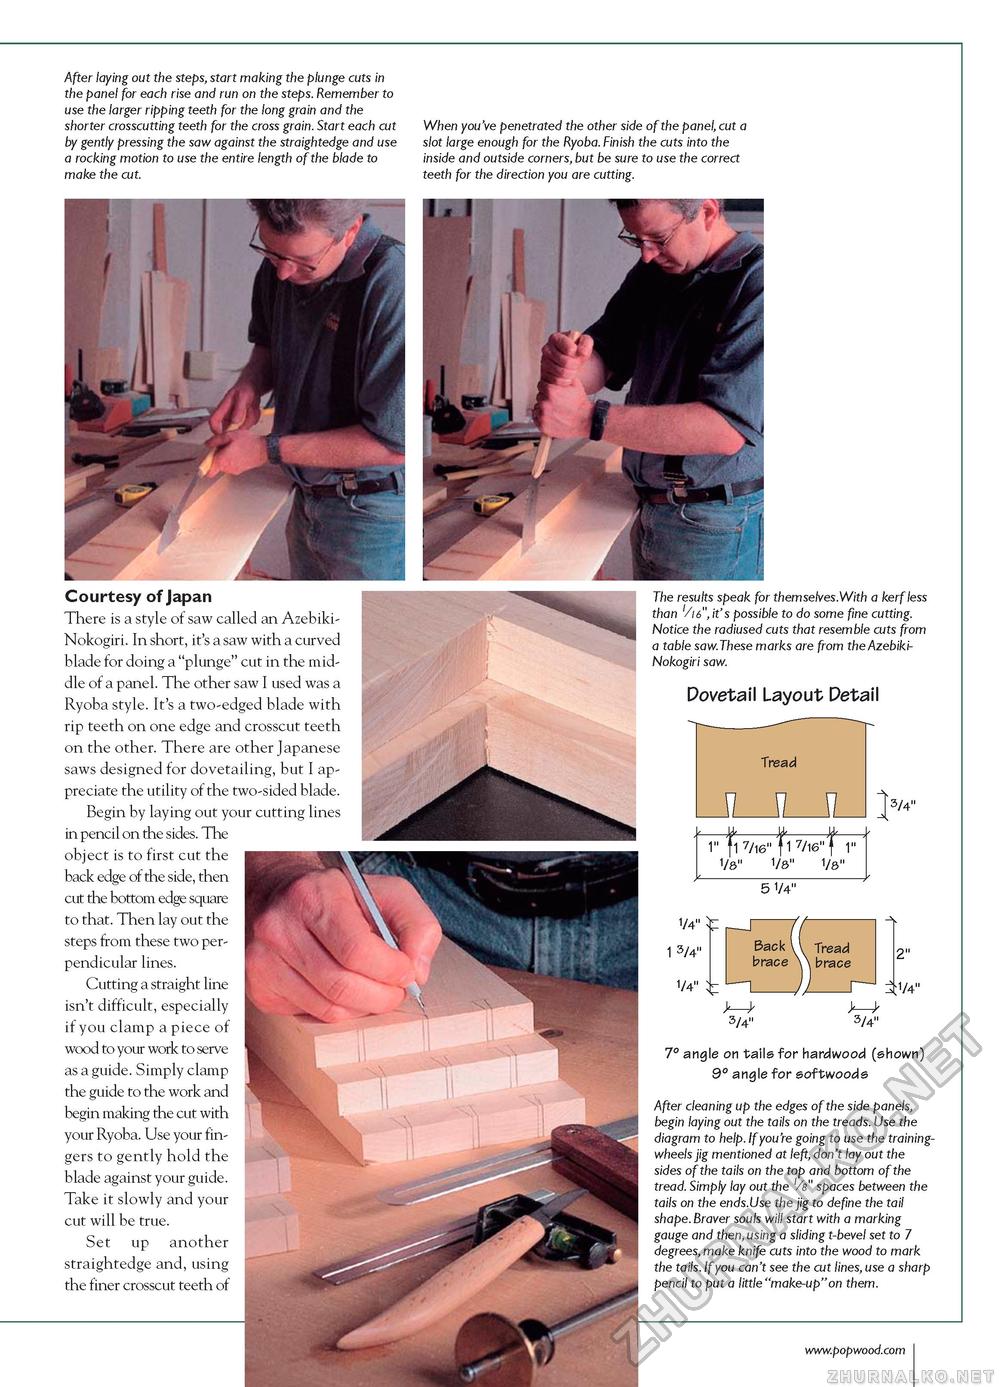
After laying out the steps, start making the plunge cuts in the panel for each rise and run on the steps. Remember to use the larger ripping teeth for the long grain and the shorter crosscutting teeth for the cross grain. Start each cut by gently pressing the saw against the straightedge and use a rocking motion to use the entire length of the blade to make the cut. When you've penetrated the other side of the panel, cut a slot large enough for the Ryoba. Finish the cuts into the inside and outside corners, but be sure to use the correct teeth for the direction you are cutting. Courtesy of Japan There is a style of saw called an Azebiki-Nokogiri. In short, it's a saw with a curved blade for doing a "plunge" cut in the middle of a panel. The other saw I used was a Ryoba style. It's a two-edged blade with rip teeth on one edge and crosscut teeth on the other. There are other Japanese saws designed for dovetailing, but I appreciate the utility of the two-sided blade. Begin by laying out your cutting lines in pencil on the sides. The object is to first cut the back edge of the side, then cut the bottom edge square to that. Then lay out the steps from these two perpendicular lines. Cutting a straight line isn't difficult, especially if you clamp a piece of wood to your work to serve as a guide. Simply clamp the guide to the work and begin making the cut with your Ryoba. Use your fingers to gently hold the blade against your guide. Take it slowly and your cut will be true. Set up another straightedge and, using the finer crosscut teeth of The results speak for themselves.With a kerf less than '/is", it's possible to do some fine cutting. Notice the radiused cuts that resemble cuts from a table saw.These marks are from the Azebiki-Nokogiri saw. Dovetail Layout Detail Tread JLJLJI } 3/4" —&-&-J*— 1" j1 7/16" f17/16"{ 1" 1/8" 1/8" 1/8" 1/4" 1 3/4" 1/4" 5 1/4" Back 1 brace Tread brace 2" 1/4" 3/4" 3/4" 7° angle on tails for hardwood (shown) 9° angle for softwoods After cleaning up the edges of the side panels, begin laying out the tails on the treads. Use the diagram to help. If you're going to use the training-wheels jig mentioned at left, don't lay out the sides of the tails on the top and bottom of the tread. Simply lay out the vs" spaces between the tails on the ends.Use the jig to define the tail shape. Braver souls will start with a marking gauge and then, using a sliding t-bevel set to 1 degrees, make knife cuts into the wood to mark the tails. If you can't see the cut lines, use a sharp pencil to put a little "make-up"on them. |


