Popular Woodworking 2000-04 № 114, страница 45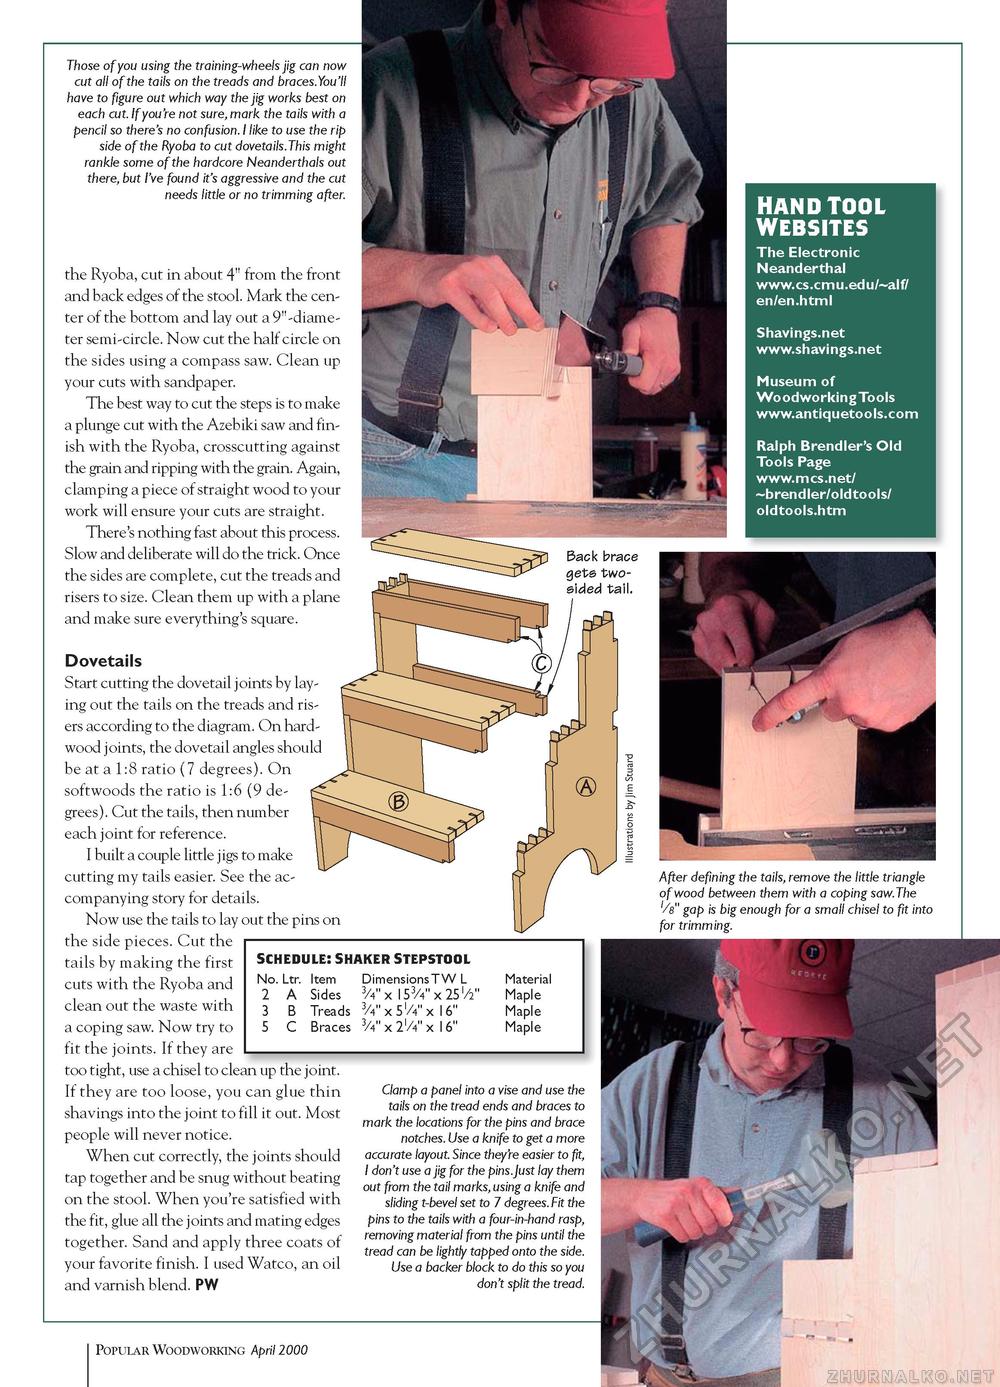
HAND TOOL WEBSITES The Electronic Neanderthal www.cs.cmu.edu/~alf/ en/en.html Shavings.net www.shavings.net Museum of Woodworking Tools www.antiquetools.com Ralph Brendler's Old Tools Page www.mcs.net/ ~brendler/oldtools/ oldtools.htm Those of you using the training-wheels jig can now cut all of the tails on the treads and braces.You'll have to figure out which way the jig works best on each cut. If you're not sure, mark the tails with a pencil so there's no confusion. I like to use the rip side of the Ryoba to cut dovetails.This might rankle some of the hardcore Neanderthals out there, but I've found it's aggressive and the cut needs little or no trimming after. the Ryoba, cut in about 4" from the front and back edges of the stool. Mark the center of the bottom and lay out a 9"-diame-ter semi-circle. Now cut the half circle on the sides using a compass saw. Clean up your cuts with sandpaper. The best way to cut the steps is to make a plunge cut with the Azebiki saw and finish with the Ryoba, crosscutting against the grain and ripping with the grain. Again, clamping a piece of straight wood to your work will ensure your cuts are straight. There's nothing fast about this process. Slow and deliberate will do the trick. Once the sides are complete, cut the treads and risers to size. Clean them up with a plane and make sure everything's square. Dovetails Start cutting the dovetail joints by laying out the tails on the treads and risers according to the diagram. On hardwood joints, the dovetail angles should be at a 1:8 ratio (7 degrees). On softwoods the ratio is 1:6 (9 degrees). Cut the tails, then number each joint for reference. I built a couple little jigs to make cutting my tails easier. See the accompanying story for details. Now use the tails to lay out the pins on the side pieces. Cut the tails by making the first cuts with the Ryoba and clean out the waste with a coping saw. Now try to fit the joints. If they are too tight, use a chisel to clean up the joint. If they are too loose, you can glue thin shavings into the joint to fill it out. Most people will never notice. When cut correctly, the joints should tap together and be snug without beating on the stool. When you're satisfied with the fit, glue all the joints and mating edges together. Sand and apply three coats of your favorite finish. I used Watco, an oil and varnish blend. PW After defining the tails, remove the little triangle of wood between them with a coping saw.The '/b" gap is big enough for a small chisel to fit into for trimming. SCHEDULE! SHAKER STEPSTOOL No. Ltr. Item 2 A Sides 3 B Treads 5 C Braces Dimensions T W L 3/4" x l53/4" x 25 '/2" 3/4" x 5l/4" x 16" 3/4" x 2l/4" x 16" Material Maple Maple Maple Clamp a panel into a vise and use the tails on the tread ends and braces to mark the locations for the pins and brace notches. Use a knife to get a more accurate layout. Since they're easier to fit, I don't use a jig for the pins.Just lay them out from the tail marks, using a knife and sliding t-bevel set to 7 degrees. Fit the pins to the tails with a four-in-hand rasp, removing material from the pins until the tread can be lightly tapped onto the side. Use a backer block to do this so you don't split the tread. 12 Popular Woodworking April 2000 |


