Popular Woodworking 2000-04 № 114, страница 48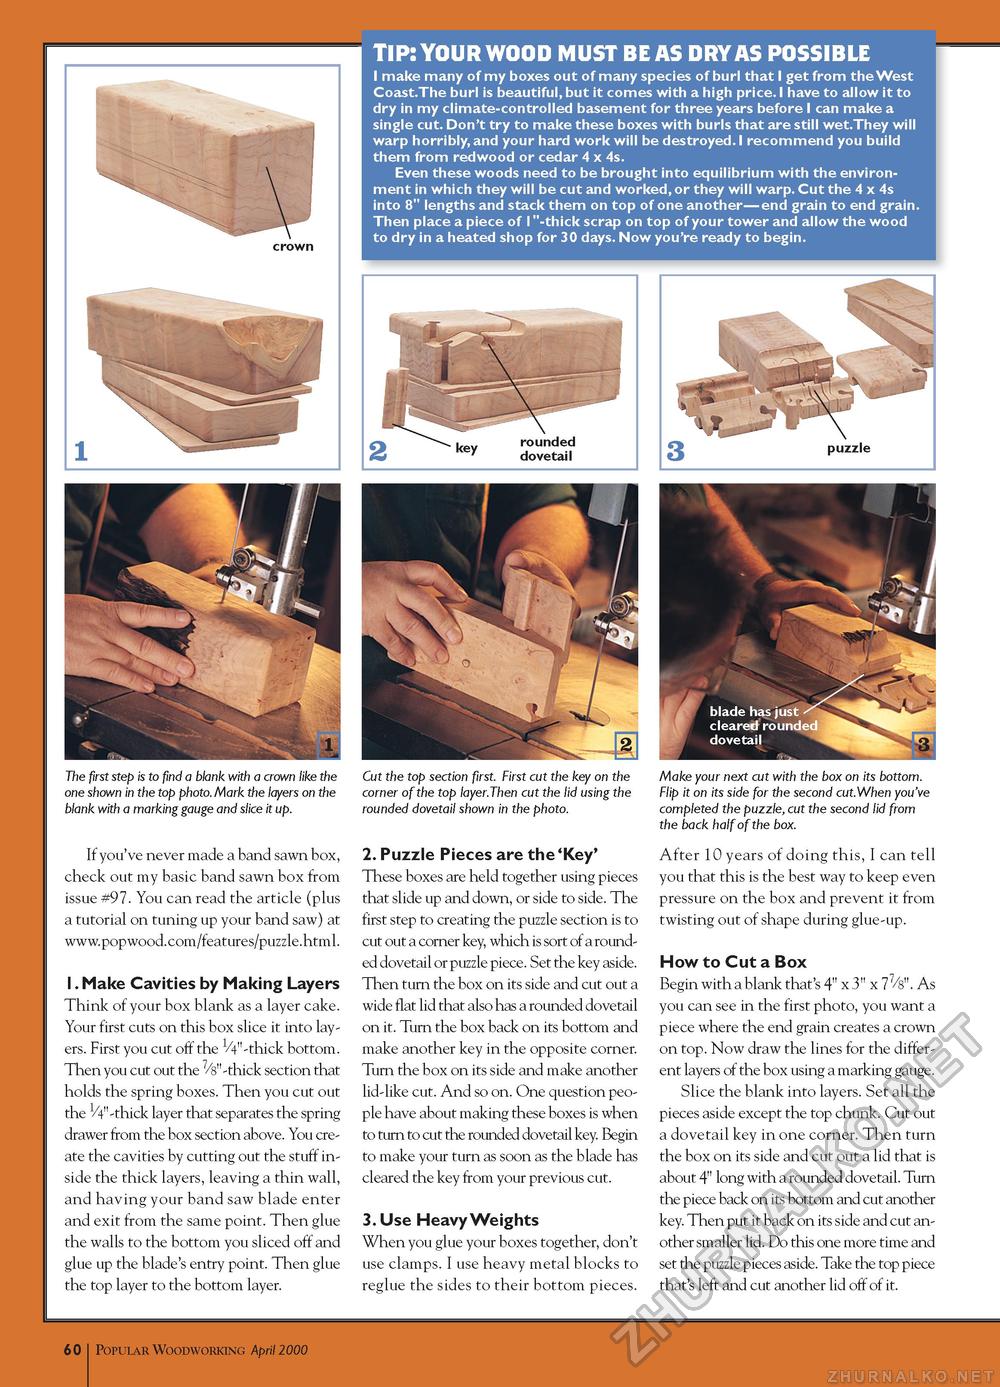
TIP: YOUR WOOD MUST BE AS DRY AS POSSIBLE I make many of my boxes out of many species of burl that I get from the West Coast.The burl is beautiful, but it comes with a high price. I have to allow it to dry in my climate-controlled basement for three years before I can make a single cut. Don't try to make these boxes with burls that are still wet.They will warp horribly, and your hard work will be destroyed. I recommend you build them from redwood or cedar 4 x 4s. Even these woods need to be brought into equilibrium with the environment in which they will be cut and worked, or they will warp. Cut the 4 x 4s into 8" lengths and stack them on top of one another—end grain to end grain. Then place a piece of 1"-thick scrap on top of your tower and allow the wood to dry in a heated shop for 30 days. Now you're ready to begin. The first step is to find a blank with a crown like the one shown in the top photo. Mark the layers on the blank with a marking gauge and slice it up. If you've never made a band sawn box, check out my basic band sawn box from issue #97. You can read the article (plus a tutorial on tuning up your band saw) at www.popwood.com/features/puzzle.html. 1. Make Cavities by Making Layers Think of your box blank as a layer cake. Your first cuts on this box slice it into layers. First you cut off the VV'-thick bottom. Then you cut out the 7/sn-thick section that holds the spring boxes. Then you cut out the 1/4" -thick layer that separates the spring drawer from the box section above. You create the cavities by cutting out the stuff inside the thick layers, leaving a thin wall, and having your band saw blade enter and exit from the same point. Then glue the walls to the bottom you sliced off and glue up the blade's entry point. Then glue the top layer to the bottom layer.
Cut the top section first. First cut the key on the corner of the top layer.Then cut the lid using the rounded dovetail shown in the photo. 2. Puzzle Pieces are the 'Key' These boxes are held together using pieces that slide up and down, or side to side. The first step to creating the puzzle section is to cut out a corner key, which is sort of a rounded dovetail or puzzle piece. Set the key aside. Then turn the box on its side and cut out a wide flat lid that also has a rounded dovetail on it. Turn the box back on its bottom and make another key in the opposite corner. Turn the box on its side and make another lid-like cut. And so on. One question people have about making these boxes is when to turn to cut the rounded dovetail key. Begin to make your turn as soon as the blade has cleared the key from your previous cut. 3. Use Heavy Weights When you glue your boxes together, don't use clamps. I use heavy metal blocks to reglue the sides to their bottom pieces. Make your next cut with the box on its bottom. Flip it on its side for the second cut.When you've completed the puzzle, cut the second lid from the back half of the box. After 10 years of doing this, I can tell you that this is the best way to keep even pressure on the box and prevent it from twisting out of shape during glue-up. How to Cut a Box Begin with a blank that's 4" x 3" x 77/s". As you can see in the first photo, you want a piece where the end grain creates a crown on top. Now draw the lines for the different layers of the box using a marking gauge. Slice the blank into layers. Set all the pieces aside except the top chunk. Cut out a dovetail key in one corner. Then turn the box on its side and cut out a lid that is about 4" long with a rounded dovetail. Turn the piece back on its bottom and cut another key. Then put it back on its side and cut another smaller lid. Do this one more time and set the puzzle pieces aside. Take the top piece that's left and cut another lid off of it. 12 Popular Woodworking April 2000 |


