Popular Woodworking 2000-04 № 114, страница 43
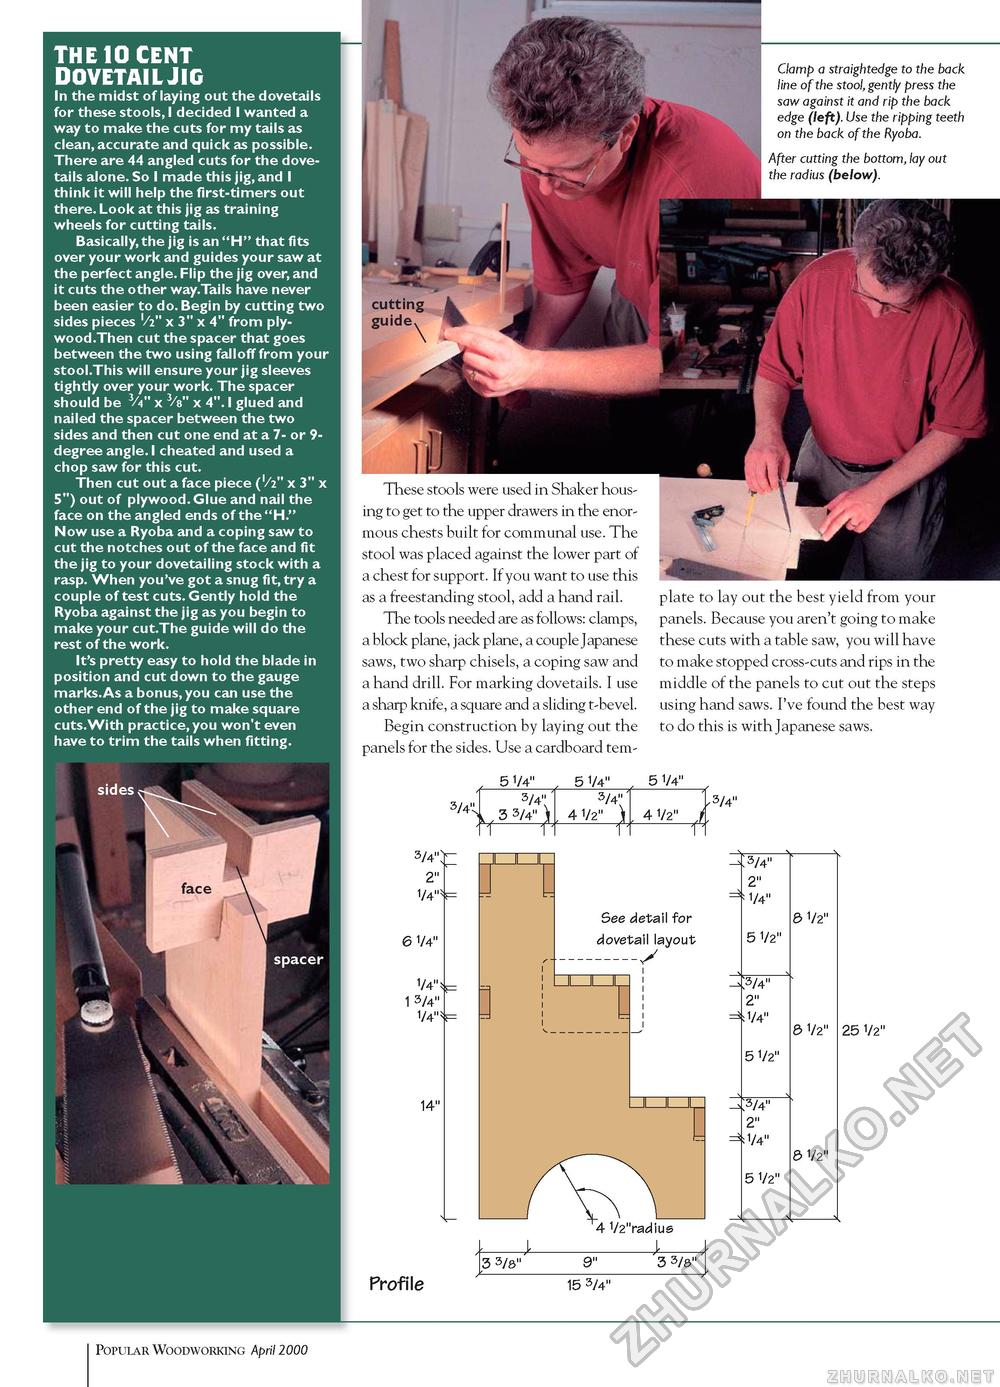
THE 10 CENT DOVETAIL JIG In the midst of laying out the dovetails for these stools, I decided I wanted a way to make the cuts for my tails as clean, accurate and quick as possible. There are 44 angled cuts for the dovetails alone. So I made this jig, and I think it will help the first-timers out there. Look at this jig as training wheels for cutting tails. Basically, the jig is an "H" that fits over your work and guides your saw at the perfect angle. Flip the jig over, and it cuts the other way.Tails have never been easier to do. Begin by cutting two sides pieces '/2" x 3" x 4" from ply-wood.Then cut the spacer that goes between the two using falloff from your stool.This will ensure your jig sleeves tightly over your work. The spacer should be 3/4" x 3/s" x 4". I glued and nailed the spacer between the two sides and then cut one end at a 7- or 9-degree angle. I cheated and used a chop saw for this cut. Then cut out a face piece ('/2" x 3" x 5") out of plywood. Glue and nail the face on the angled ends of the "H." Now use a Ryoba and a coping saw to cut the notches out of the face and fit the jig to your dovetailing stock with a rasp. When you've got a snug fit, try a couple of test cuts. Gently hold the Ryoba against the jig as you begin to make your cut.The guide will do the rest of the work. It's pretty easy to hold the blade in position and cut down to the gauge marks.As a bonus, you can use the other end of the jig to make square cuts.With practice, you won't even have to trim the tails when fitting. Clamp a straightedge to the back line of the stool, gently press the saw against it and rip the back edge (left). Use the ripping teeth on the back of the Ryoba. After cutting the bottom, lay out the radius (below). These stools were used in Shaker housing to get to the upper drawers in the enormous chests built for communal use. The stool was placed against the lower part of a chest for support. If you want to use this as a freestanding stool, add a hand rail. The tools needed are as follows: clamps, a block plane, jack plane, a couple Japanese saws, two sharp chisels, a coping saw and a hand drill. For marking dovetails. I use a sharp knife, a square and a sliding t-bevel. Begin construction by laying out the panels for the sides. Use a cardboard tem plate to lay out the best yield from your panels. Because you aren't going to make these cuts with a table saw, you will have to make stopped cross-cuts and rips in the middle of the panels to cut out the steps using hand saws. I've found the best way to do this is with Japanese saws. 5 1/4" 5 1/4" 5 1/4" 3/4" 3/4" 3/4" \f 3 5/4' 4 1/2" \ 4V2" J 3/4" w; 2" 1/4"*= 6 1/4" 1/4"!^ 1 3/4" 1/4"! = 14" fl See detail for dovetail layout ------y H =5; 4 1/2"radius 3/4" 2" 1/4" 5 1/2" 3/4" 2" 1/4" 5 1/2" 3/4" 2" 1/4" 5 1/2" 8 1/2" 8 1/2" 8 1/2" 25 1/2" Profile
15 3/4" 15 3/4" 12 Popular Woodworking April 2000 |


