Popular Woodworking 2000-10 № 117, страница 41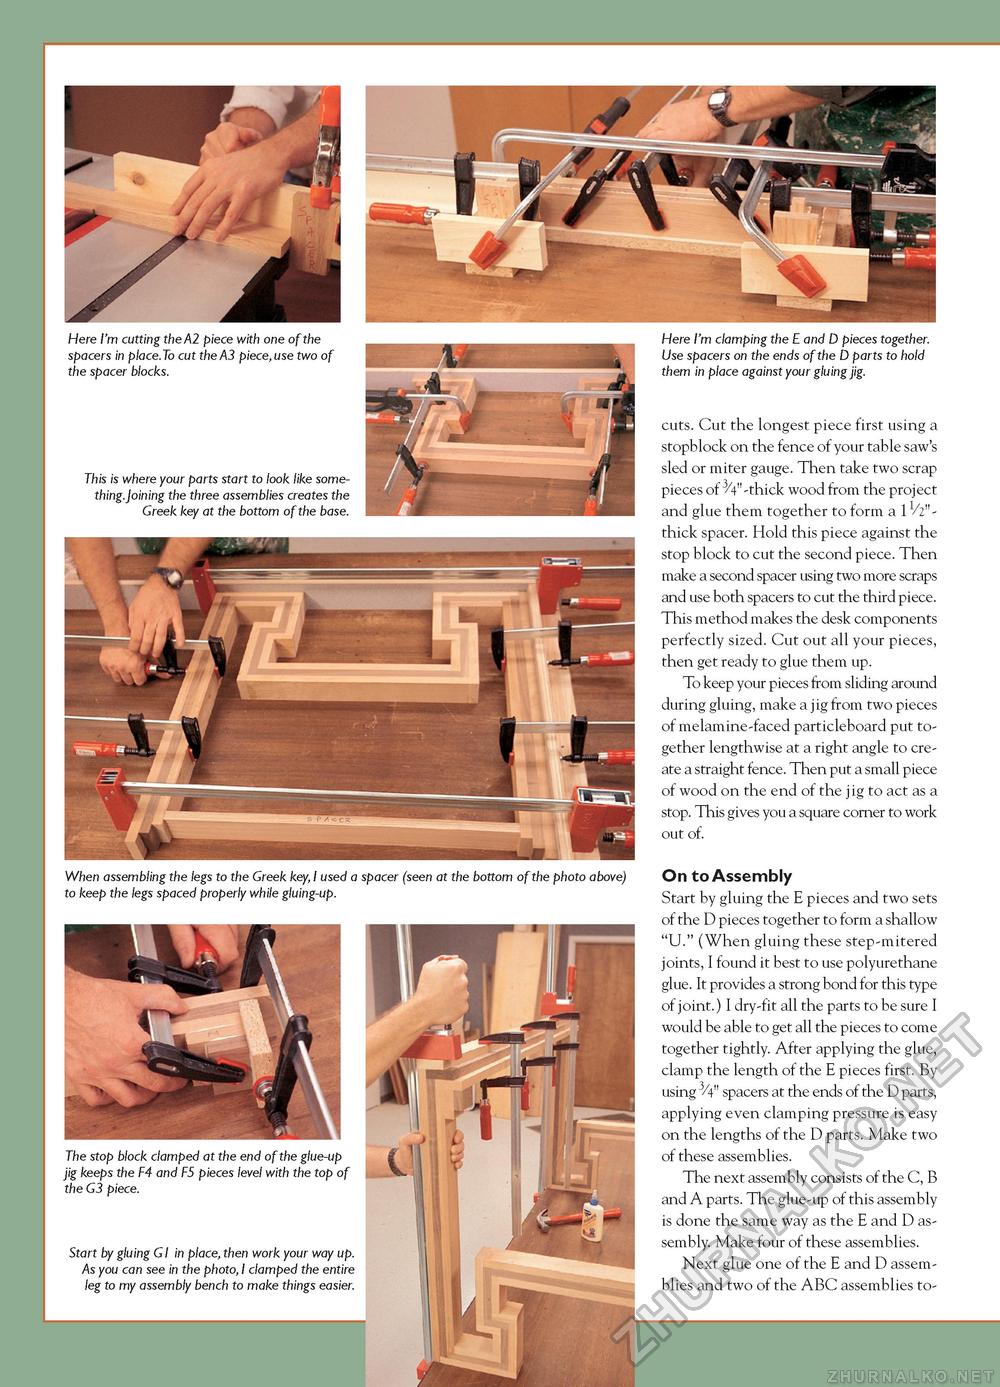
Here I'm cutting the A2 piece with one of the spacers in place.To cut the A3 piece,use two of the spacer blocks. This is where your parts start to look like some-thing.Joining the three assemblies creates the Greek key at the bottom of the base. When assembling the legs to the Greek key, I used a spacer (seen at the bottom of the photo above) to keep the legs spaced properly while gluing-up. The stop block clamped at the end of the glue-up jig keeps the F4 and F5 pieces level with the top of the G3 piece. Start by gluing G1 in place, then work your way up. As you can see in the photo, I clamped the entire leg to my assembly bench to make things easier. Here I'm clamping the E and D pieces together. Use spacers on the ends of the D parts to hold them in place against your gluing jig. cuts. Cut the longest piece first using a stopblock on the fence of your table saw's sled or miter gauge. Then take two scrap pieces of ^V'-thick wood from the project and glue them together to form a 1/2"-thick spacer. Hold this piece against the stop block to cut the second piece. Then make a second spacer using two more scraps and use both spacers to cut the third piece. This method makes the desk components perfectly sized. Cut out all your pieces, then get ready to glue them up. To keep your pieces from sliding around during gluing, make a jig from two pieces of melamine-faced particleboard put together lengthwise at a right angle to create a straight fence. Then put a small piece of wood on the end of the jig to act as a stop. This gives you a square corner to work out of. On to Assembly Start by gluing the E pieces and two sets of the D pieces together to form a shallow "U." (When gluing these step-mitered joints, I found it best to use polyurethane glue. It provides a strong bond for this type of joint.) I dry-fit all the parts to be sure I would be able to get all the pieces to come together tightly. After applying the glue, clamp the length of the E pieces first. By using 3/4" spacers at the ends of the D parts, applying even clamping pressure is easy on the lengths of the D parts. Make two of these assemblies. The next assembly consists of the C, B and A parts. The glue-up of this assembly is done the same way as the E and D assembly. Make four of these assemblies. Next glue one of the E and D assemblies and two of the ABC assemblies to- |


