Popular Woodworking 2000-12 № 119, страница 55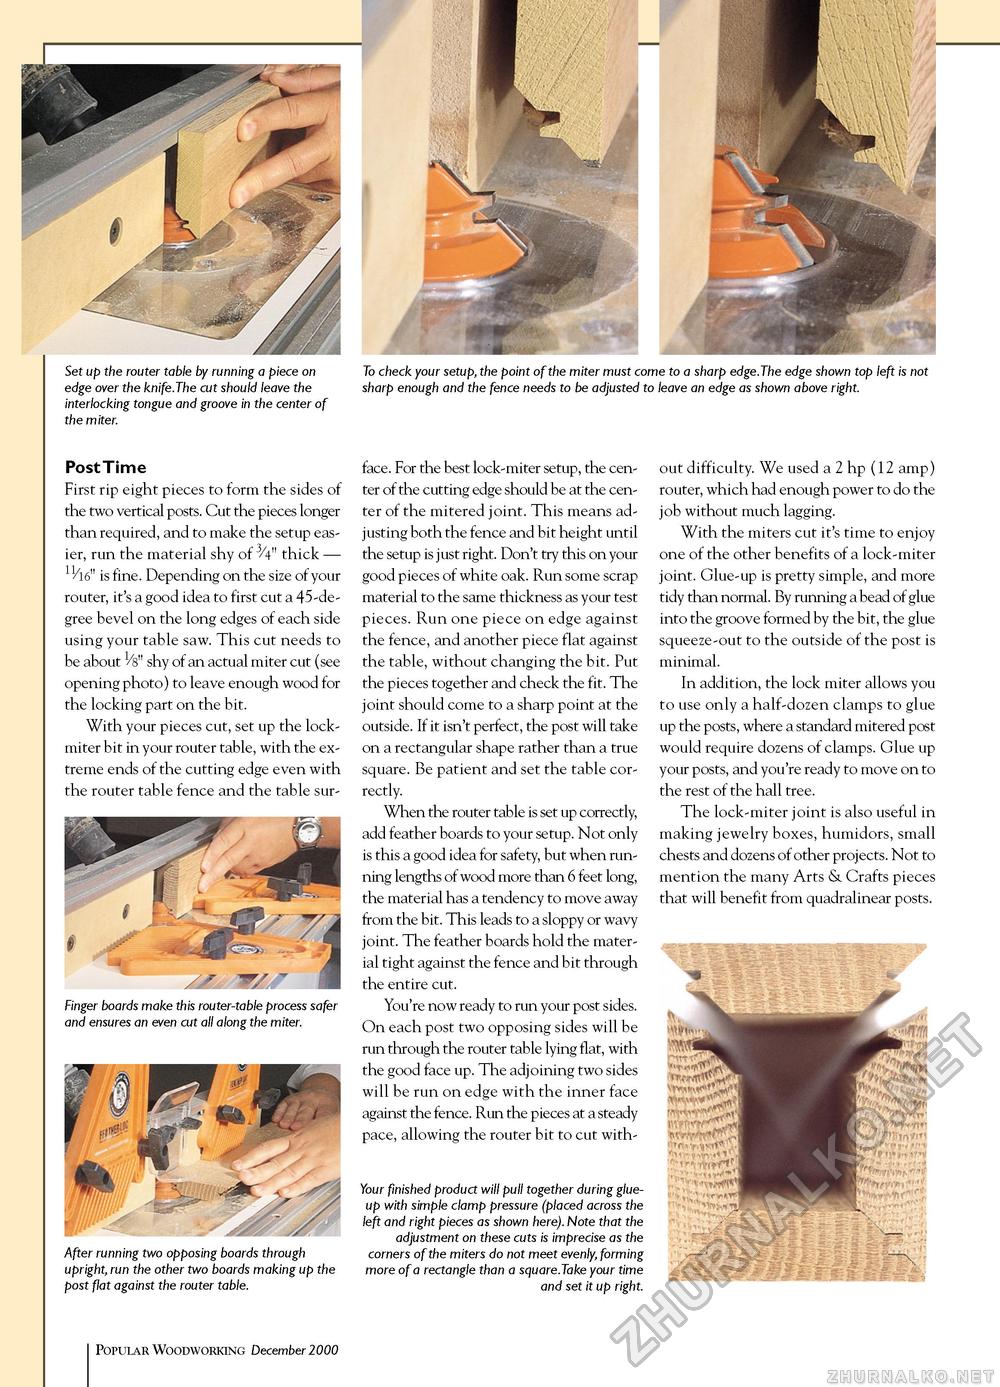
Set up the router table by running a piece on To check your setup, the point of the miter must come to a sharp edge.The edge shown top left is not edge over the knife.The cut should leave the sharp enough and the fence needs to be adjusted to leave an edge as shown above right. interlocking tongue and groove in the center of the miter. Post Time First rip eight pieces to form the sides of the two vertical posts. Cut the pieces longer than required, and to make the setup easier, run the material shy of 3/4" thick — is fine. Depending on the size of your router, it's a good idea to first cut a 45-de-gree bevel on the long edges of each side using your table saw. This cut needs to be about Vs" shy of an actual miter cut (see opening photo) to leave enough wood for the locking part on the bit. With your pieces cut, set up the lock-miter bit in your router table, with the extreme ends of the cutting edge even with the router table fence and the table sur- After running two opposing boards through upright, run the other two boards making up the post flat against the router table. face. For the best lock-miter setup, the center of the cutting edge should be at the center of the mitered joint. This means adjusting both the fence and bit height until the setup is just right. Don't try this on your good pieces of white oak. Run some scrap material to the same thickness as your test pieces. Run one piece on edge against the fence, and another piece flat against the table, without changing the bit. Put the pieces together and check the fit. The joint should come to a sharp point at the outside. If it isn't perfect, the post will take on a rectangular shape rather than a true square. Be patient and set the table correctly. When the router table is set up correctly, add feather boards to your setup. Not only is this a good idea for safety, but when running lengths of wood more than 6 feet long, the material has a tendency to move away from the bit. This leads to a sloppy or wavy joint. The feather boards hold the material tight against the fence and bit through the entire cut. You're now ready to run your post sides. On each post two opposing sides will be run through the router table lying flat, with the good face up. The adjoining two sides will be run on edge with the inner face against the fence. Run the pieces at a steady pace, allowing the router bit to cut with- Your finished product will pull together during glue-up with simple clamp pressure (placed across the left and right pieces as shown here). Note that the adjustment on these cuts is imprecise as the corners of the miters do not meet evenly, forming more of a rectangle than a square.Take your time and set it up right. out difficulty. We used a 2 hp (12 amp) router, which had enough power to do the job without much lagging. With the miters cut it's time to enjoy one of the other benefits of a lock-miter joint. Glue-up is pretty simple, and more tidy than normal. By running a bead of glue into the groove formed by the bit, the glue squeeze-out to the outside of the post is minimal. In addition, the lock miter allows you to use only a half-dozen clamps to glue up the posts, where a standard mitered post would require dozens of clamps. Glue up your posts, and you're ready to move on to the rest of the hall tree. The lock-miter joint is also useful in making jewelry boxes, humidors, small chests and dozens of other projects. Not to mention the many Arts & Crafts pieces that will benefit from quadralinear posts. 55 Popular Woodworking December 1000 |


