Popular Woodworking 2001-02 № 120, страница 41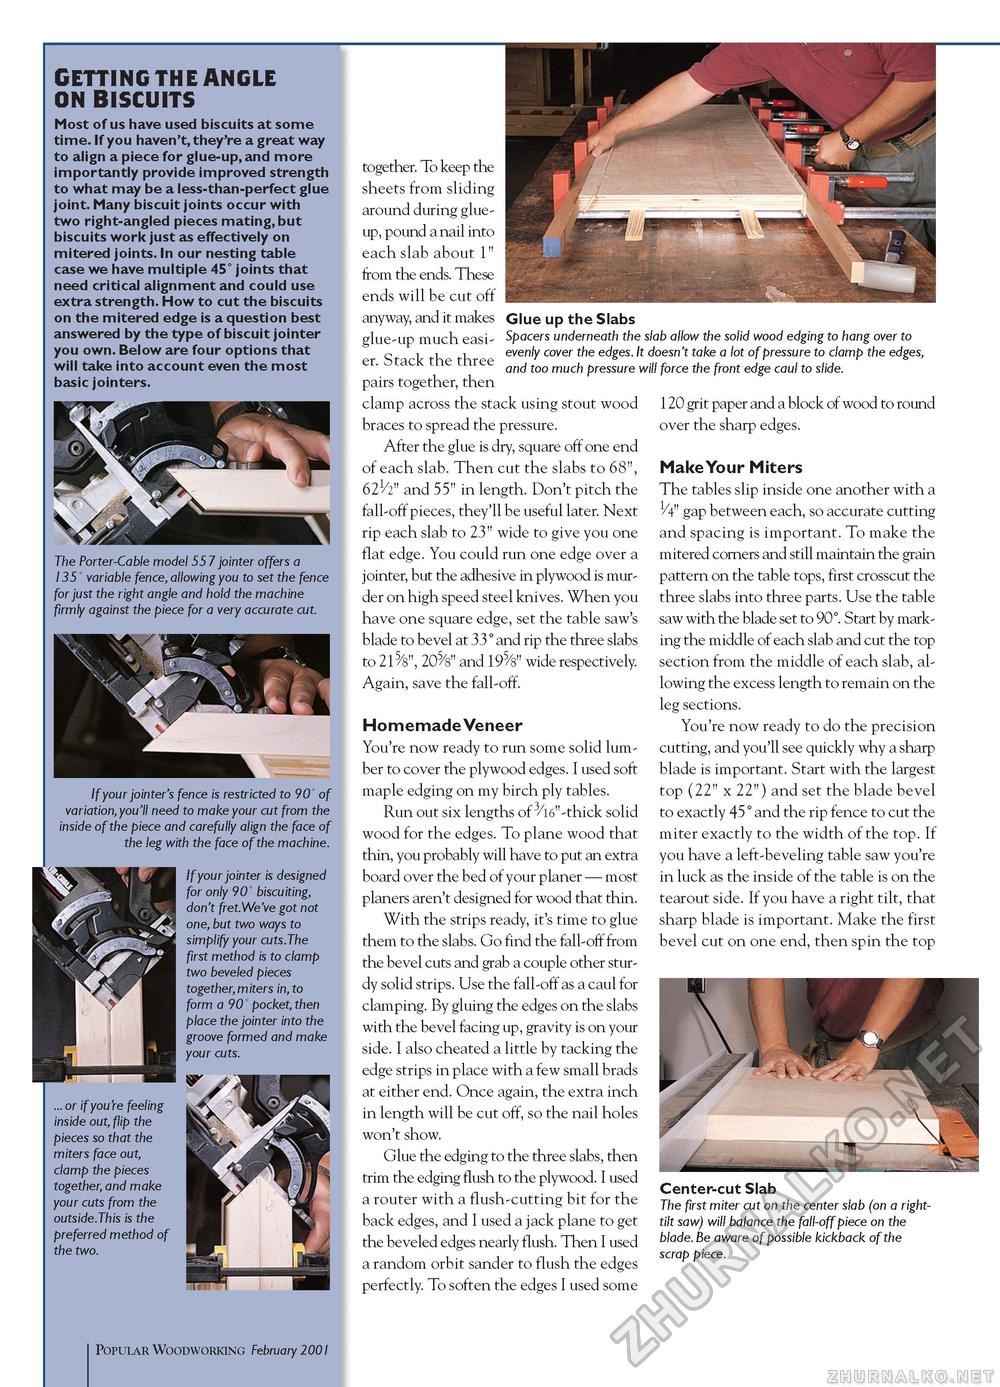
GETTING THE ANGLE ON BISCUITS Most of us have used biscuits at some time. If you haven't,they're a great way to align a piece for glue-up, and more importantly provide improved strength to what may be a less-than-perfect glue joint. Many biscuit joints occur with two right-angled pieces mating,but biscuits work just as effectively on mitered joints. In our nesting table case we have multiple 45° joints that need critical alignment and could use extra strength. How to cut the biscuits on the mitered edge is a question best answered by the type of biscuit jointer you own. Below are four options that will take into account even the most basic jointers. The Porter-Cable model 557 jointer offers a 135' variable fence, allowing you to set the fence for just the right angle and hold the machine firmly against the piece for a very accurate cut. If your jointer's fence is restricted to 90' of variation,you'll need to make your cut from the inside of the piece and carefully align the face of the leg with the face of the machine. If your jointer is designed for only 90' biscuiting, don't fret.We've got not one, but two ways to simplify your cuts.The first method is to clamp two beveled pieces together,miters in, to form a 90' pocket, then place the jointer into the groove formed and make your cuts. ... or if you're feeling inside out, flip the pieces so that the miters face out, clamp the pieces together, and make your cuts from the outside.This is the preferred method of the two. together. To keep the sheets from sliding around during glue-up, pound a nail into each slab about 1" from the ends. These ends will be cut off anyway, and it makes glue-up much easier. Stack the three pairs together, then Glue up the Slabs Spacers underneath the slab allow the solid wood edging to hang over to evenly cover the edges. It doesn't take a lot of pressure to clamp the edges, and too much pressure will force the front edge caul to slide. clamp across the stack using stout wood braces to spread the pressure. After the glue is dry, square off one end of each slab. Then cut the slabs to 68", 621/2" and 55" in length. Don't pitch the fall-off pieces, they'll be useful later. Next rip each slab to 23" wide to give you one flat edge. You could run one edge over a jointer, but the adhesive in plywood is murder on high speed steel knives. When you have one square edge, set the table saw's blade to bevel at 33° and rip the three slabs to 215/8", 205/8" and 195/8" wide respectively. Again, save the fall-off. Homemade Veneer You're now ready to run some solid lumber to cover the plywood edges. I used soft maple edging on my birch ply tables. Run out six lengths of 3/16"-thick solid wood for the edges. To plane wood that thin, you probably will have to put an extra board over the bed of your planer — most planers aren't designed for wood that thin. With the strips ready, it's time to glue them to the slabs. Go find the fall-off from the bevel cuts and grab a couple other sturdy solid strips. Use the fall-off as a caul for clamping. By gluing the edges on the slabs with the bevel facing up, gravity is on your side. I also cheated a little by tacking the edge strips in place with a few small brads at either end. Once again, the extra inch in length will be cut off, so the nail holes won't show. Glue the edging to the three slabs, then trim the edging flush to the plywood. I used a router with a flush-cutting bit for the back edges, and I used a jack plane to get the beveled edges nearly flush. Then I used a random orbit sander to flush the edges perfectly. To soften the edges I used some 120 grit paper and a block of wood to round over the sharp edges. Make Your Miters The tables slip inside one another with a 1/4" gap between each, so accurate cutting and spacing is important. To make the mitered corners and still maintain the grain pattern on the table tops, first crosscut the three slabs into three parts. Use the table saw with the blade set to 90°. Start by marking the middle of each slab and cut the top section from the middle of each slab, allowing the excess length to remain on the leg sections. You're now ready to do the precision cutting, and you'll see quickly why a sharp blade is important. Start with the largest top (22" x 22") and set the blade bevel to exactly 45° and the rip fence to cut the miter exactly to the width of the top. If you have a left-beveling table saw you're in luck as the inside of the table is on the tearout side. If you have a right tilt, that sharp blade is important. Make the first bevel cut on one end, then spin the top Center-cut Slab The first miter cut on the center slab (on a right-tilt saw) will balance the fall-off piece on the blade. Be aware of possible kickback of the scrap piece. 41 Popular Woodworking February 2001 |


