Popular Woodworking 2001-02 № 120, страница 42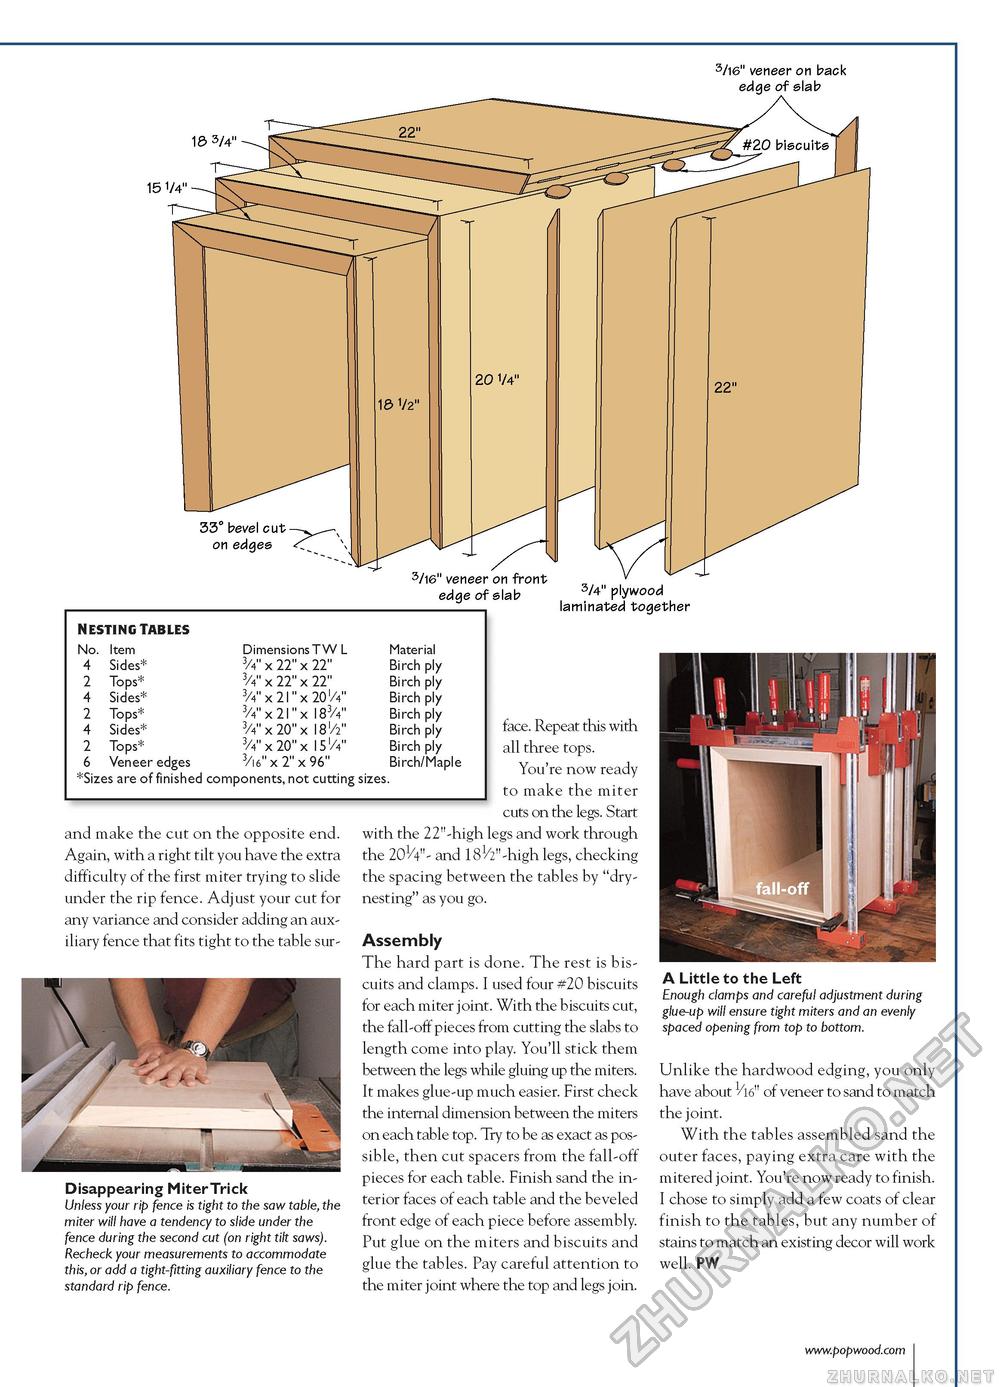
3/l6" veneer on back edge of slab 18 3/4' 15 1/4" and make the cut on the opposite end. Again, with a right tilt you have the extra difficulty of the first miter trying to slide under the rip fence. Adjust your cut for any variance and consider adding an auxiliary fence that fits tight to the table sur- Disappearing Miter Trick Unless your rip fence is tight to the saw table, the miter will have a tendency to slide under the fence during the second cut (on right tilt saws). Recheck your measurements to accommodate this, or add a tight-fitting auxiliary fence to the standard rip fence. face. Repeat this with all three tops. You're now ready to make the miter cuts on the legs. Start with the 22"-high legs and work through the 201/4"- and 181/2"-high legs, checking the spacing between the tables by "dry-nesting" as you go. Assembly The hard part is done. The rest is biscuits and clamps. I used four #20 biscuits for each miter joint. With the biscuits cut, the fall-off pieces from cutting the slabs to length come into play. You'll stick them between the legs while gluing up the miters. It makes glue-up much easier. First check the internal dimension between the miters on each table top. Try to be as exact as possible, then cut spacers from the fall-off pieces for each table. Finish sand the interior faces of each table and the beveled front edge of each piece before assembly. Put glue on the miters and biscuits and glue the tables. Pay careful attention to the miter joint where the top and legs join. A Little to the Left Enough clamps and careful adjustment during glue-up will ensure tight miters and an evenly spaced opening from top to bottom. Unlike the hardwood edging, you only have about 1/16" of veneer to sand to match the joint. With the tables assembled sand the outer faces, paying extra care with the mitered joint. You're now ready to finish. I chose to simply add a few coats of clear finish to the tables, but any number of stains to match an existing decor will work well. PW |


