Popular Woodworking 2001-06 № 122, страница 33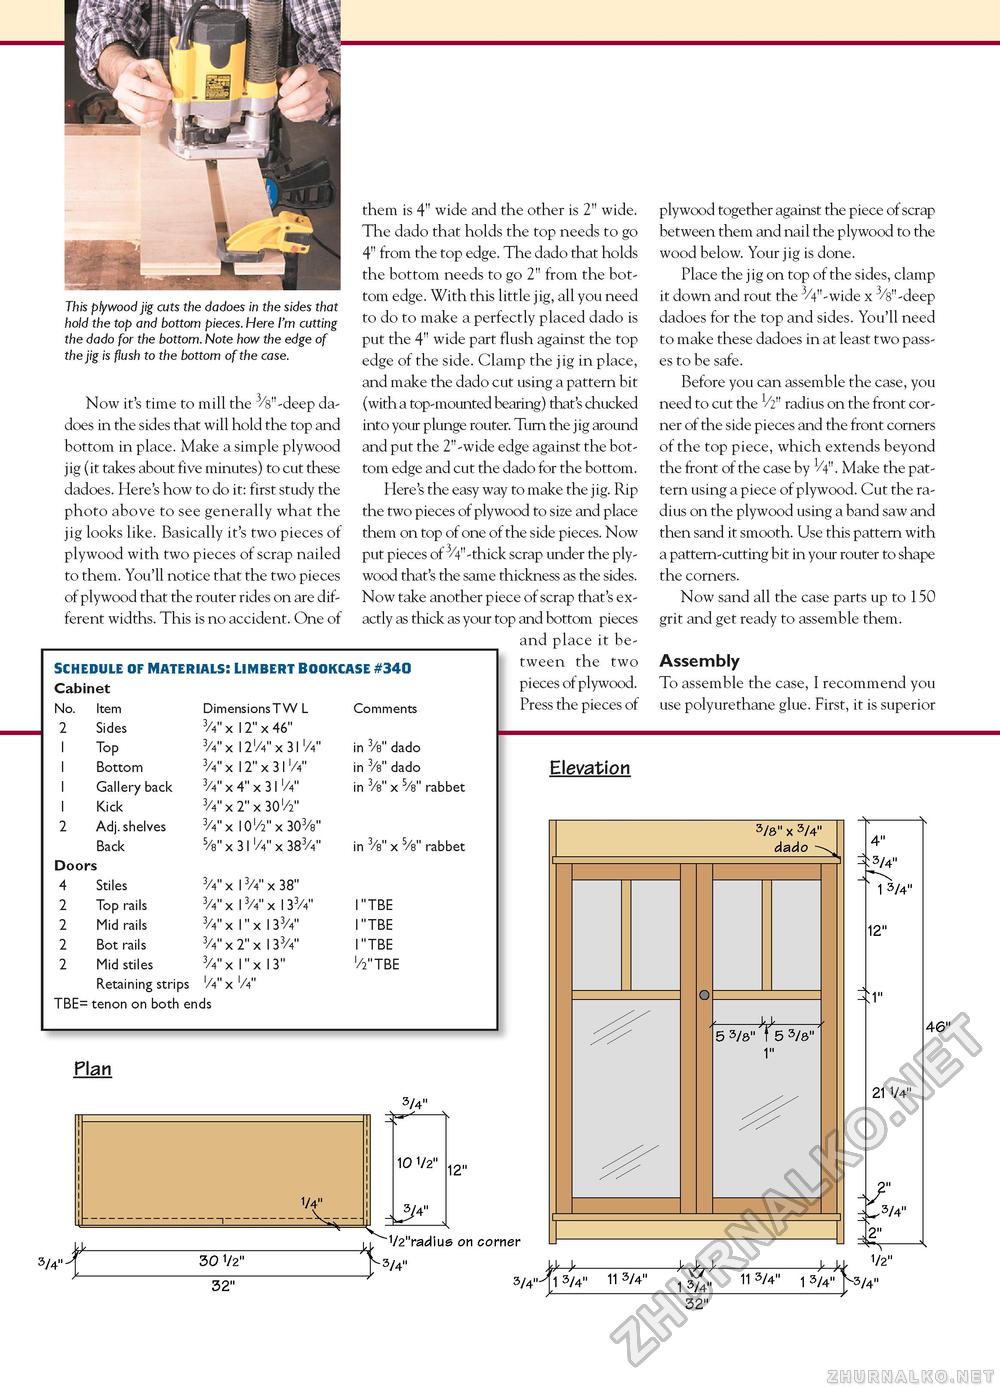
This plywood jig cuts the dadoes in the sides that hold the top and bottom pieces. Here I'm cutting the dado for the bottom. Note how the edge of the jig is flush to the bottom of the case. Now it's time to mill the 3/s"-deep dadoes in the sides that will hold the top and bottom in place. Make a simple plywood jig (it takes about five minutes) to cut these dadoes. Here's how to do it: first study the photo above to see generally what the jig looks like. Basically it's two pieces of plywood with two pieces of scrap nailed to them. You'll notice that the two pieces of plywood that the router rides on are different widths. This is no accident. One of SCHEDULE OF MATERIALS! LIMBERT BOOKCASE #340 Cabinet
rabbet rabbet TBE= tenon on both ends them is 4" wide and the other is 2" wide. The dado that holds the top needs to go 4" from the top edge. The dado that holds the bottom needs to go 2" from the bottom edge. With this little jig, all you need to do to make a perfectly placed dado is put the 4" wide part flush against the top edge of the side. Clamp the jig in place, and make the dado cut using a pattern bit (with a top-mounted bearing) that's chucked into your plunge router. Turn the jig around and put the 2"-wide edge against the bottom edge and cut the dado for the bottom. Here's the easy way to make the jig. Rip the two pieces of plywood to size and place them on top of one of the side pieces. Now put pieces of 3/4"-thick scrap under the plywood that's the same thickness as the sides. Now take another piece of scrap that's exactly as thick as your top and bottom pieces and place it between the two pieces of plywood. Press the pieces of rabbet rabbet TBE= tenon on both ends plywood together against the piece of scrap between them and nail the plywood to the wood below. Your jig is done. Place the jig on top of the sides, clamp it down and rout the 3/4" -wide x /8"-deep dadoes for the top and sides. You'll need to make these dadoes in at least two passes to be safe. Before you can assemble the case, you need to cut the V2" radius on the front corner of the side pieces and the front corners of the top piece, which extends beyond the front of the case by 1/4". Make the pattern using a piece of plywood. Cut the radius on the plywood using a band saw and then sand it smooth. Use this pattern with a pattern-cutting bit in your router to shape the corners. Now sand all the case parts up to 150 grit and get ready to assemble them. Assembly To assemble the case, I recommend you use polyurethane glue. First, it is superior Elevation Plan 5/8"x 5/4" dado O 5 3/8" f 5 5/8" 1" 4" ;3/4" 1 5/4" 12" 1 3/4" 11 3/4" 32" |


