Popular Woodworking 2001-08 № 123, страница 37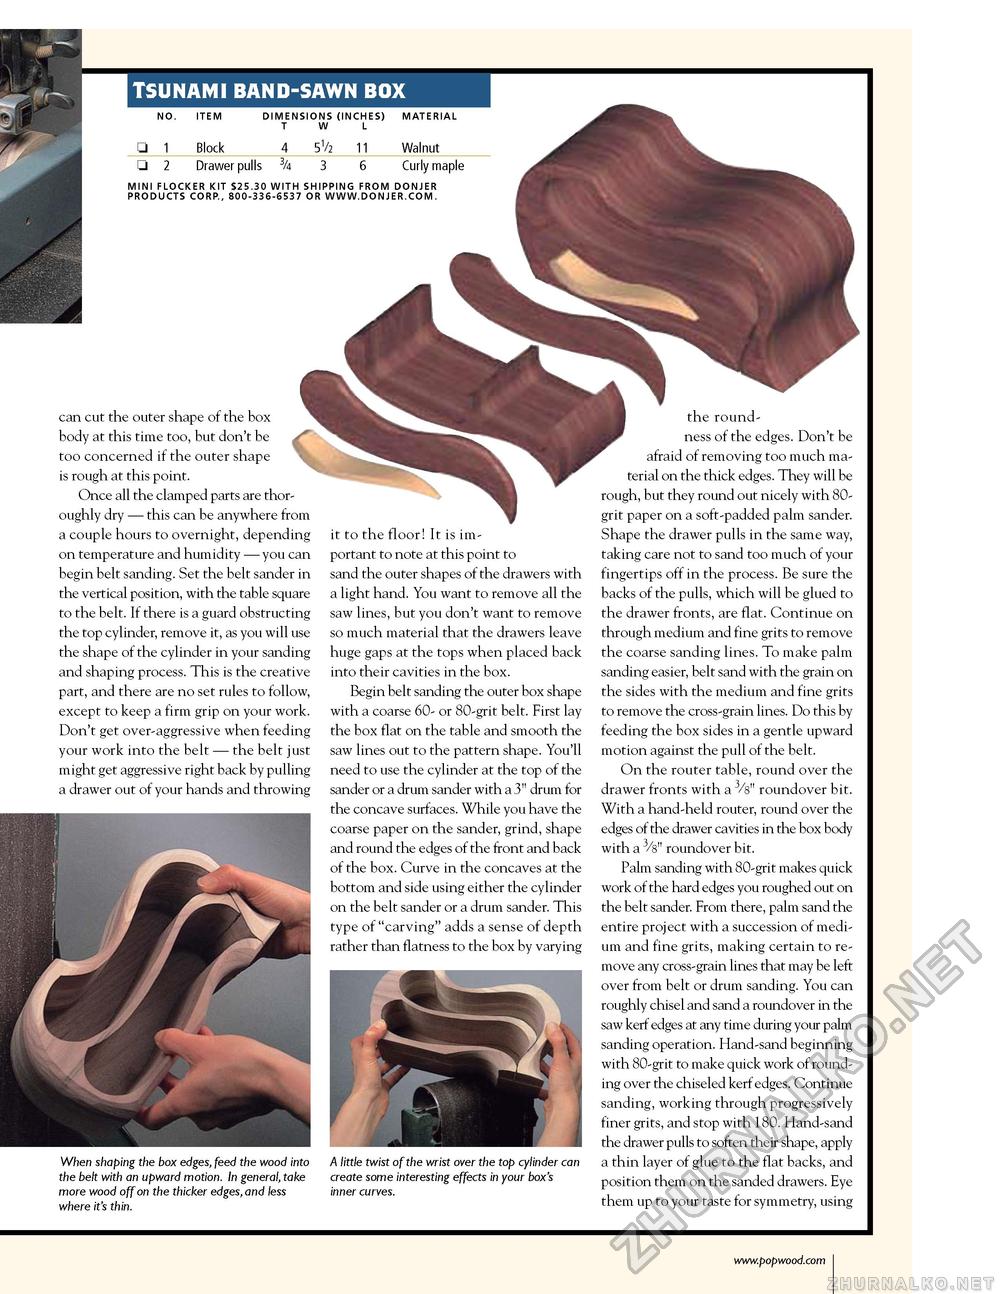
TSUNAMI BAND-SAWN BOX DIMENSIONS (INCHES) T W L □ 1 □ 2 Block Drawer pulls 3/4 Walnut Curly maple MINI FLOCKER KIT S25.30 WITH SHIPPING FROM DONJER PRODUCTS CORP., 800-336-6537 OR WWW.DONJER.COM. can cut the outer shape of the box body at this time too, but don't be too concerned if the outer shape is rough at this point. Once all the clamped parts are thoroughly dry — this can be anywhere from a couple hours to overnight, depending on temperature and humidity — you can begin belt sanding. Set the belt sander in the vertical position, with the table square to the belt. If there is a guard obstructing the top cylinder, remove it, as you will use the shape of the cylinder in your sanding and shaping process. This is the creative part, and there are no set rules to follow, except to keep a firm grip on your work. Don't get over-aggressive when feeding your work into the belt — the belt just might get aggressive right back by pulling a drawer out of your hands and throwing it to the floor! It is important to note at this point to sand the outer shapes of the drawers with a light hand. You want to remove all the saw lines, but you don't want to remove so much material that the drawers leave huge gaps at the tops when placed back into their cavities in the box. Begin belt sanding the outer box shape with a coarse 60- or 80-grit belt. First lay the box flat on the table and smooth the saw lines out to the pattern shape. You'll need to use the cylinder at the top of the sander or a drum sander with a 3" drum for the concave surfaces. While you have the coarse paper on the sander, grind, shape and round the edges of the front and back of the box. Curve in the concaves at the bottom and side using either the cylinder on the belt sander or a drum sander. This type of "carving" adds a sense of depth rather than flatness to the box by varying When shaping the box edges, feed the wood into the belt with an upward motion. In general, take more wood off on the thicker edges, and less where it's thin. A little twist of the wrist over the top cylinder can create some interesting effects in your box's inner curves. the roundness of the edges. Don't be afraid of removing too much material on the thick edges. They will be rough, but they round out nicely with 80-grit paper on a soft-padded palm sander. Shape the drawer pulls in the same way, taking care not to sand too much of your fingertips off in the process. Be sure the backs of the pulls, which will be glued to the drawer fronts, are flat. Continue on through medium and fine grits to remove the coarse sanding lines. To make palm sanding easier, belt sand with the grain on the sides with the medium and fine grits to remove the cross-grain lines. Do this by feeding the box sides in a gentle upward motion against the pull of the belt. On the router table, round over the drawer fronts with a 3/8" roundover bit. With a hand-held router, round over the edges of the drawer cavities in the box body with a 3/8" roundover bit. Palm sanding with 80-grit makes quick work of the hard edges you roughed out on the belt sander. From there, palm sand the entire project with a succession of medium and fine grits, making certain to remove any cross-grain lines that may be left over from belt or drum sanding. You can roughly chisel and sand a roundover in the saw kerf edges at any time during your palm sanding operation. Hand-sand beginning with 80-grit to make quick work of rounding over the chiseled kerf edges. Continue sanding, working through progressively finer grits, and stop with 180. Hand-sand the drawer pulls to soften their shape, apply a thin layer of glue to the flat backs, and position them on the sanded drawers. Eye them up to your taste for symmetry, using |


